January 20, 2026 Update:
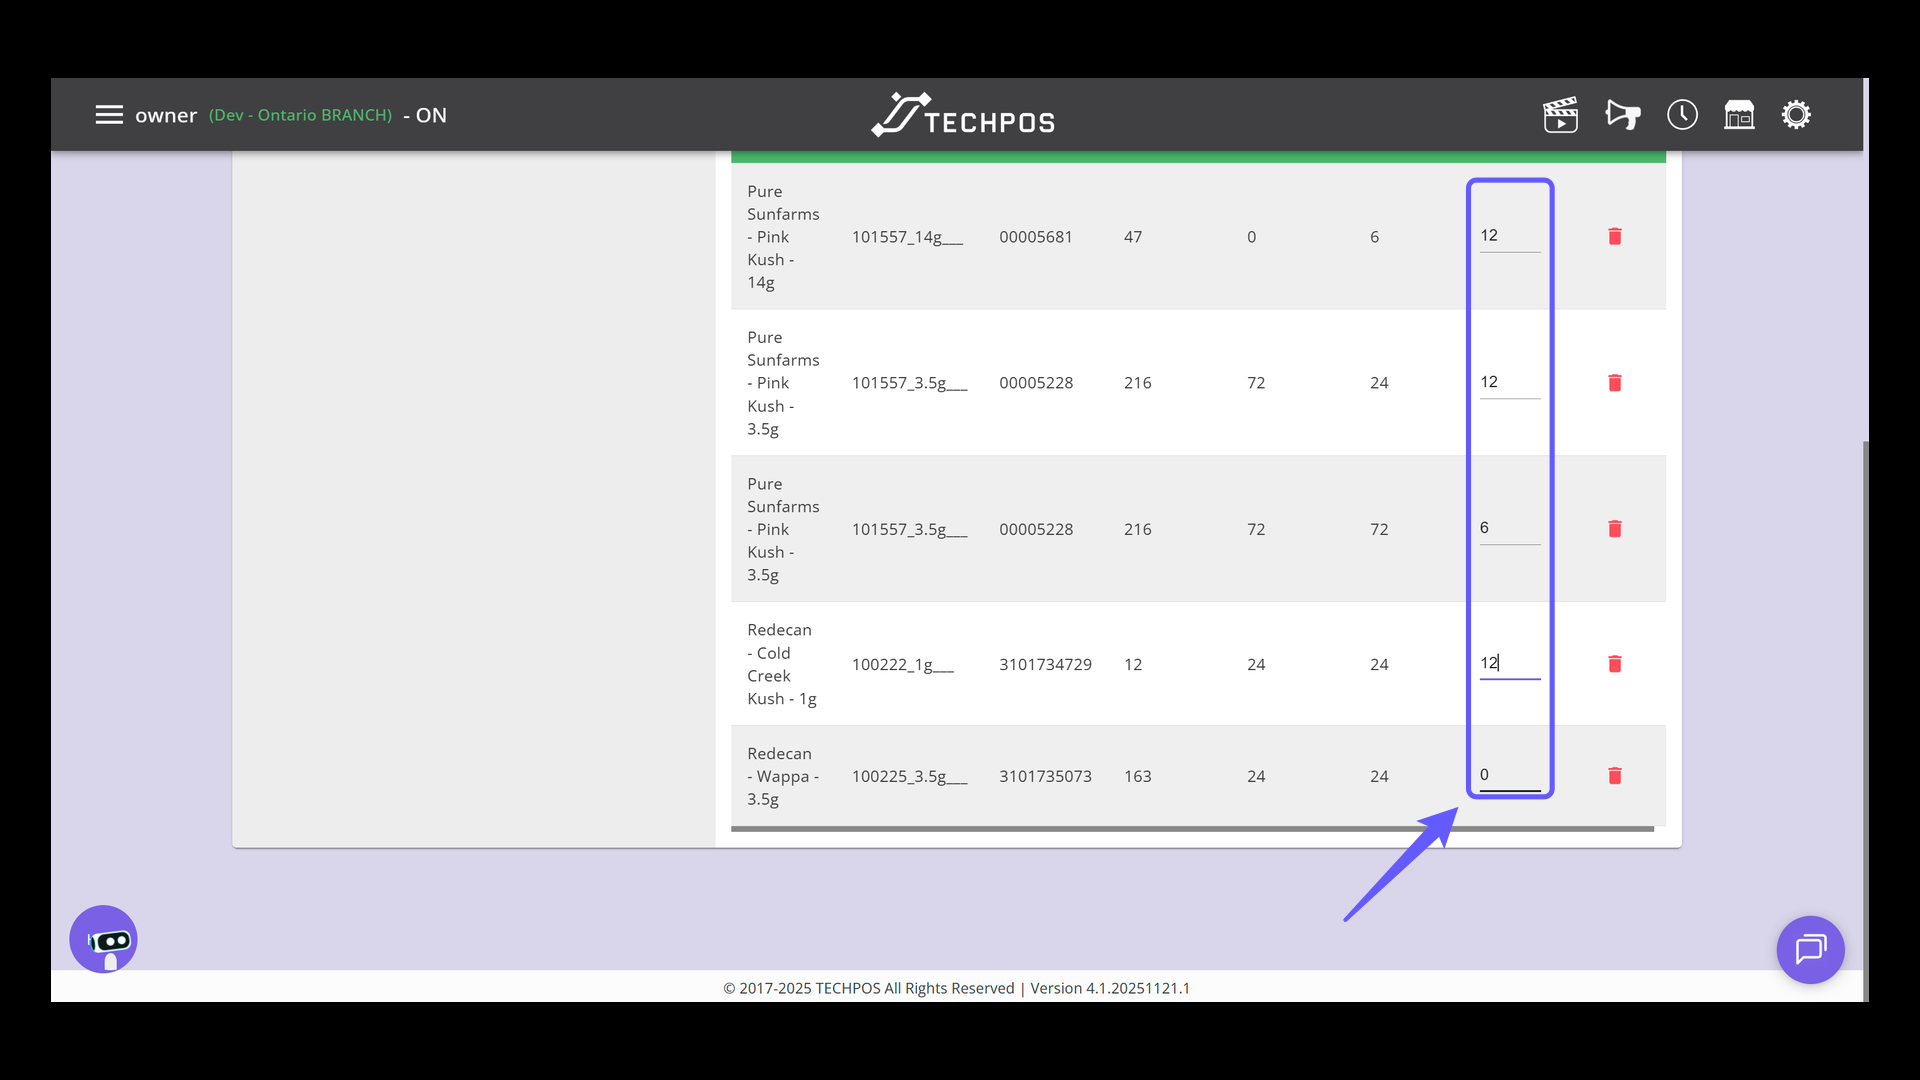
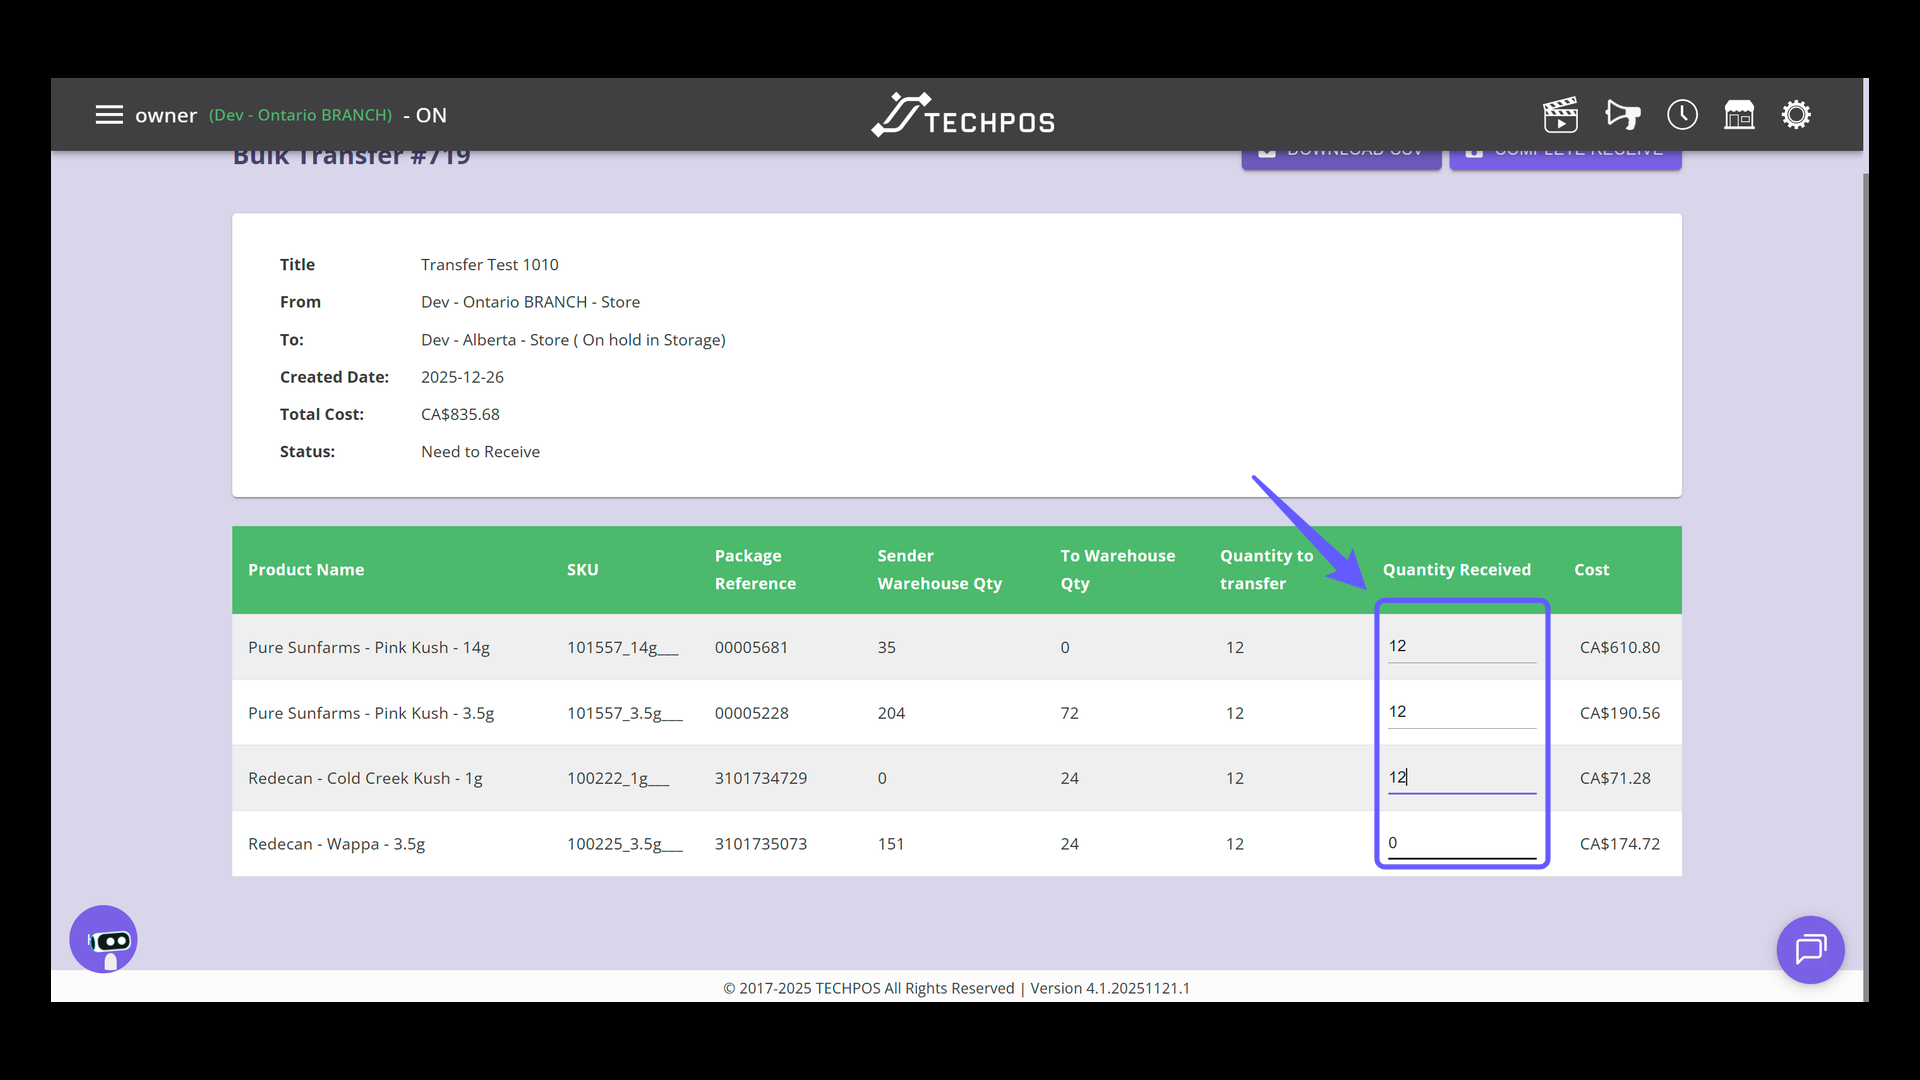
A new column called “To Warehouse Qty” is added on the Bulk Transfer page.
This column shows the real-time quantity in the destination (To) warehouse for each item, so you can quickly confirm what is currently available in the receiving warehouse.
Where to find it
- Go to the Bulk Transfer page and view the items table.
- You will see the new To Warehouse Qty column alongside the existing quantity columns.

1. Access Main Menu
Click the menu icon to access the main navigation panel.
2. Access Inventory Menu
Select Inventory.
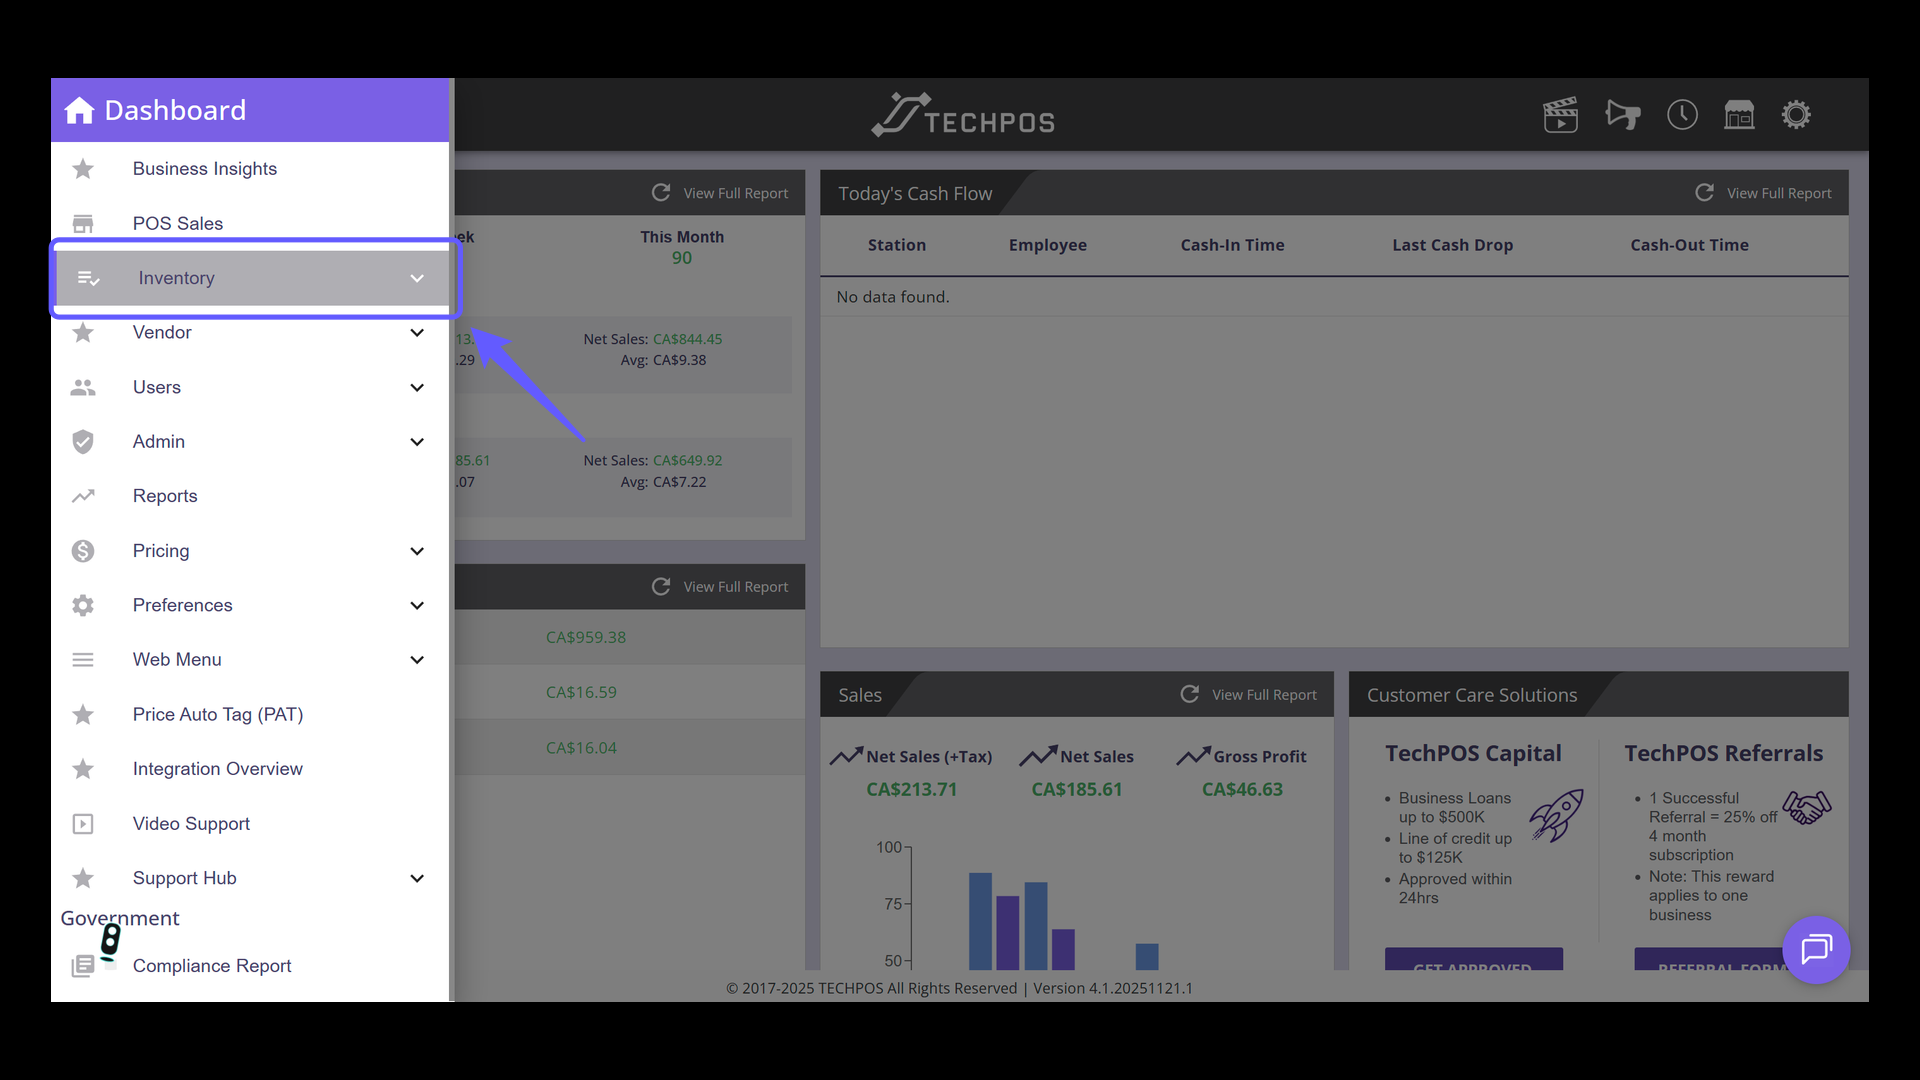
3. Access Bulk Transfer
Select 'Bulk Transfer' from the menu to initiate a transfer of inventory items between locations.

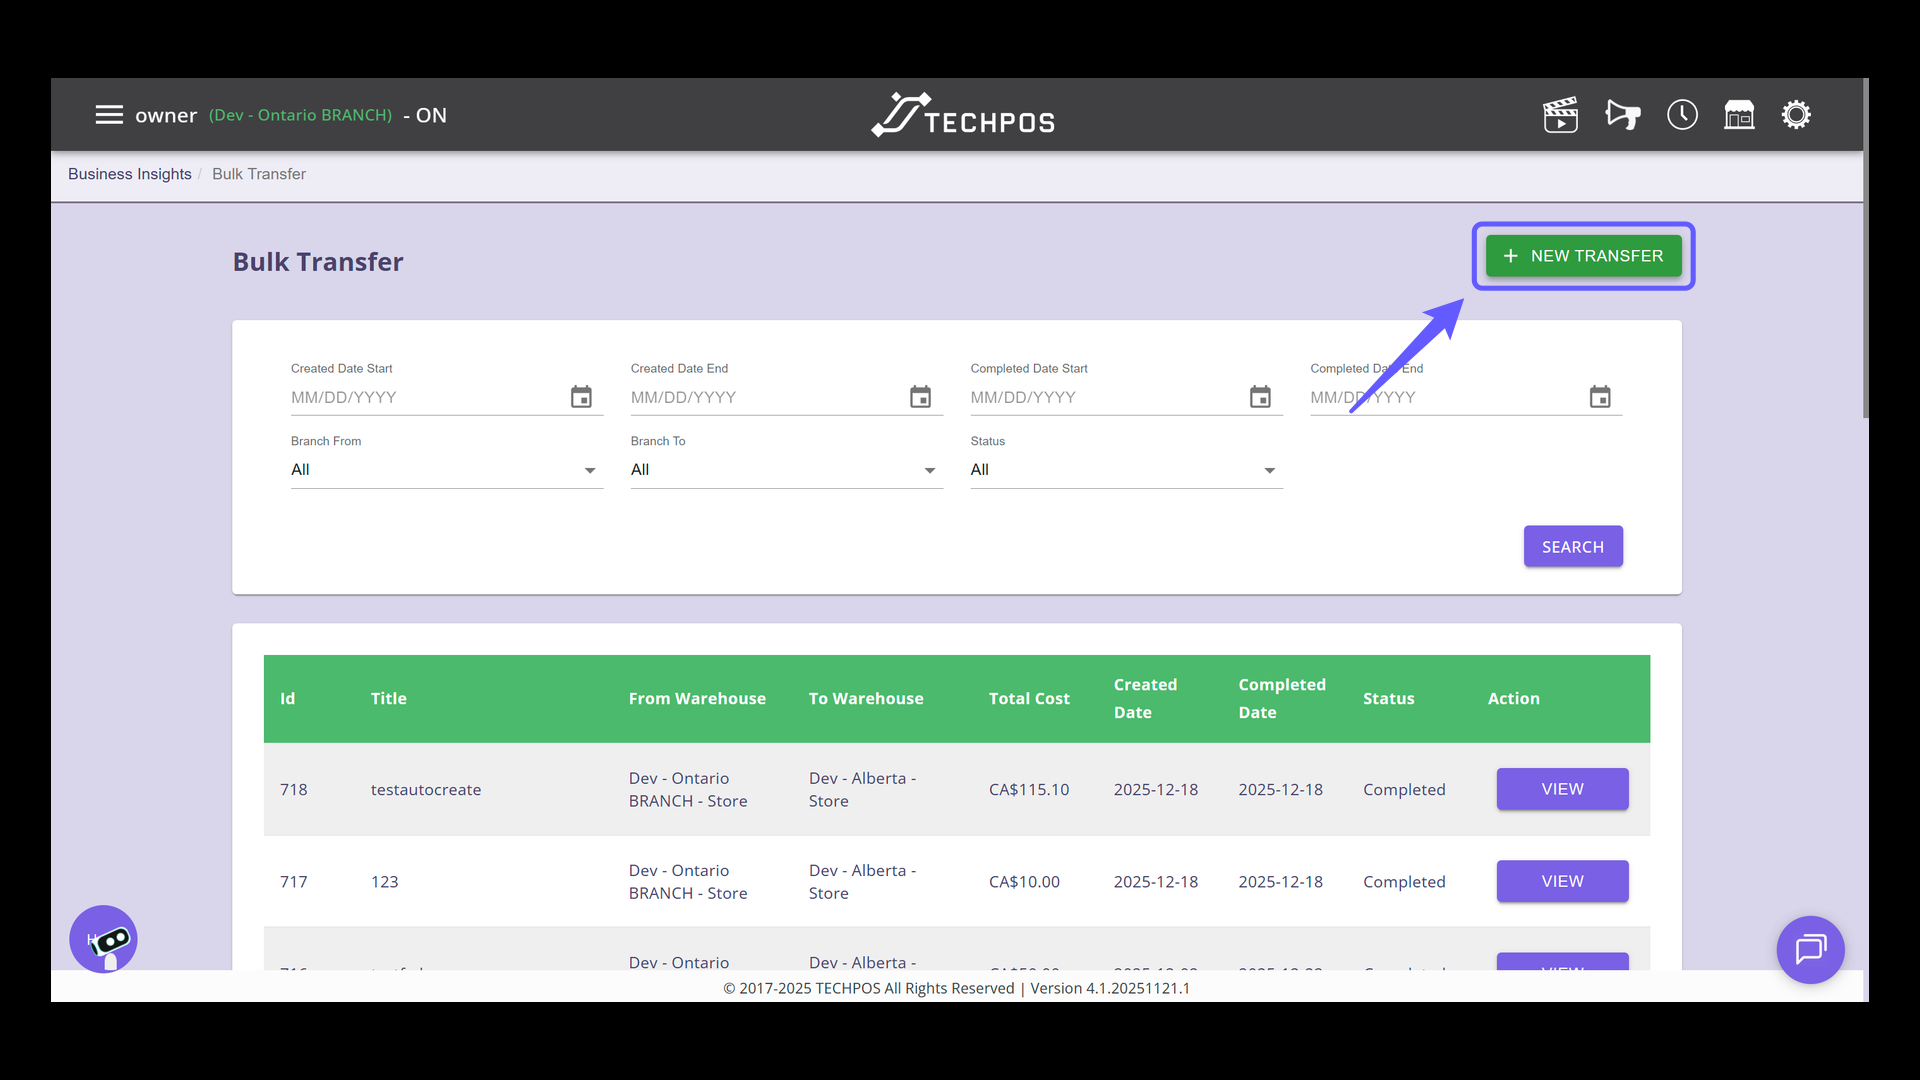
4. Initiate a New Transfer
Click on 'New Transfer' to start the process.
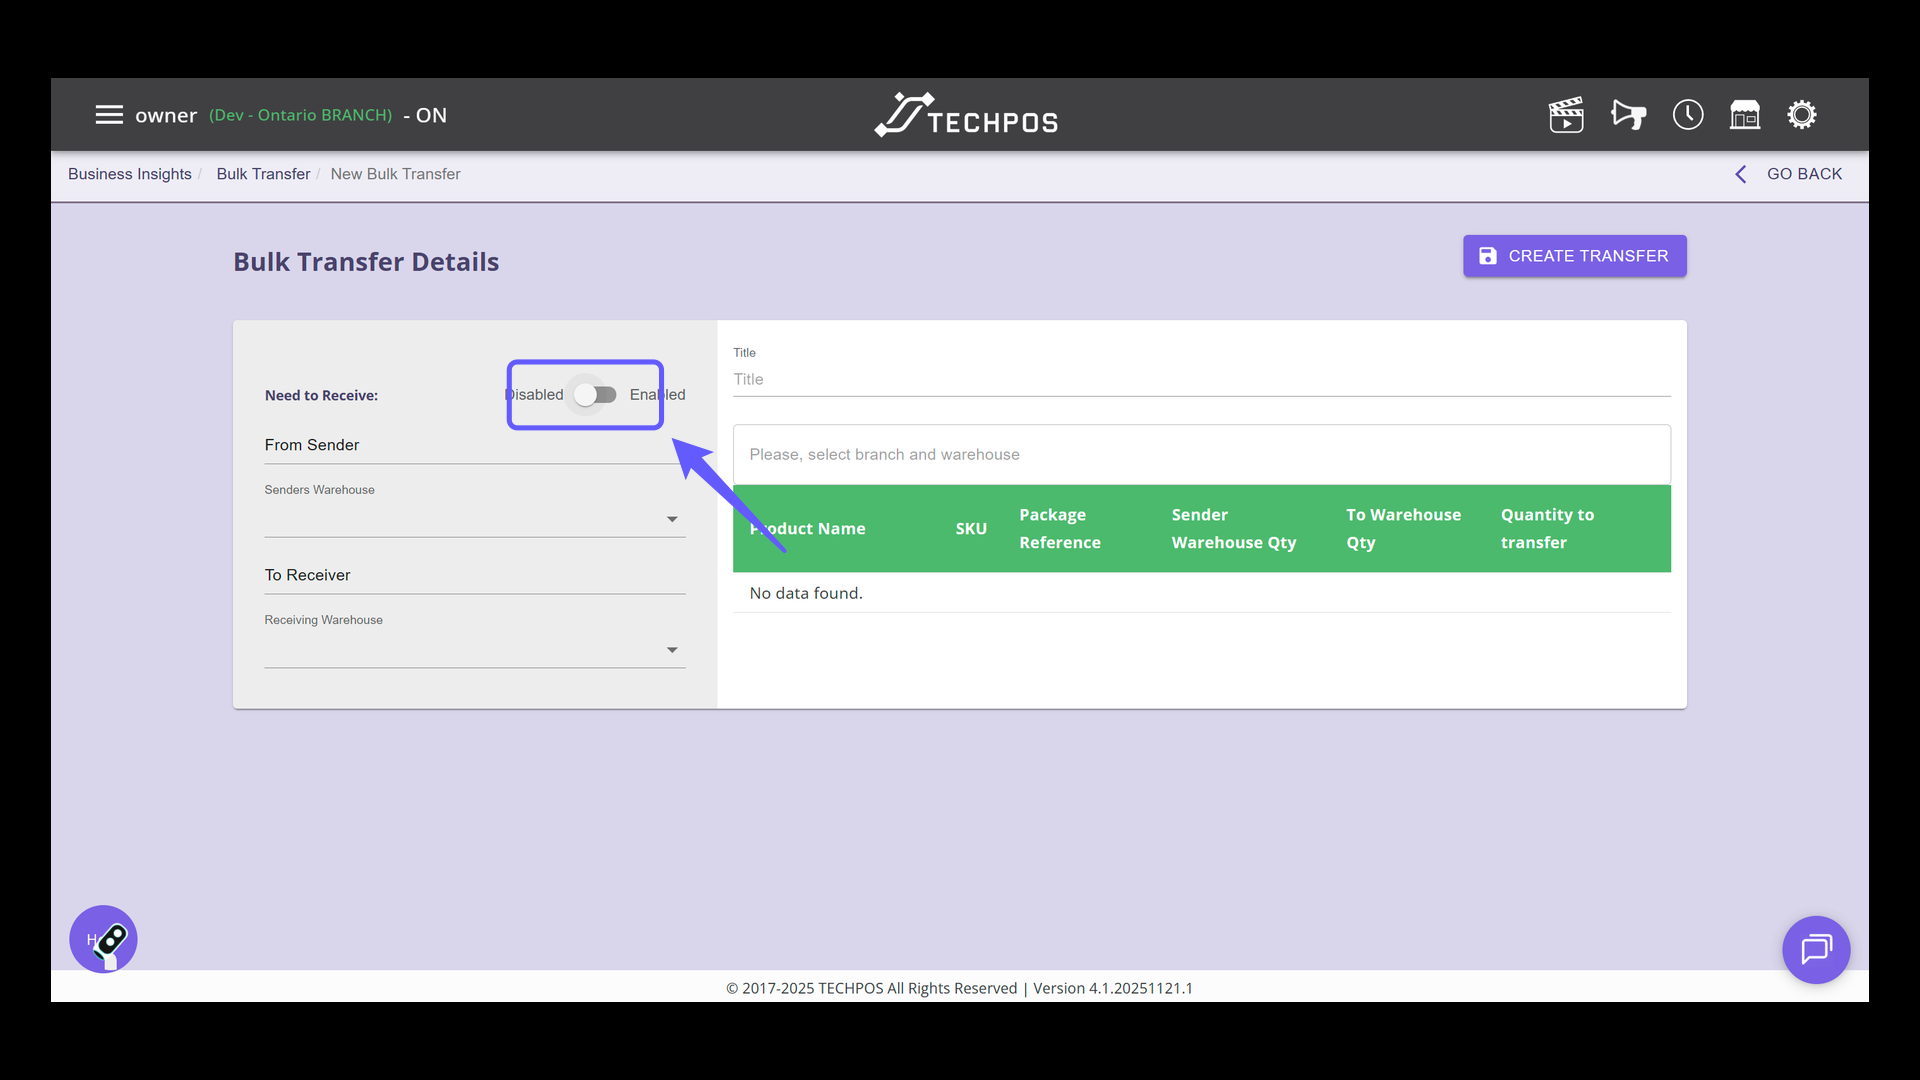
5. Enable/Disable Need to Receive Setting
Toggle the switch to 'Enabled' or 'Disabled' to determine the bulk transfer flow. When set to 'Enabled,' you'll be prompted to enter the received quantity for each SKU. With 'Disabled,' simply clicking the transfer button moves all products immediately, bypassing any quantity confirmation.
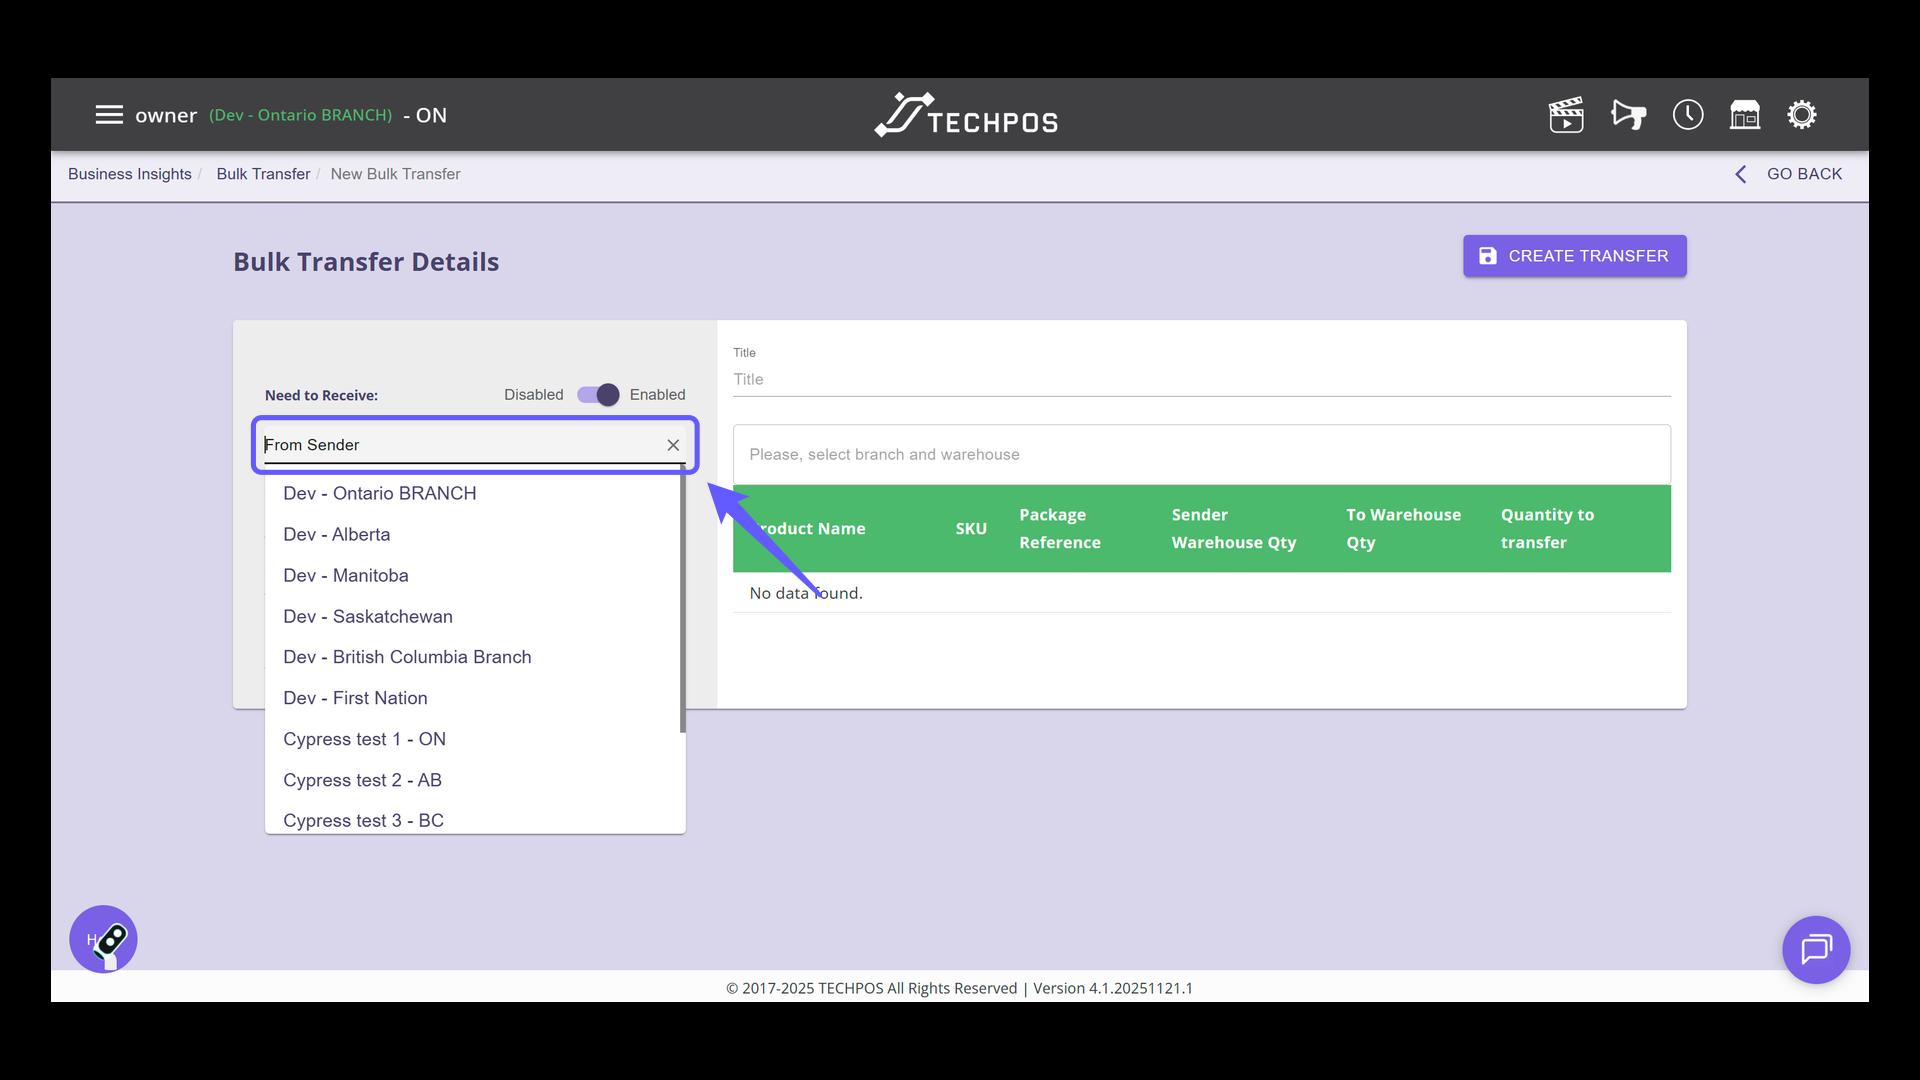
6. Select Sender Branch
Select a sender from the dropdown menu. This is the source from which products will be shipped.
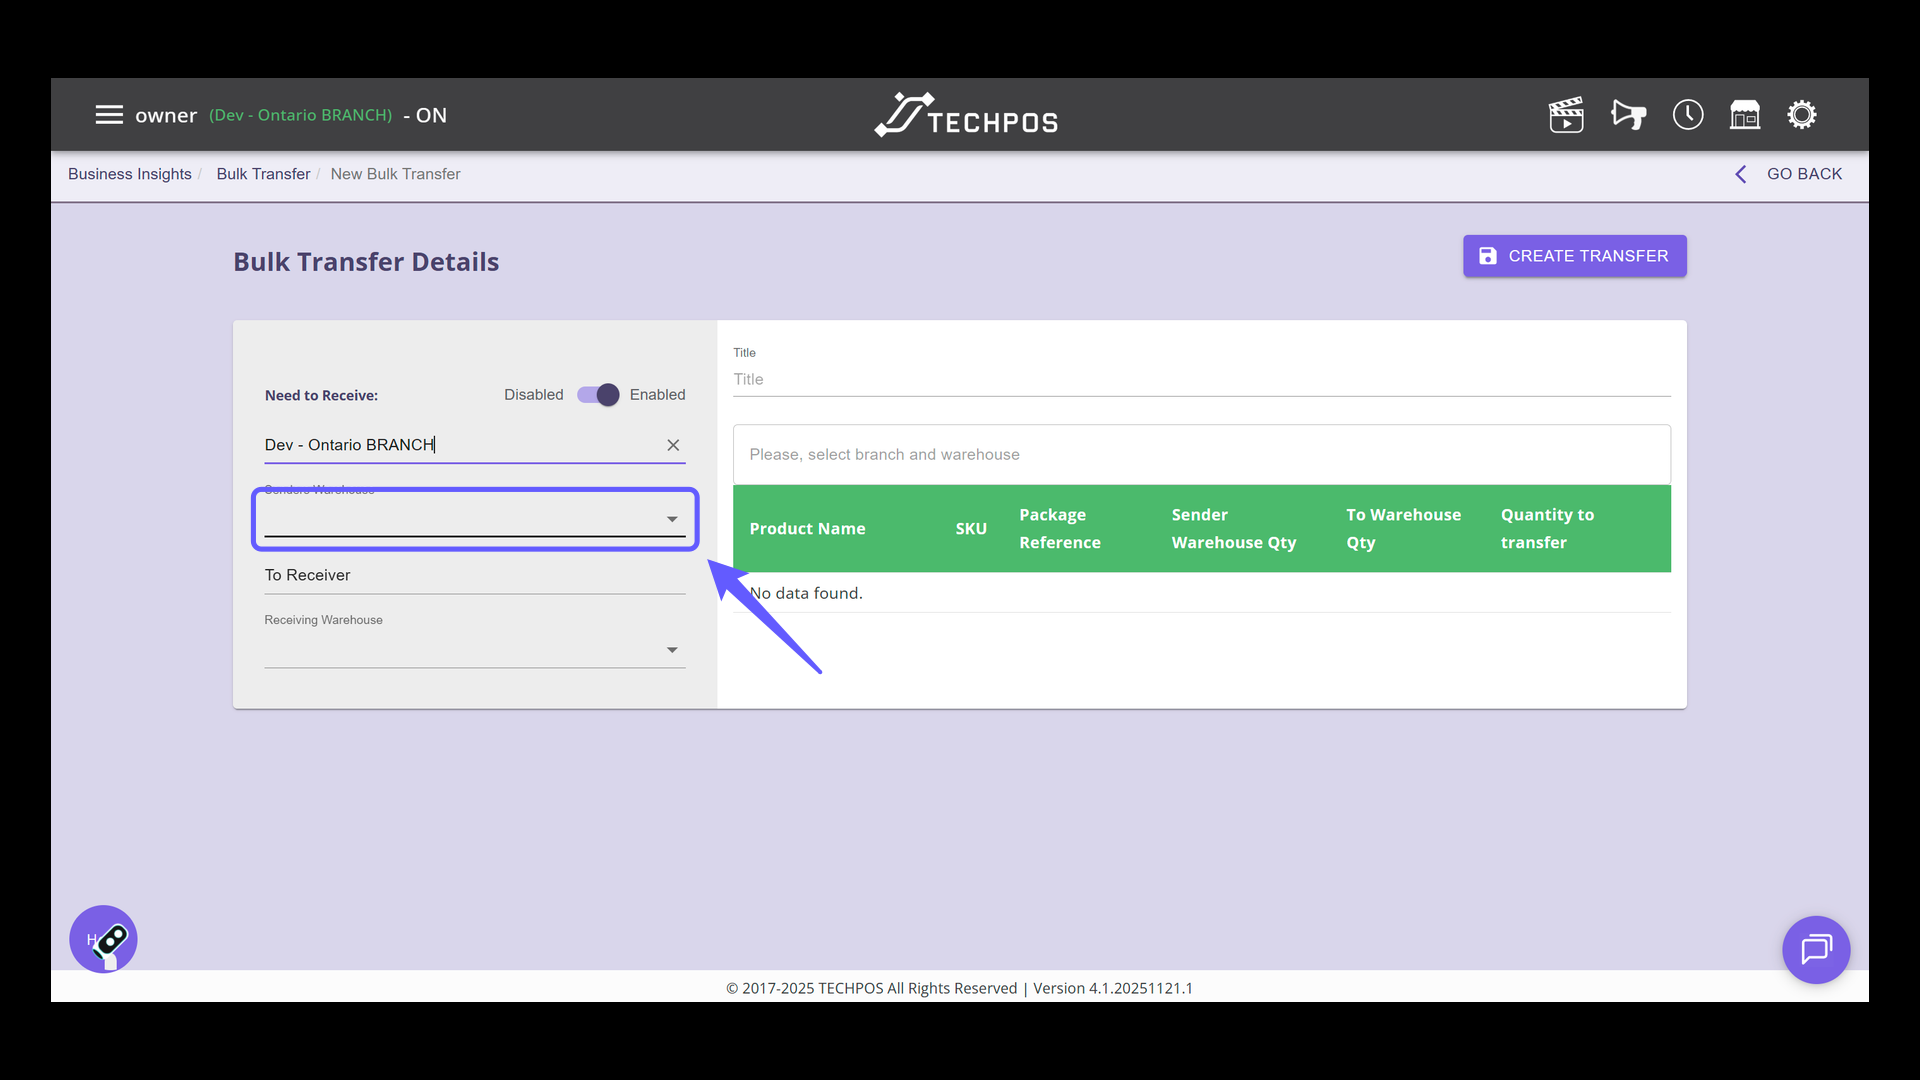
7. Select the Sender's Warehouse
Select an option from the Sender's Warehouse dropdown to initiate the bulk transfer setup. Ensure the inventory you're transferring is located in the chosen warehouse.
8. Select Receiving Store
Choose the destination store or branch from the dropdown menu to designate where the products will be transferred.

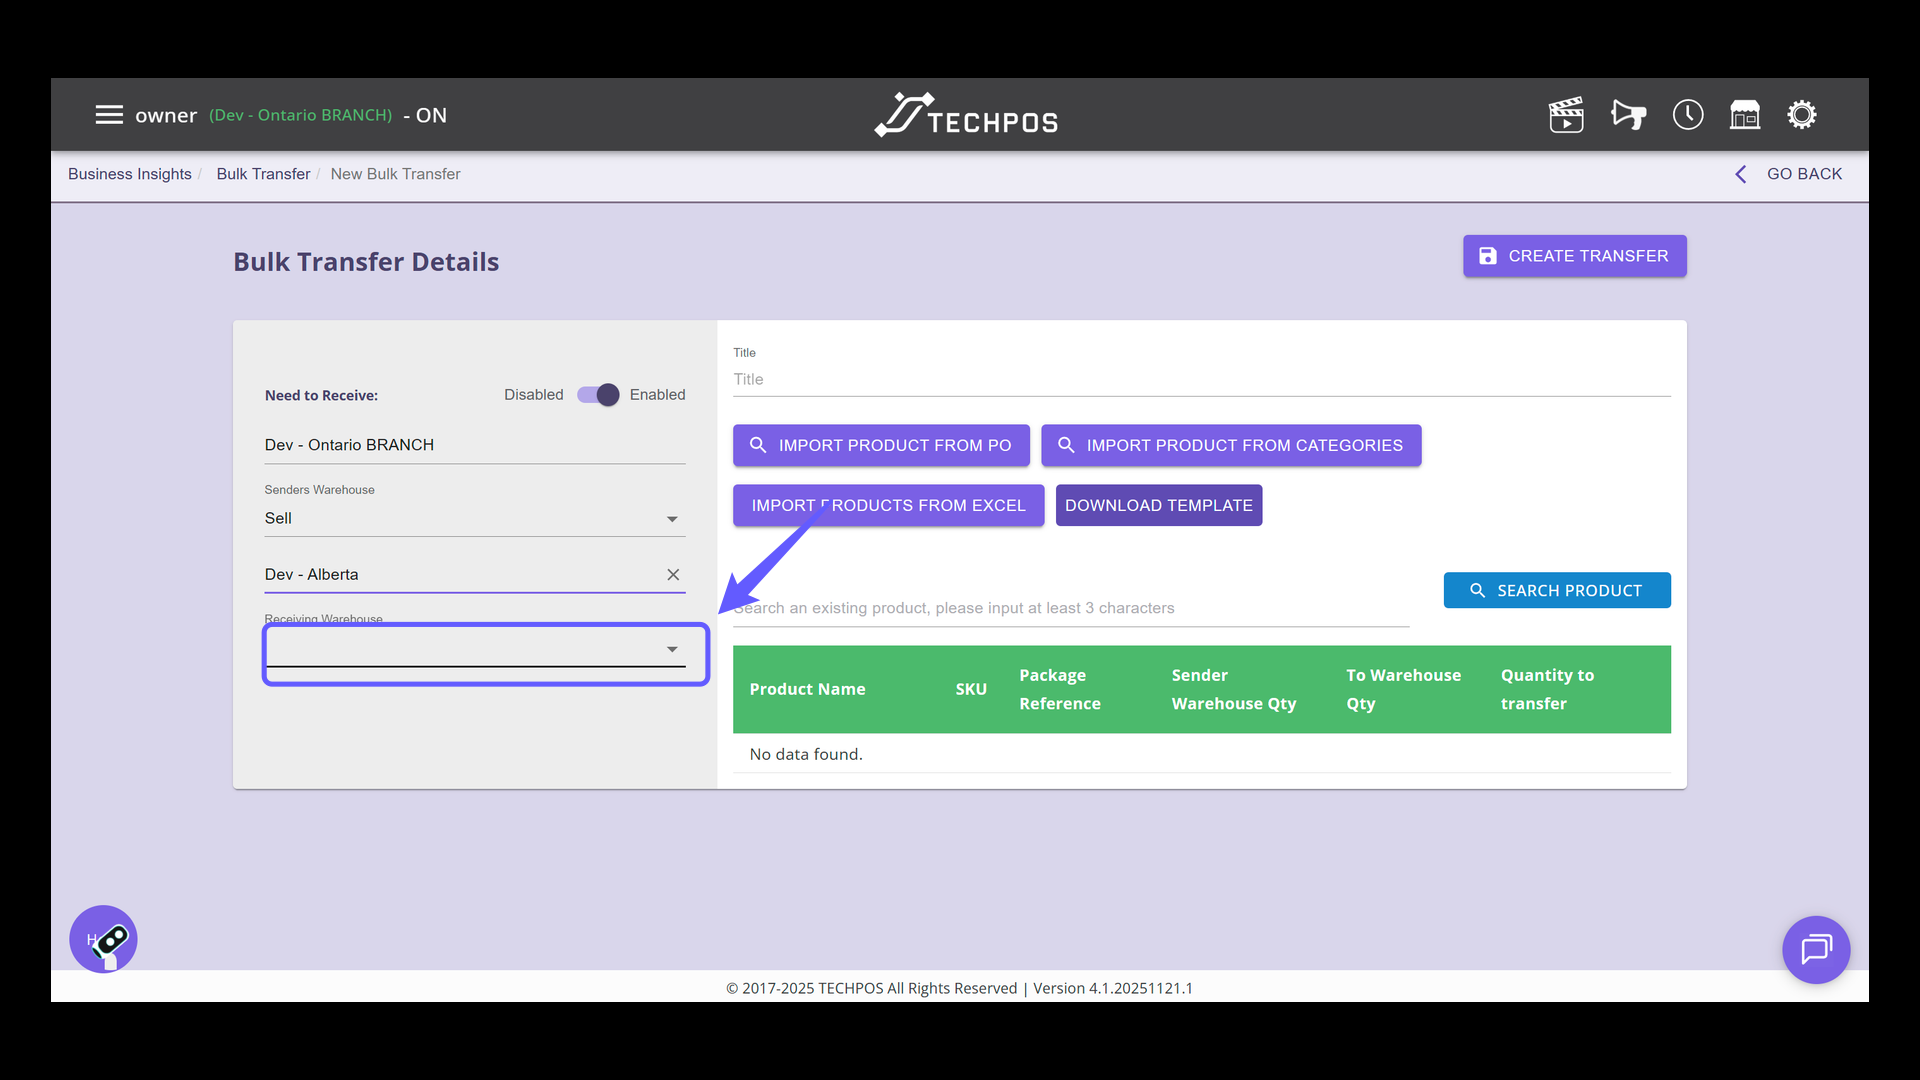
9. Select Receiver Warehouse
Choose the appropriate option from the dropdown menu labeled 'Receiving Warehouse' to specify where the items will be delivered.
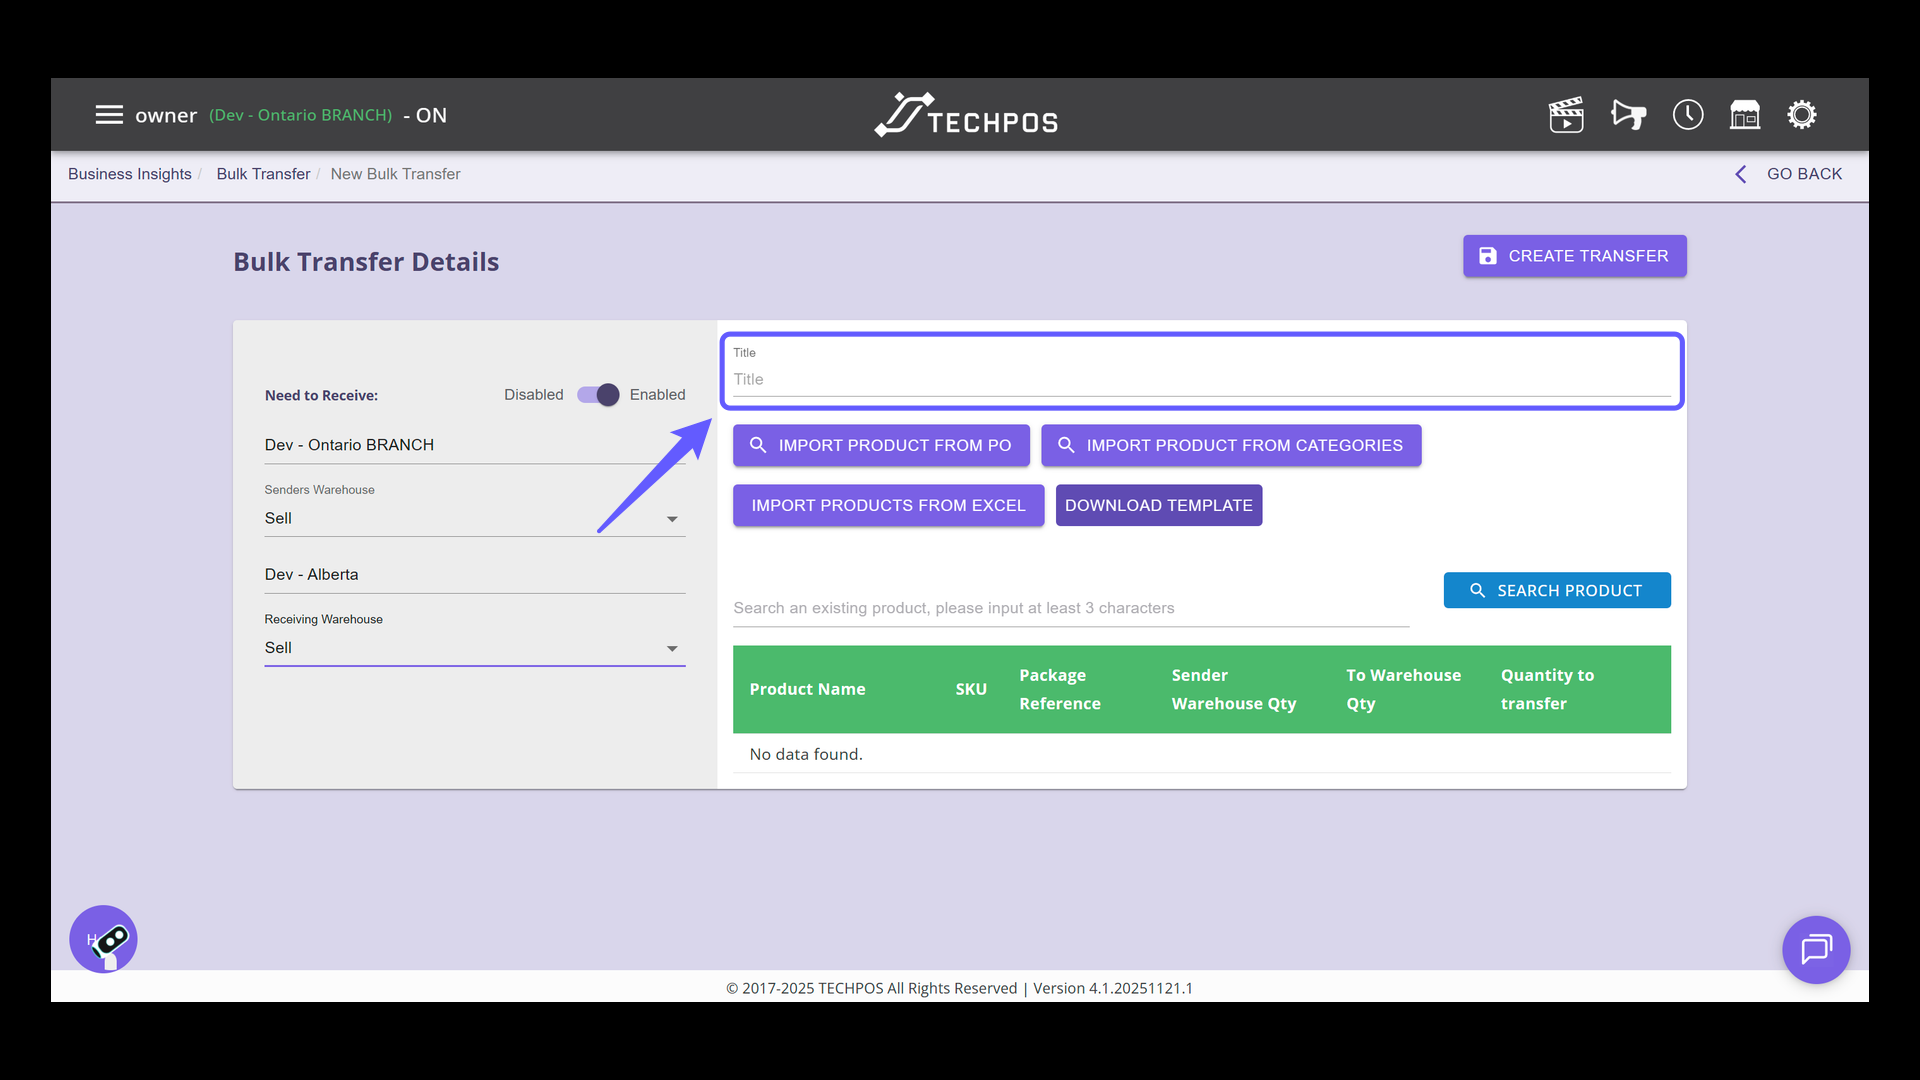
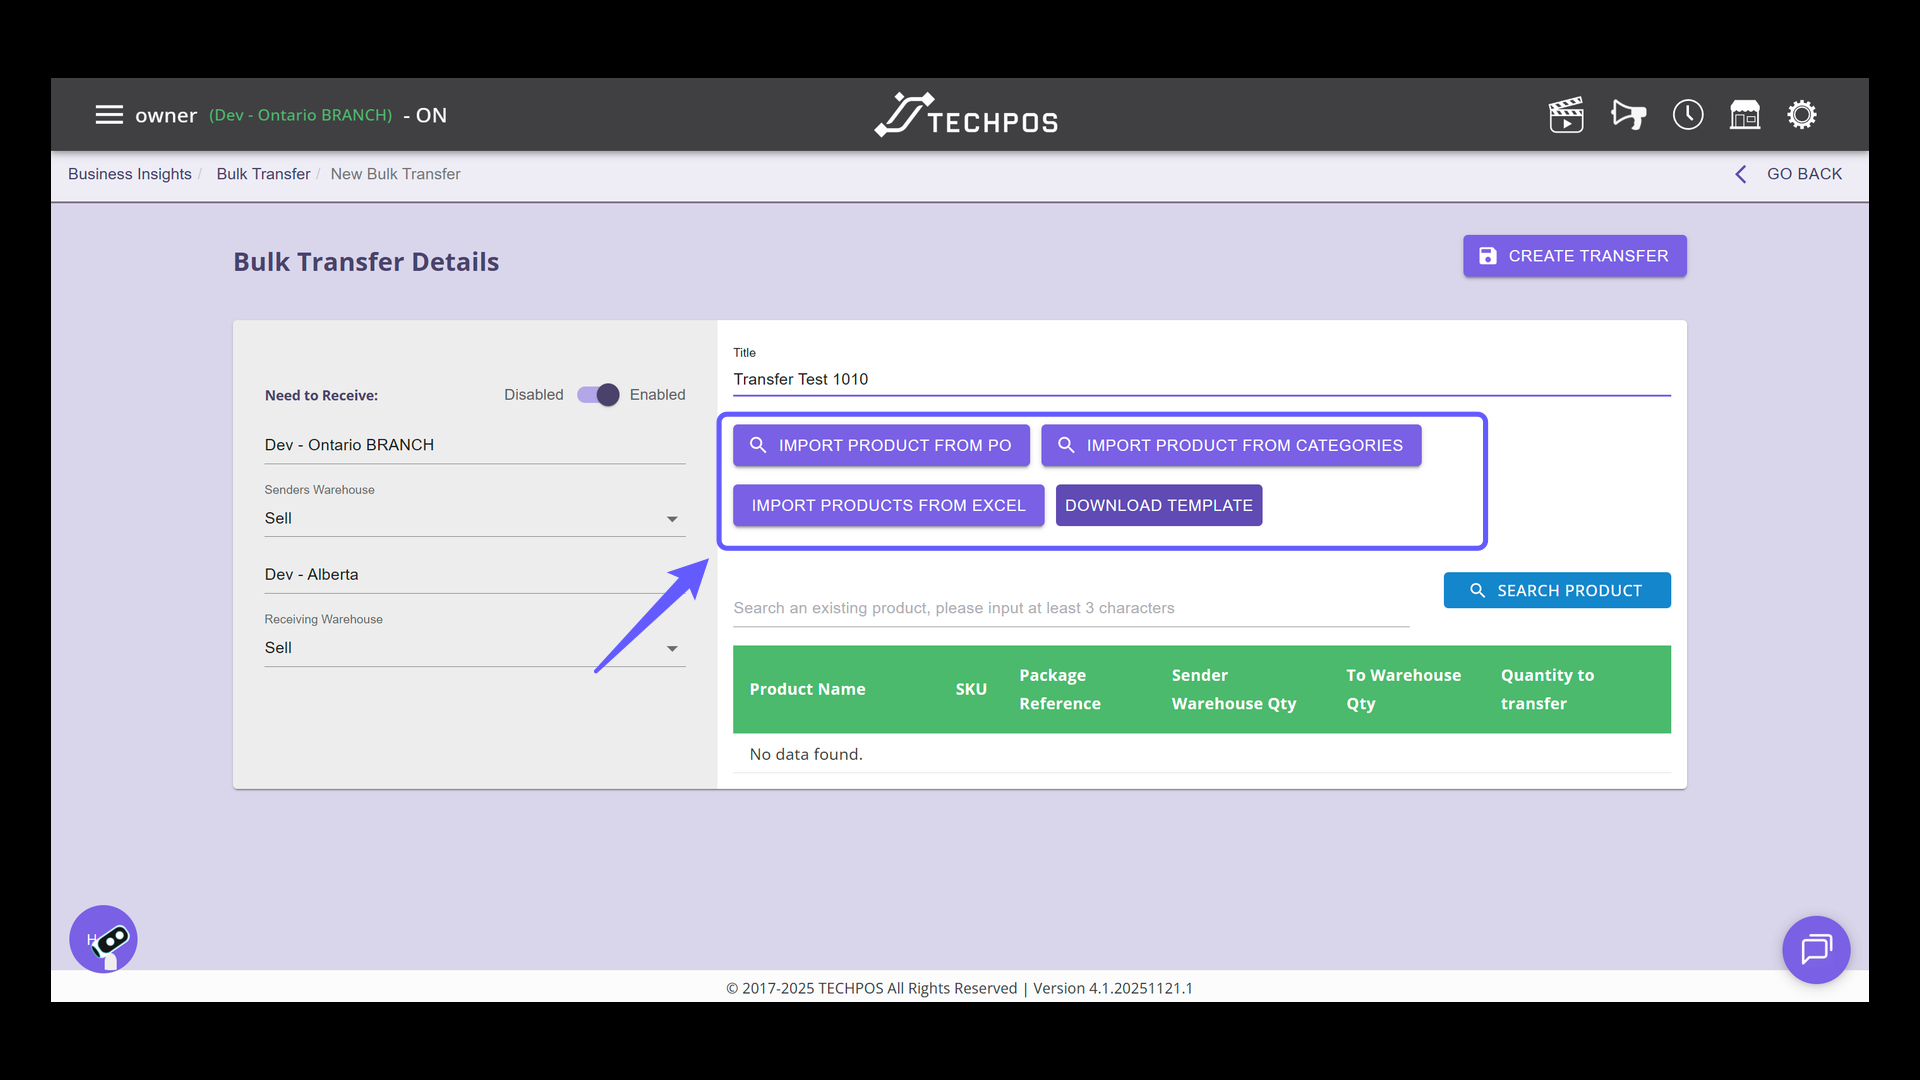
10. Enter Title for Bulk Transfer
Enter a title describing the bulk transfer in the field provided.
11. Manage Bulk Transfer Products
Choose either from Import Product from PO, from Categories, or from the template to add the products to be transferred.
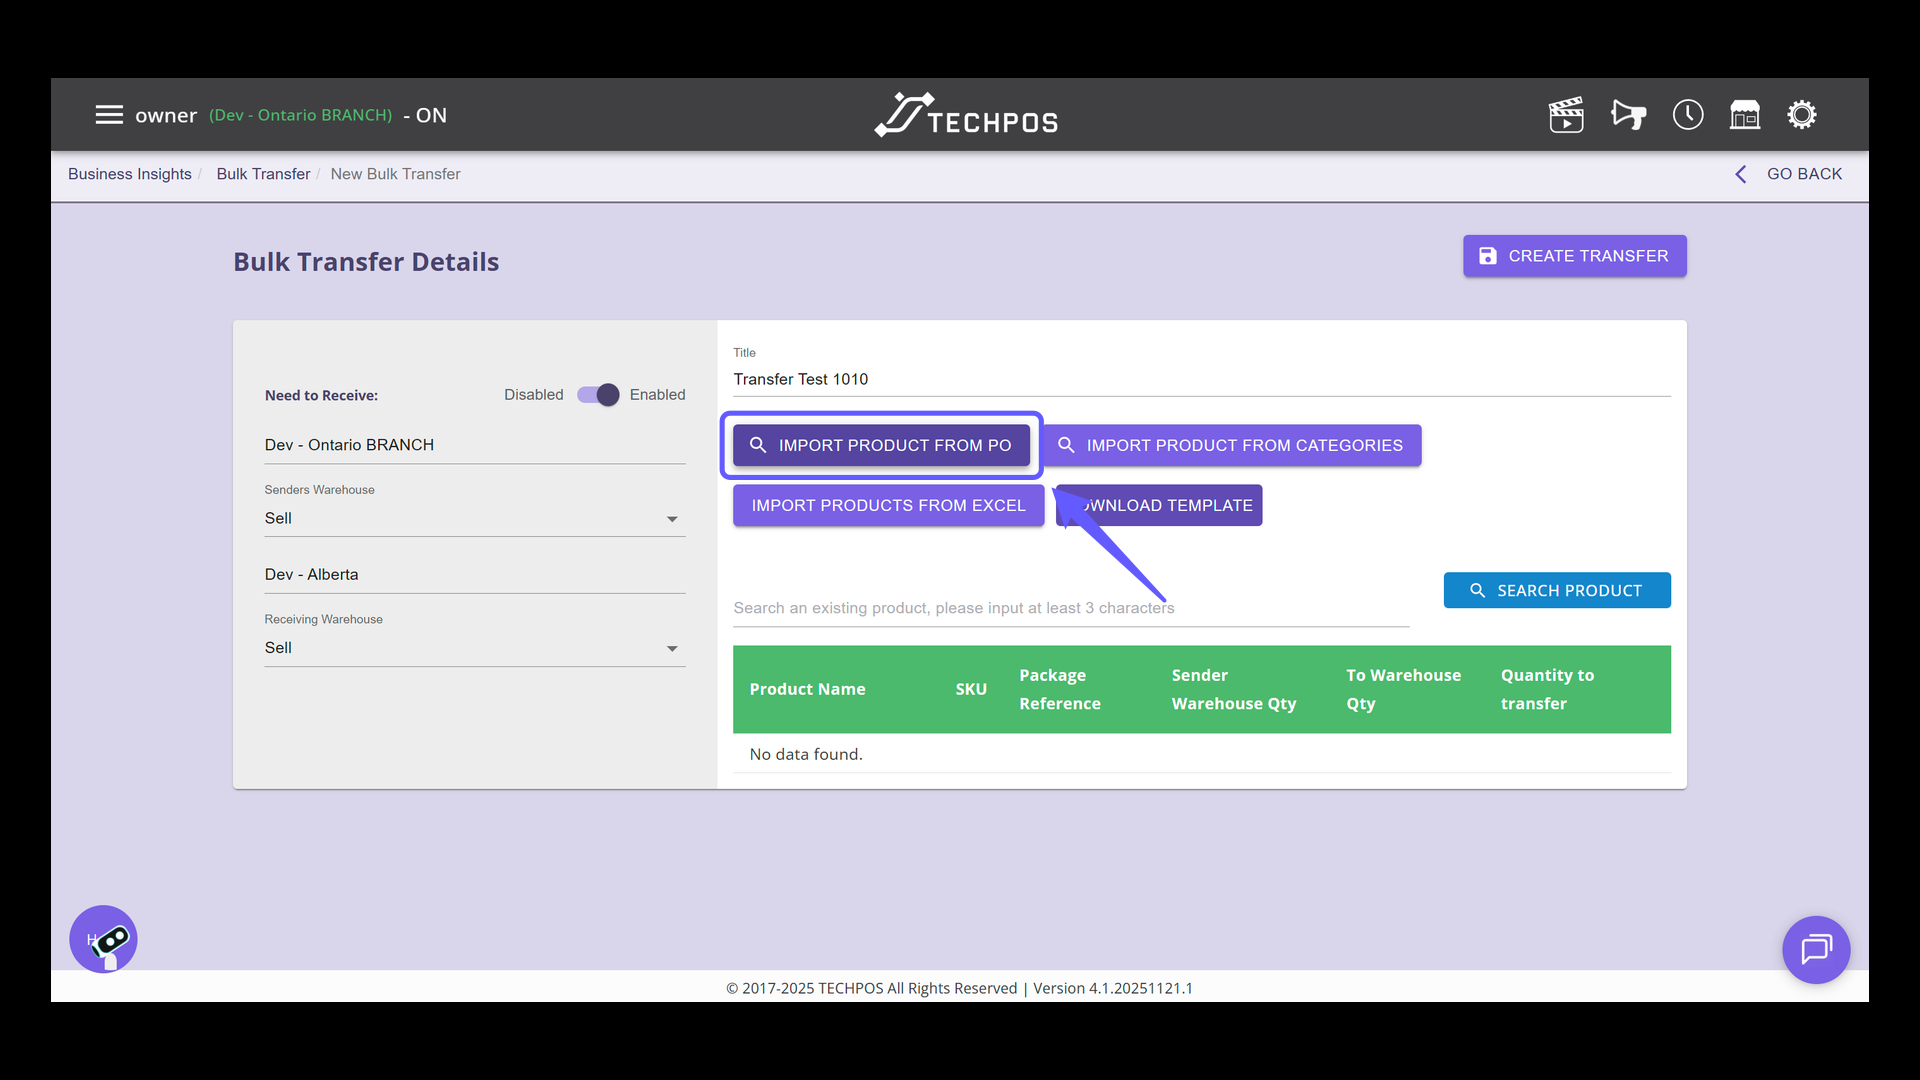
12. Import Product from PO
Select the button labeled 'Import Product from PO' to initiate product importation from purchase order.
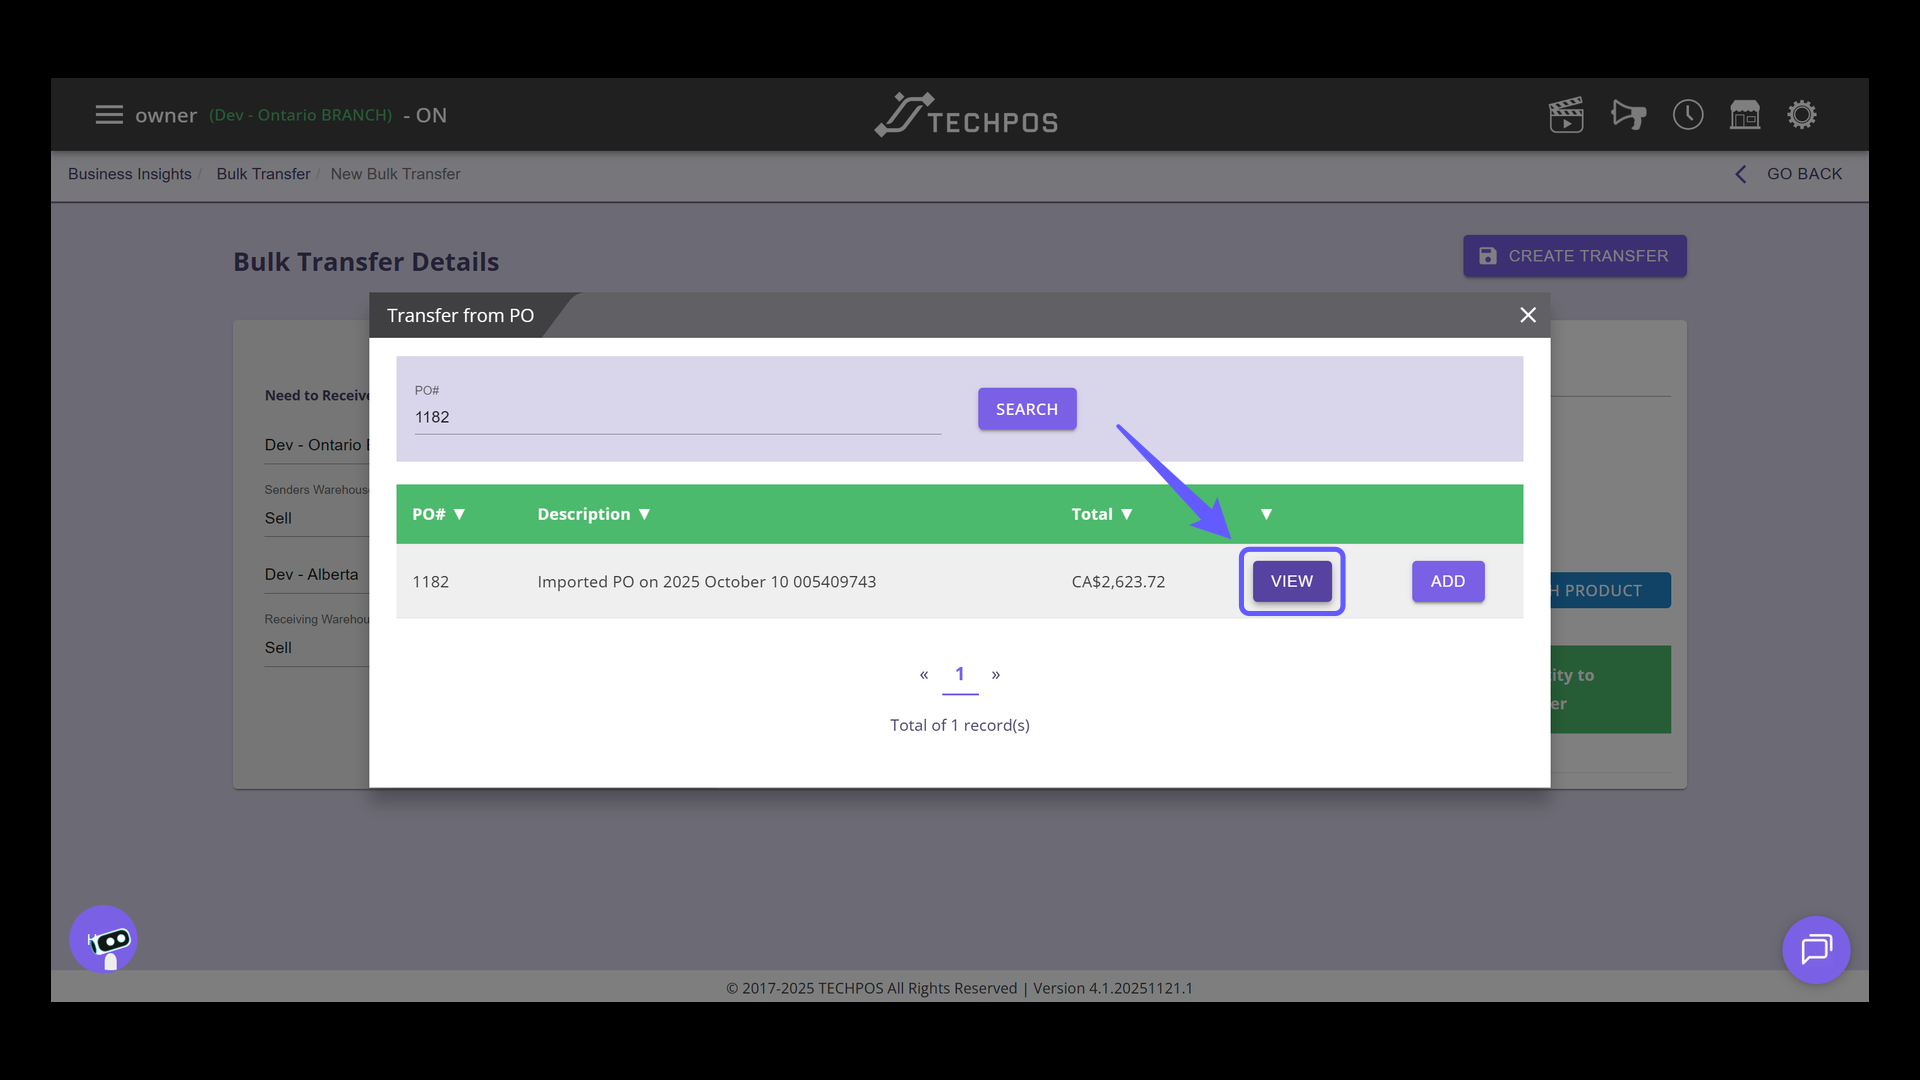
13. Enter Purchase Order Number
Input the purchase order number in the PO# field to proceed with the search.

14. Select Purchase Order Details
Click 'VIEW' to access the details of the selected purchase order.
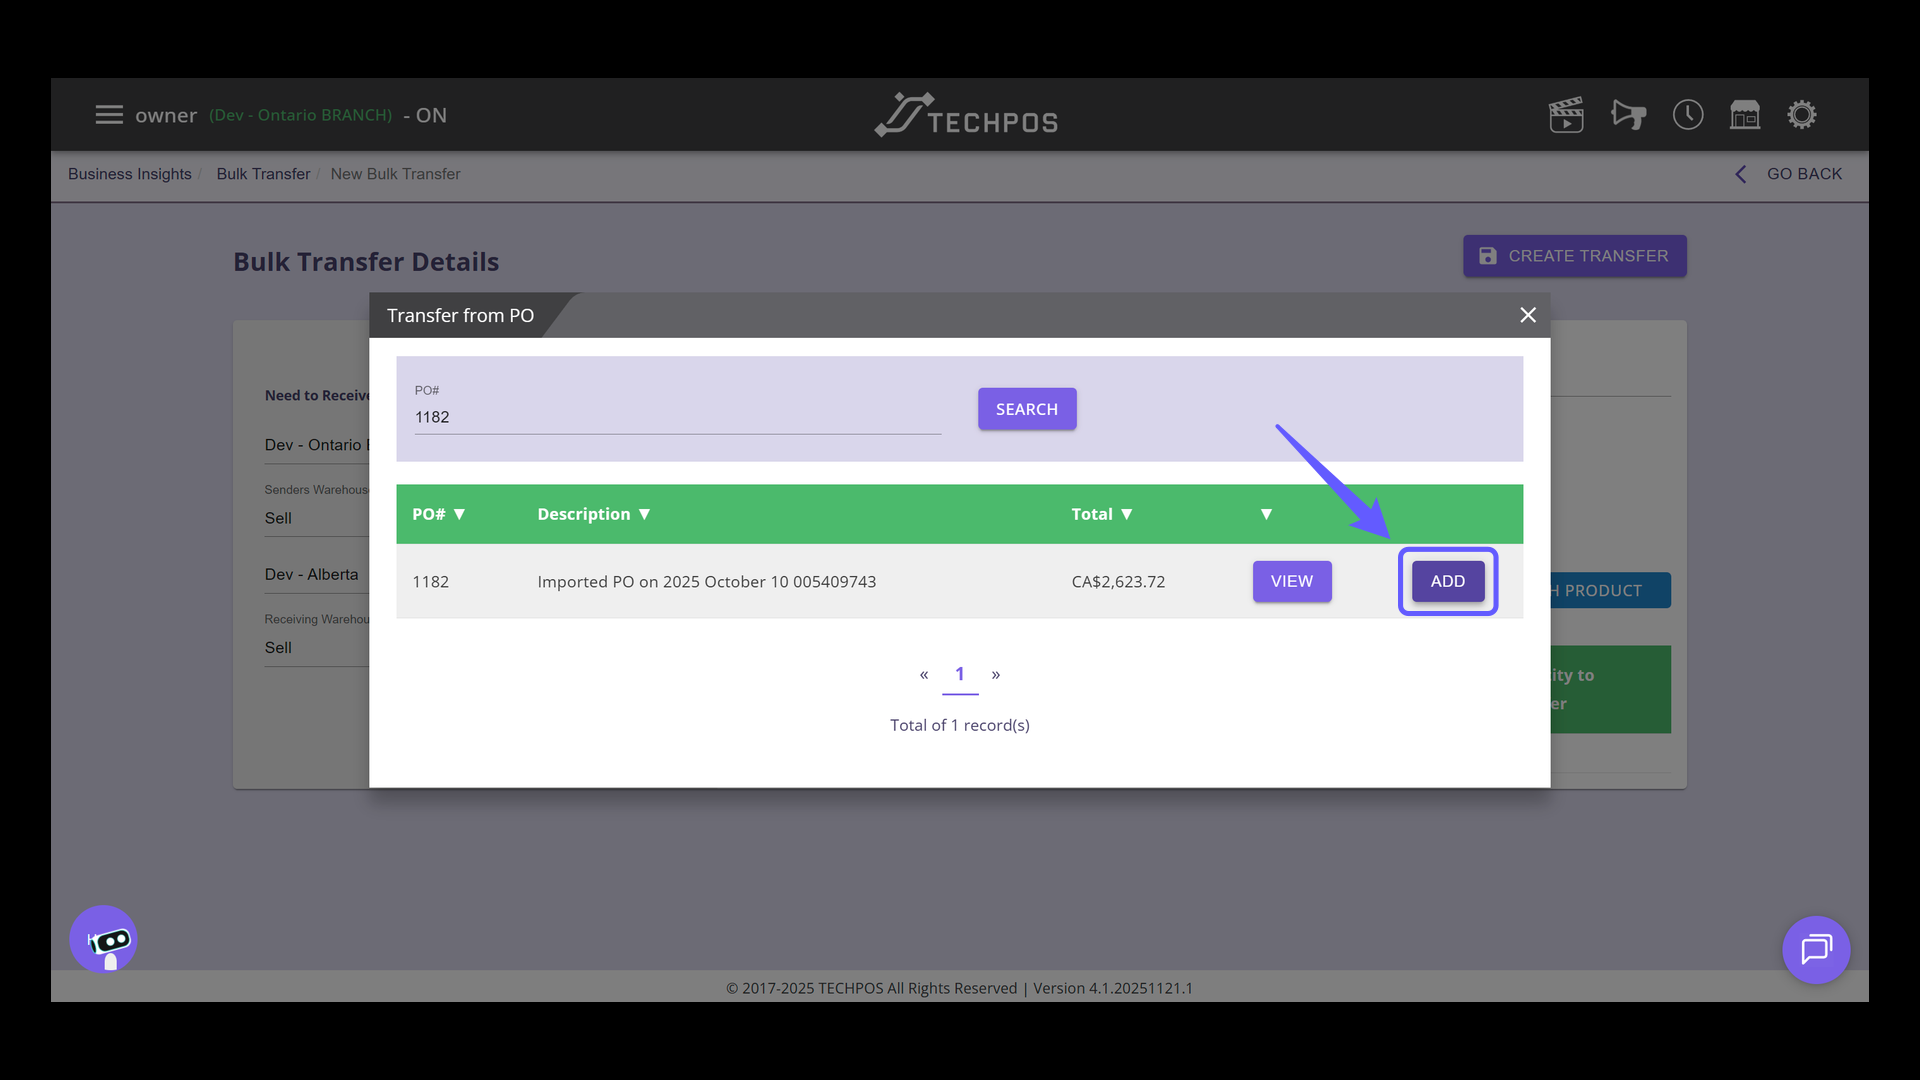
15. Add a Purchase Order
Click the 'Add' button to include the selected purchase order in the transfer list.
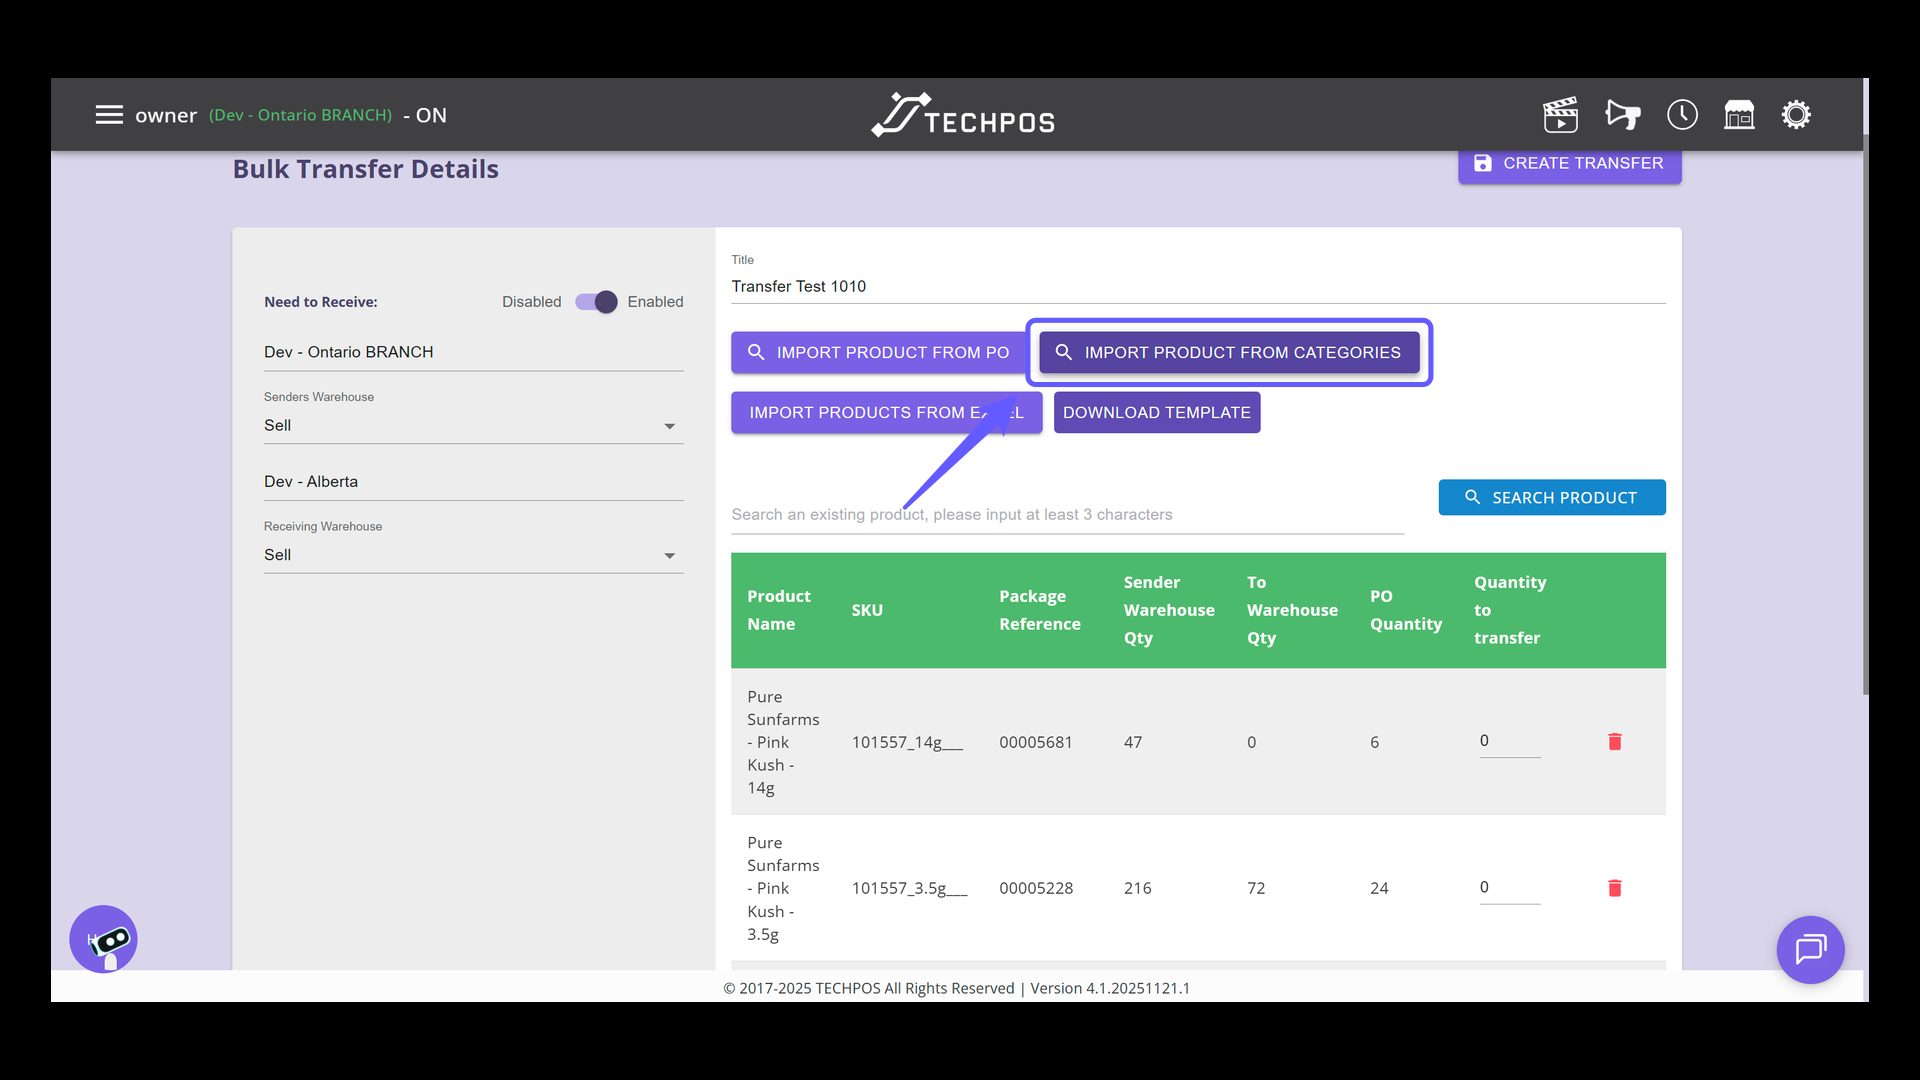
16. Import Product from Categories
Select "Import Product From Categories" to browse and import items into the system based on their specific categories.
17. Select a Category
Choose a category from the dropdown menu to proceed with the transfer.

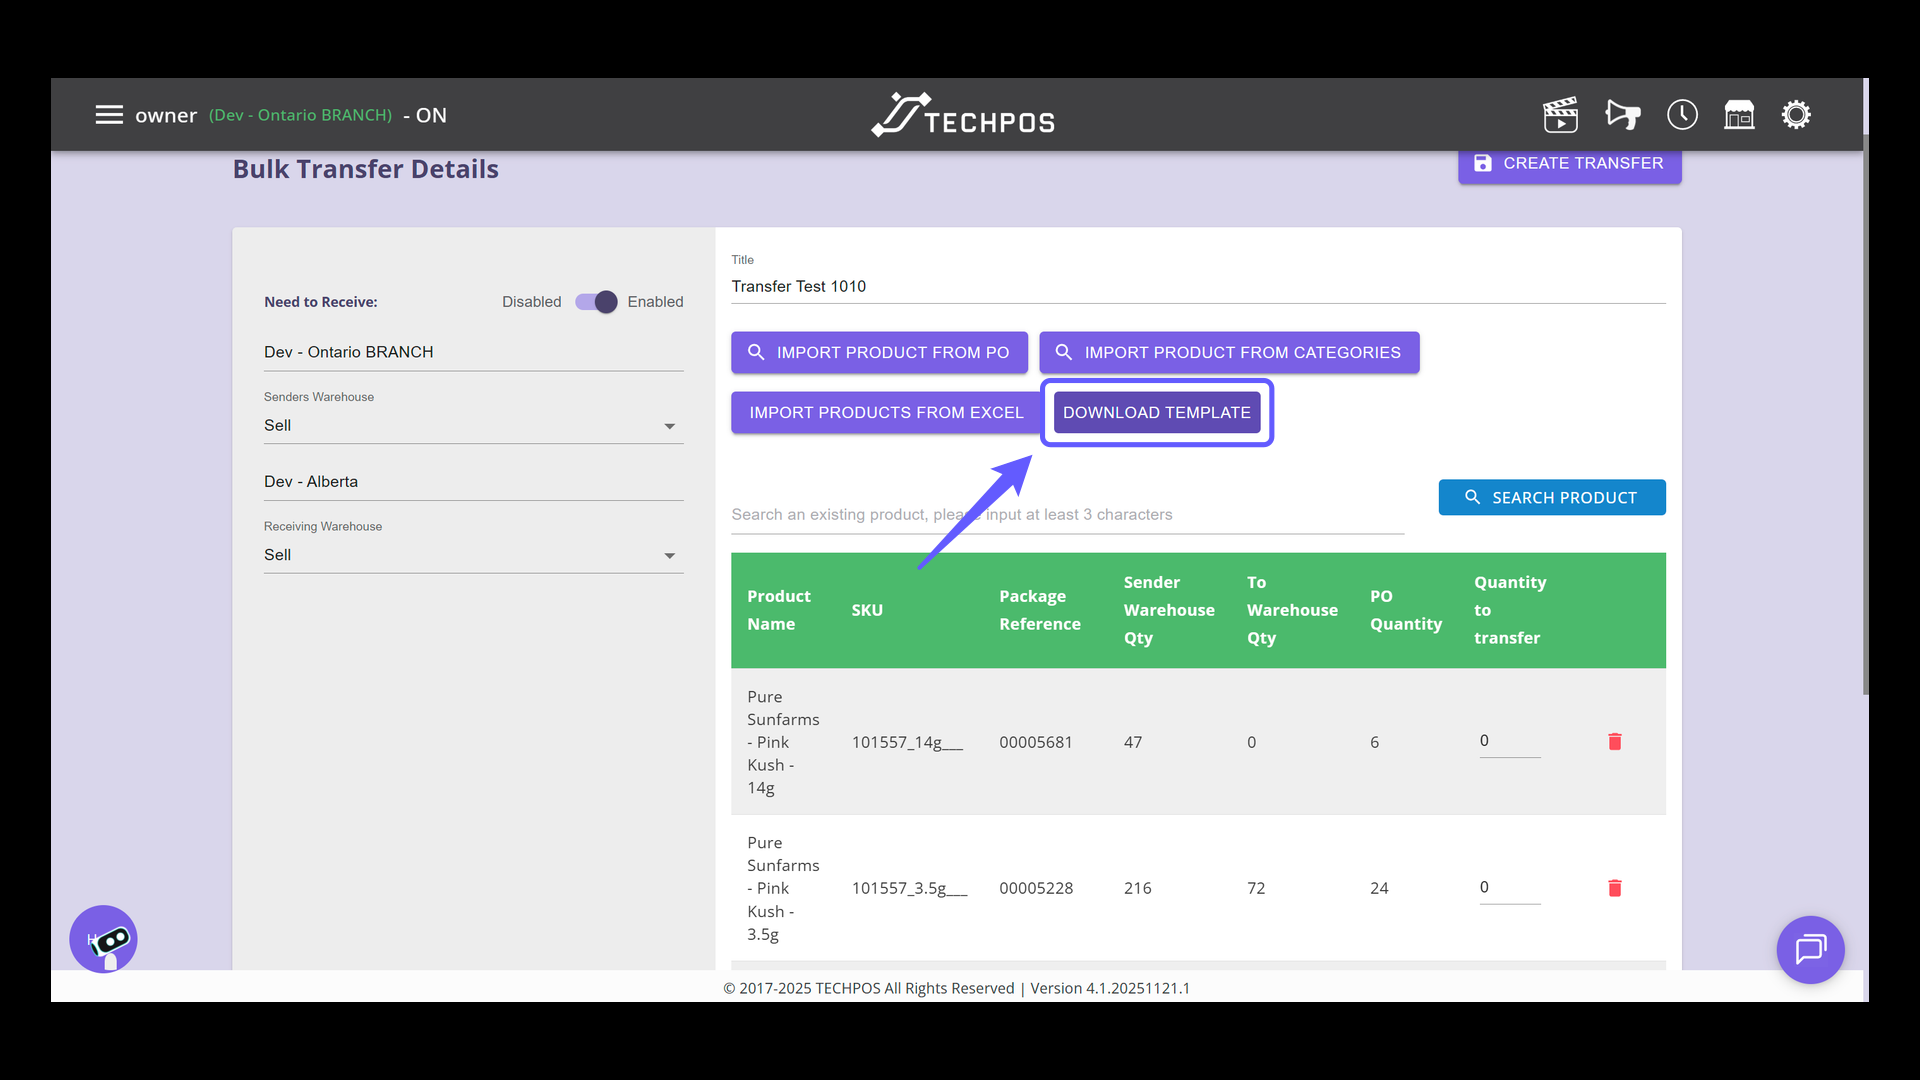
18. Download the Template
Click 'Download Template' to get the product import file. You must enter the SKU (mandatory), while Product Name and Package Reference are optional. After filling it out, click the 'Import Products from Excel' button.
19. Enter Transfer Quantity
Input the desired quantity to be transferred in the provided field.
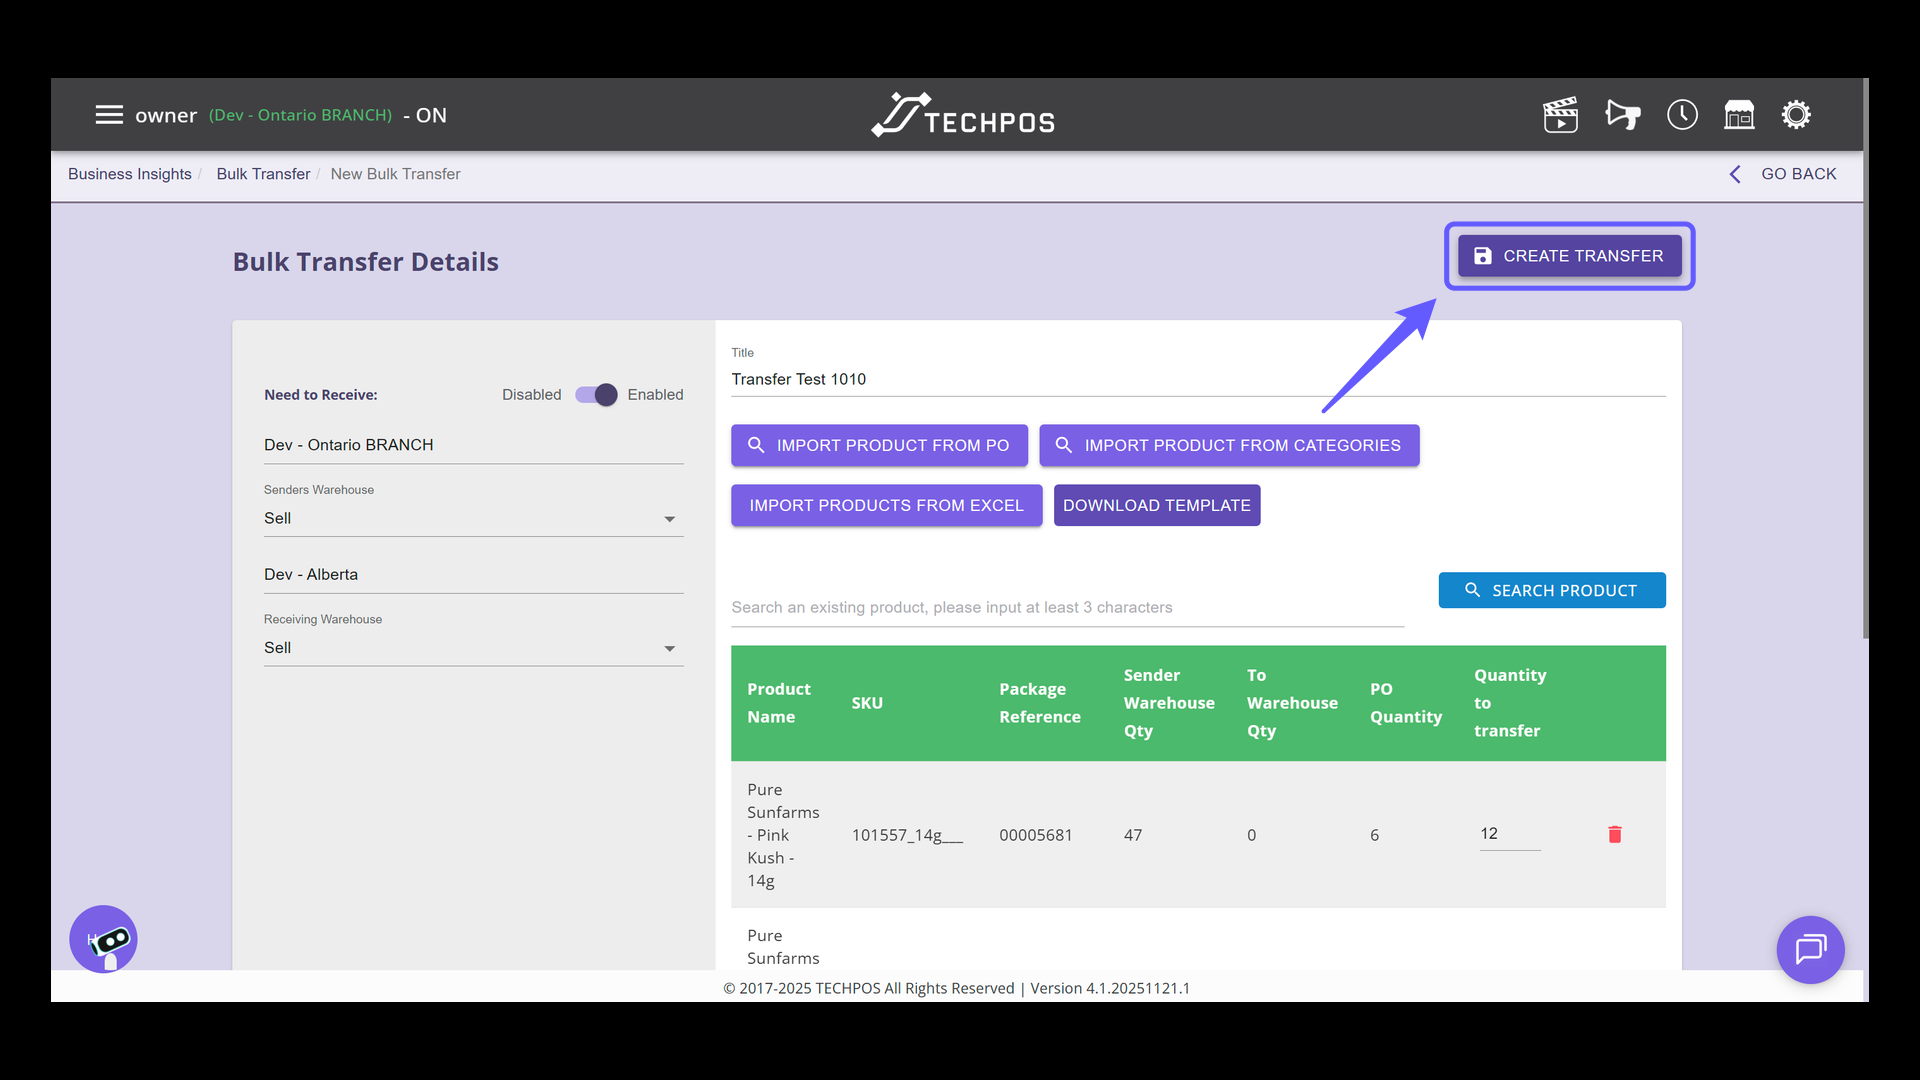
20. Initiate Transfer Process
Click 'Create Transfer' to proceed with initiating the transfer process for the selected products.
21. Check Transfer Status - Pending
Once the transfer is created, the status will switch to pending. This means you can still modify the transfer since it hasn't started yet. If changes are necessary, simply click the edit button.
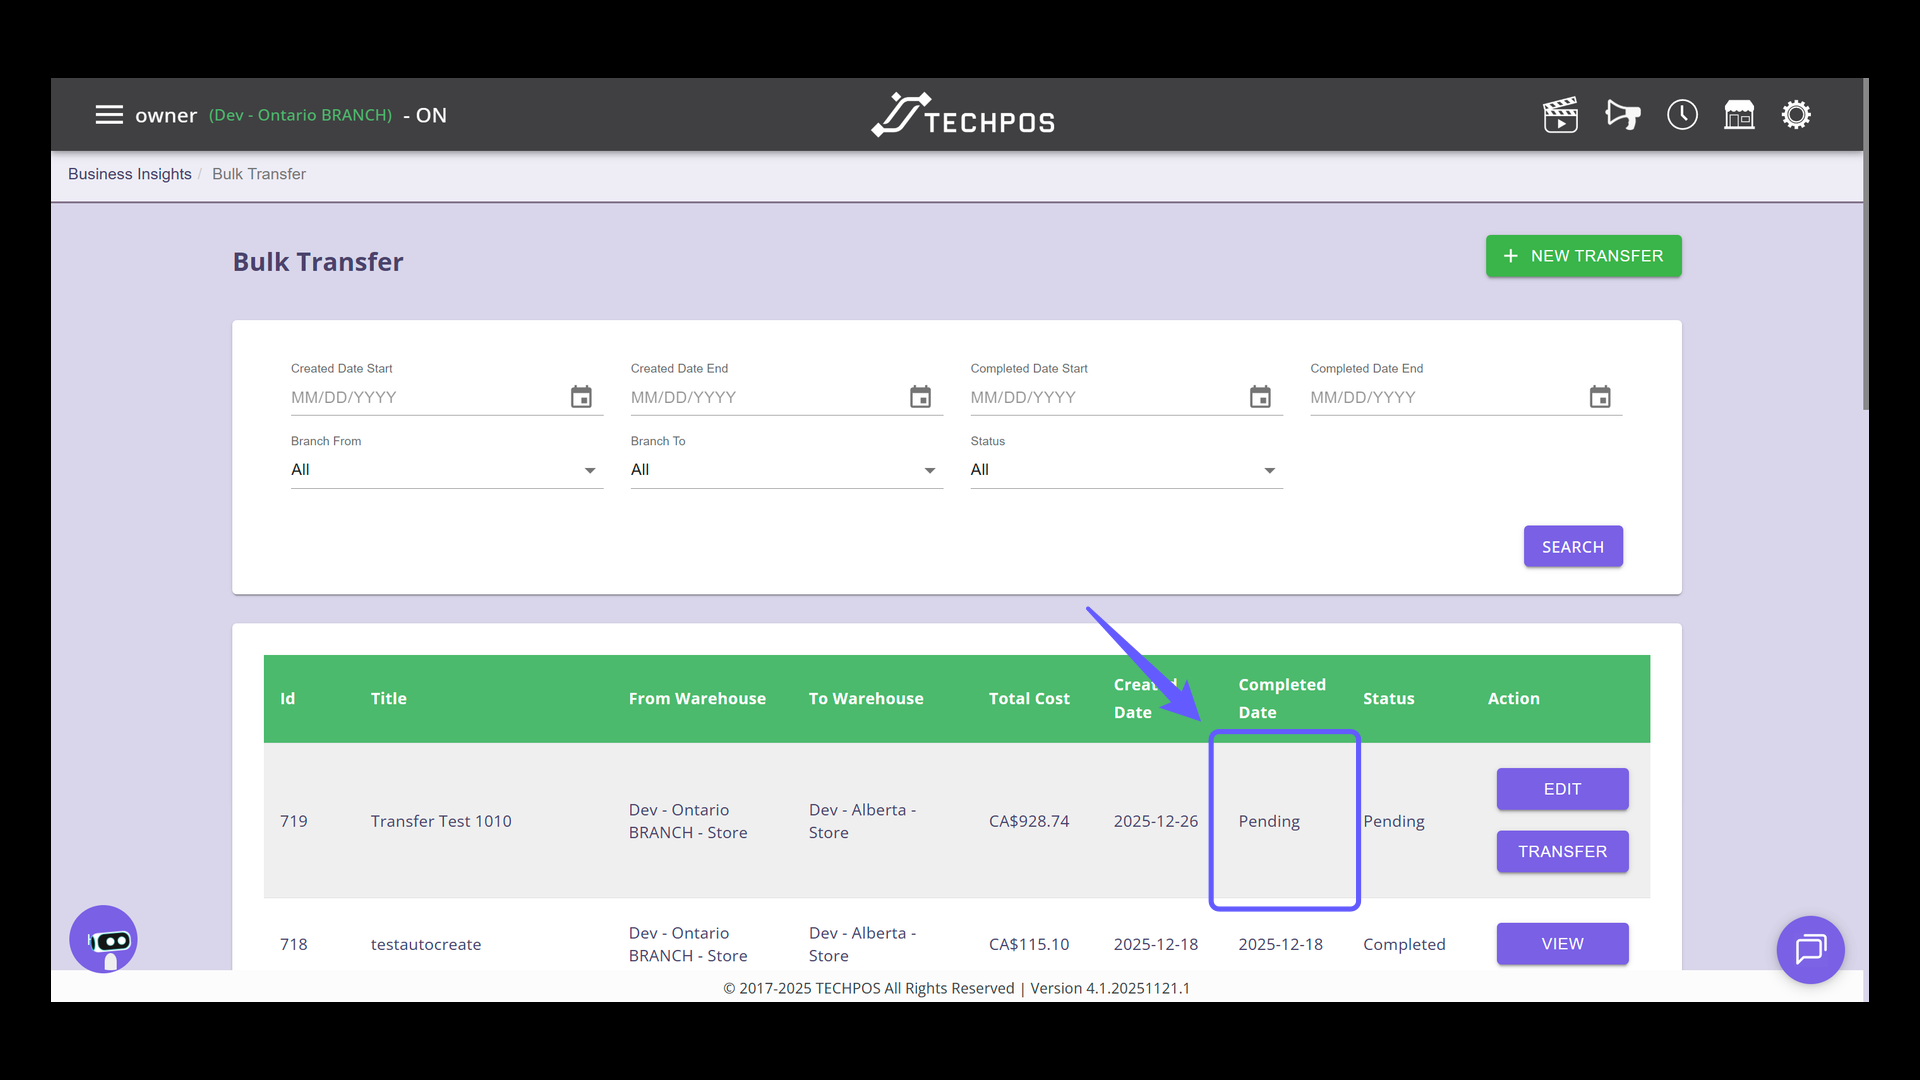
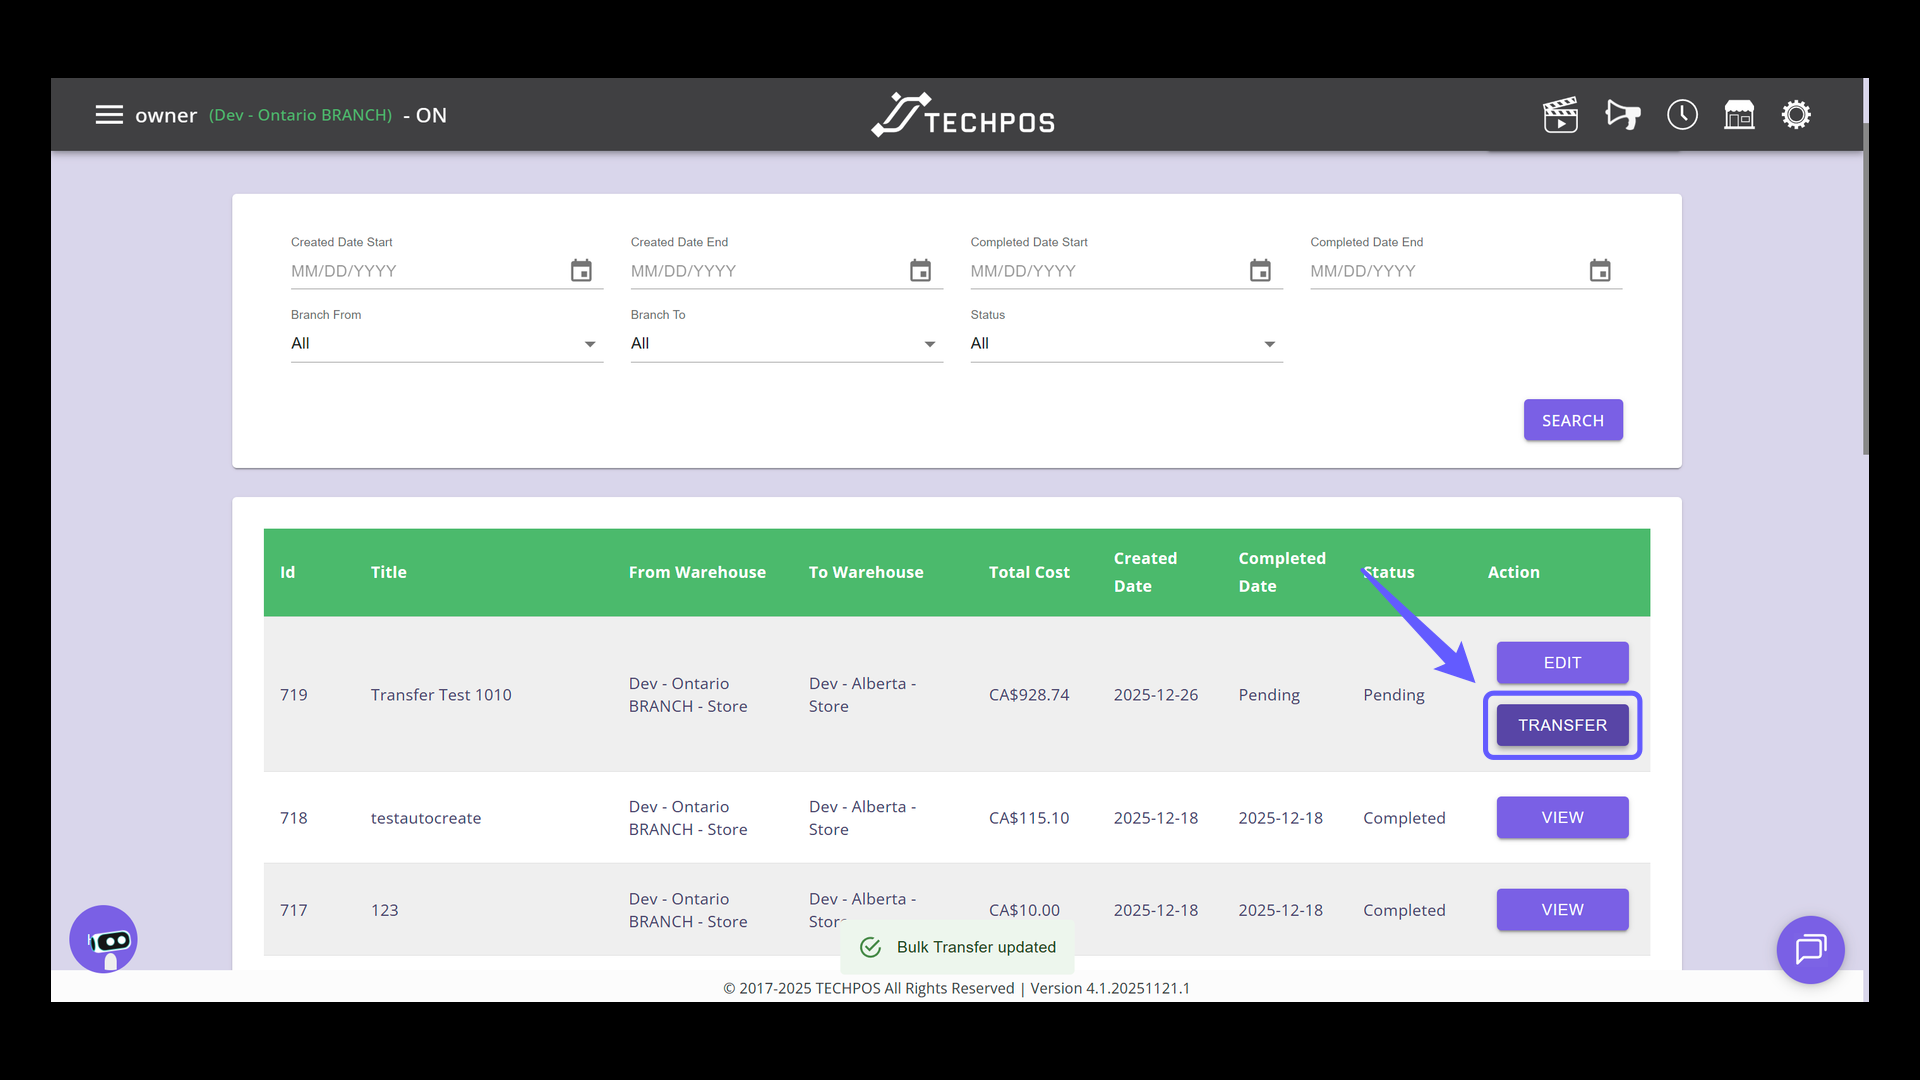
22. Initiate Transfer
Click to initiate the transfer process for the selected item.
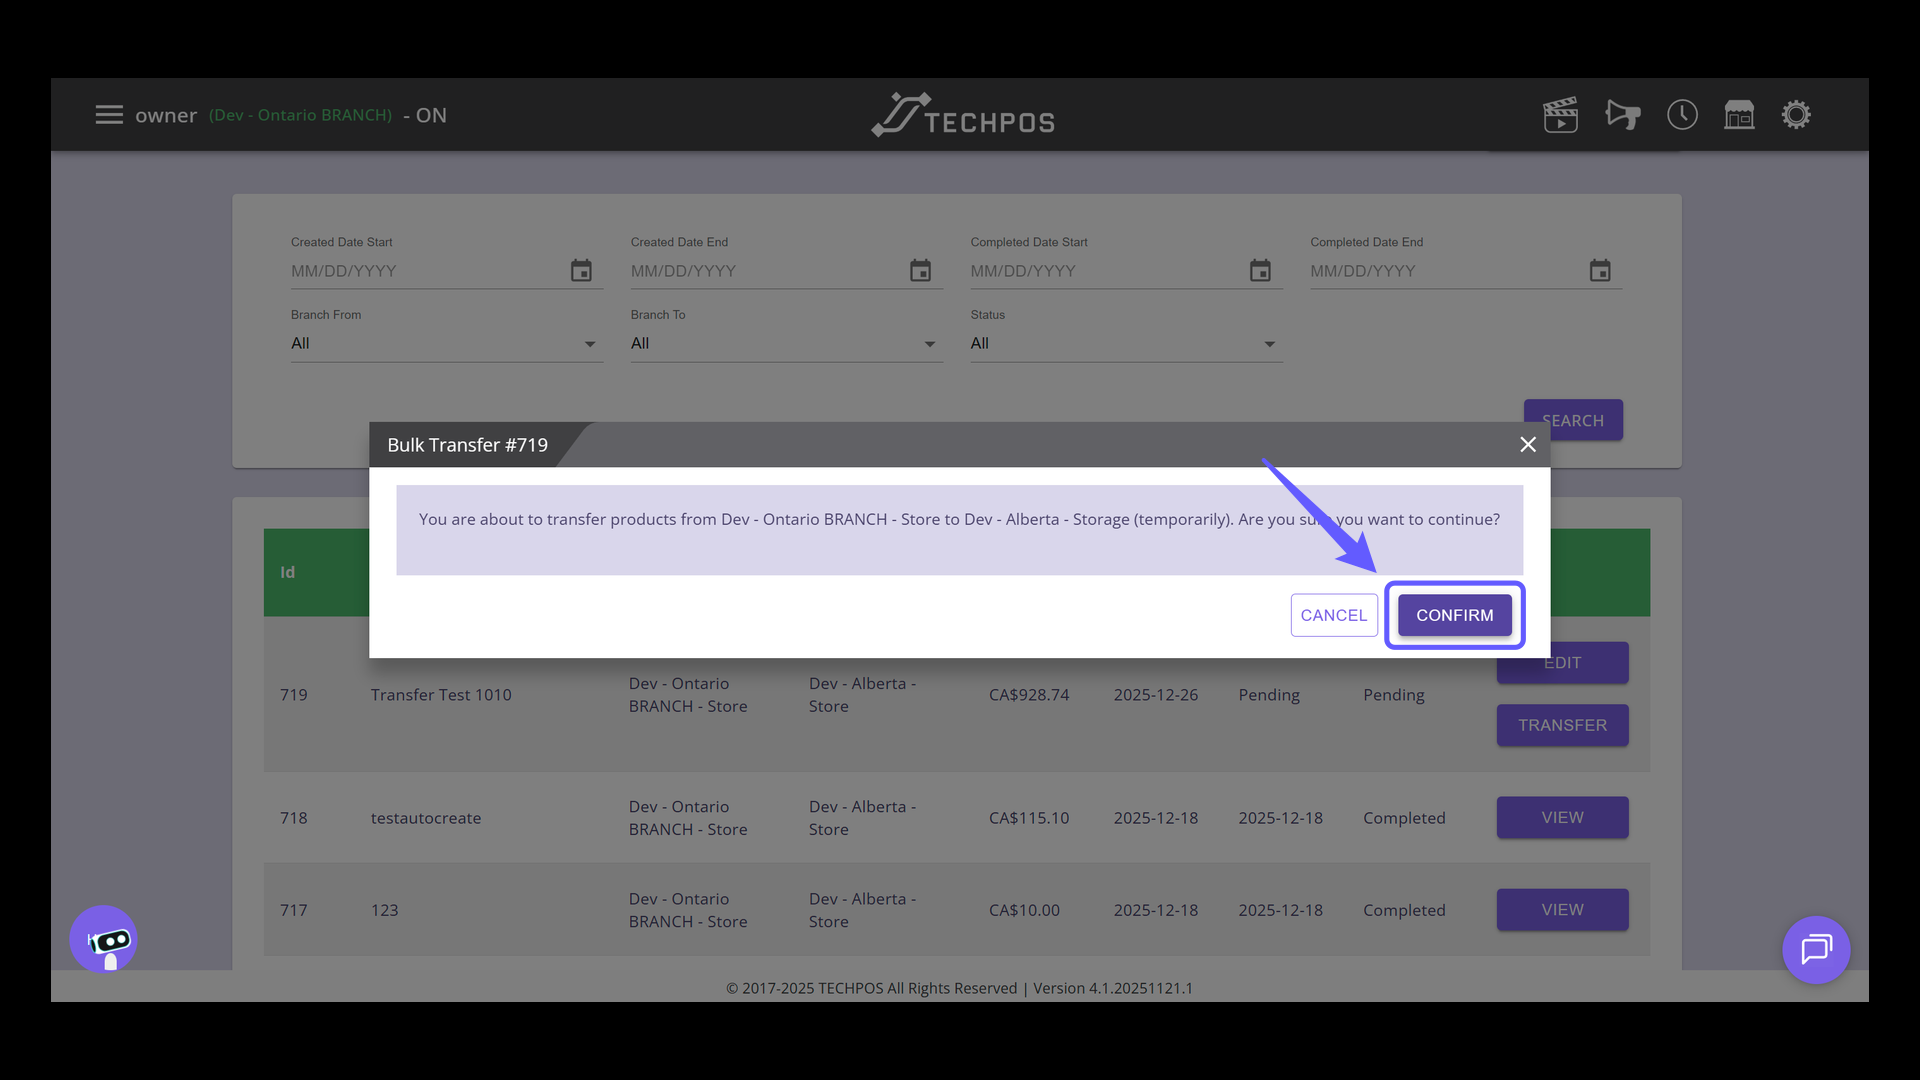
23. Confirm Bulk Transfer Action
Click 'CONFIRM' to start the product transfer. The next steps will vary based on the "Need to Receive" setting. If it's disabled, clicking 'CONFIRM' will instantly mark the transfer as complete. If enabled, the process will continue with further steps.
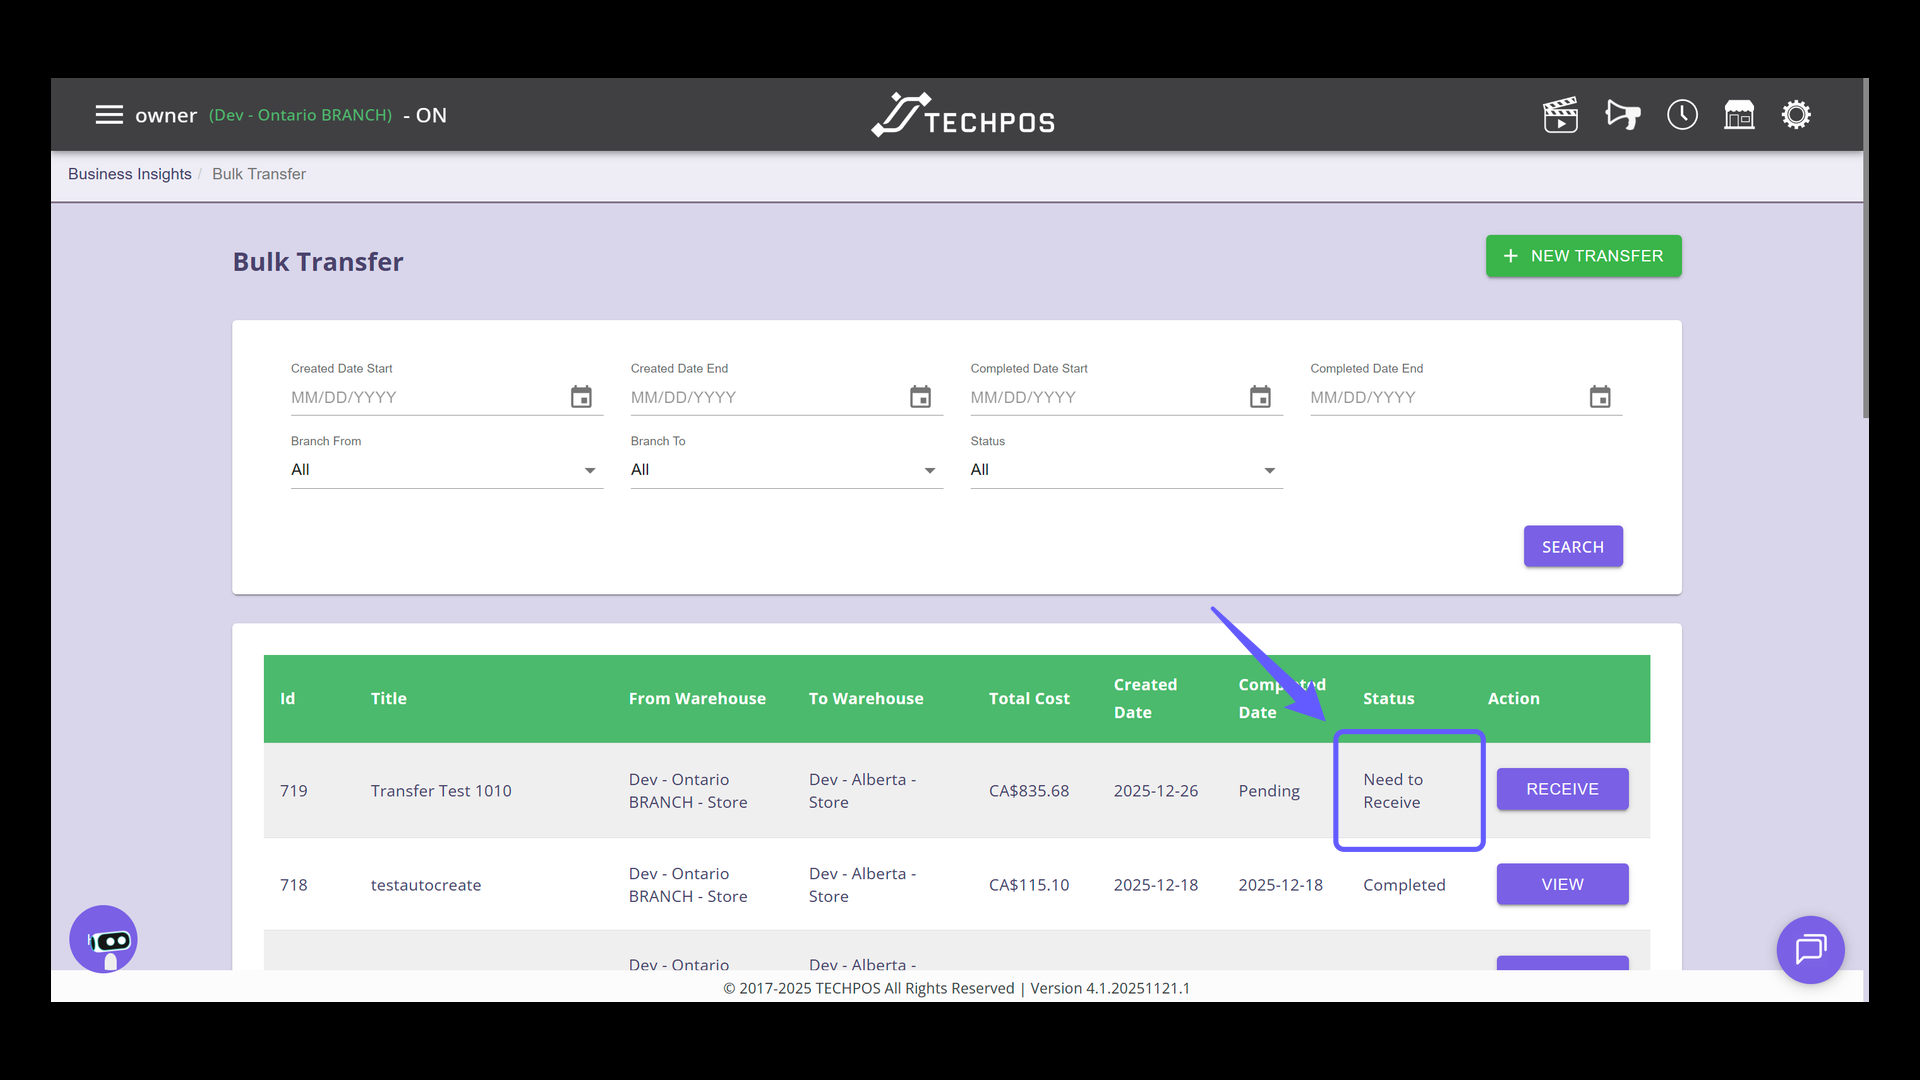
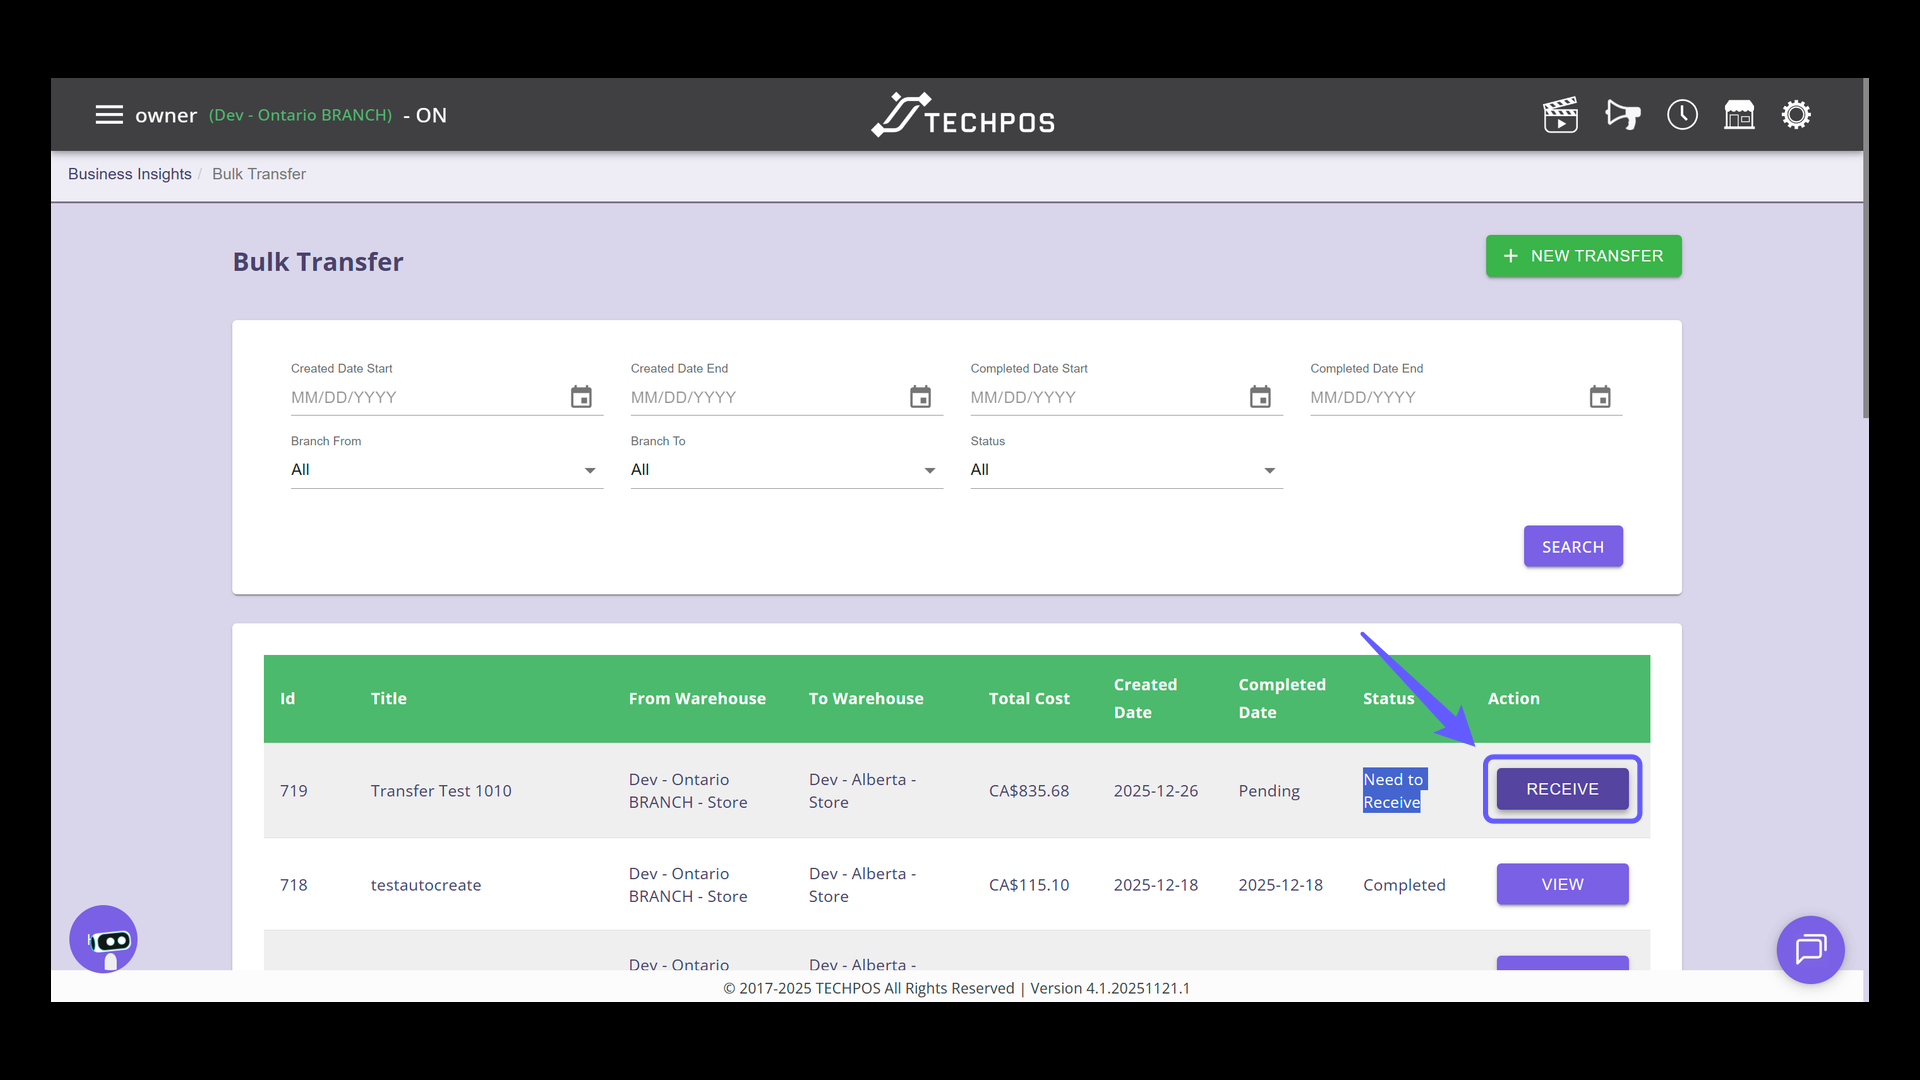
24. Receive Pending Transfer
Since the "Need to Receive" setting was activated when the transfer was created, the status now changed to "Need to Receive," signifying that the products are now in transit.
25. Initiate Transfer Reception
Upon receiving the transfer at the branch, promptly click the receive button.
26. Record Quantity Received
Update the quantity received reflect the accurate stock movement.
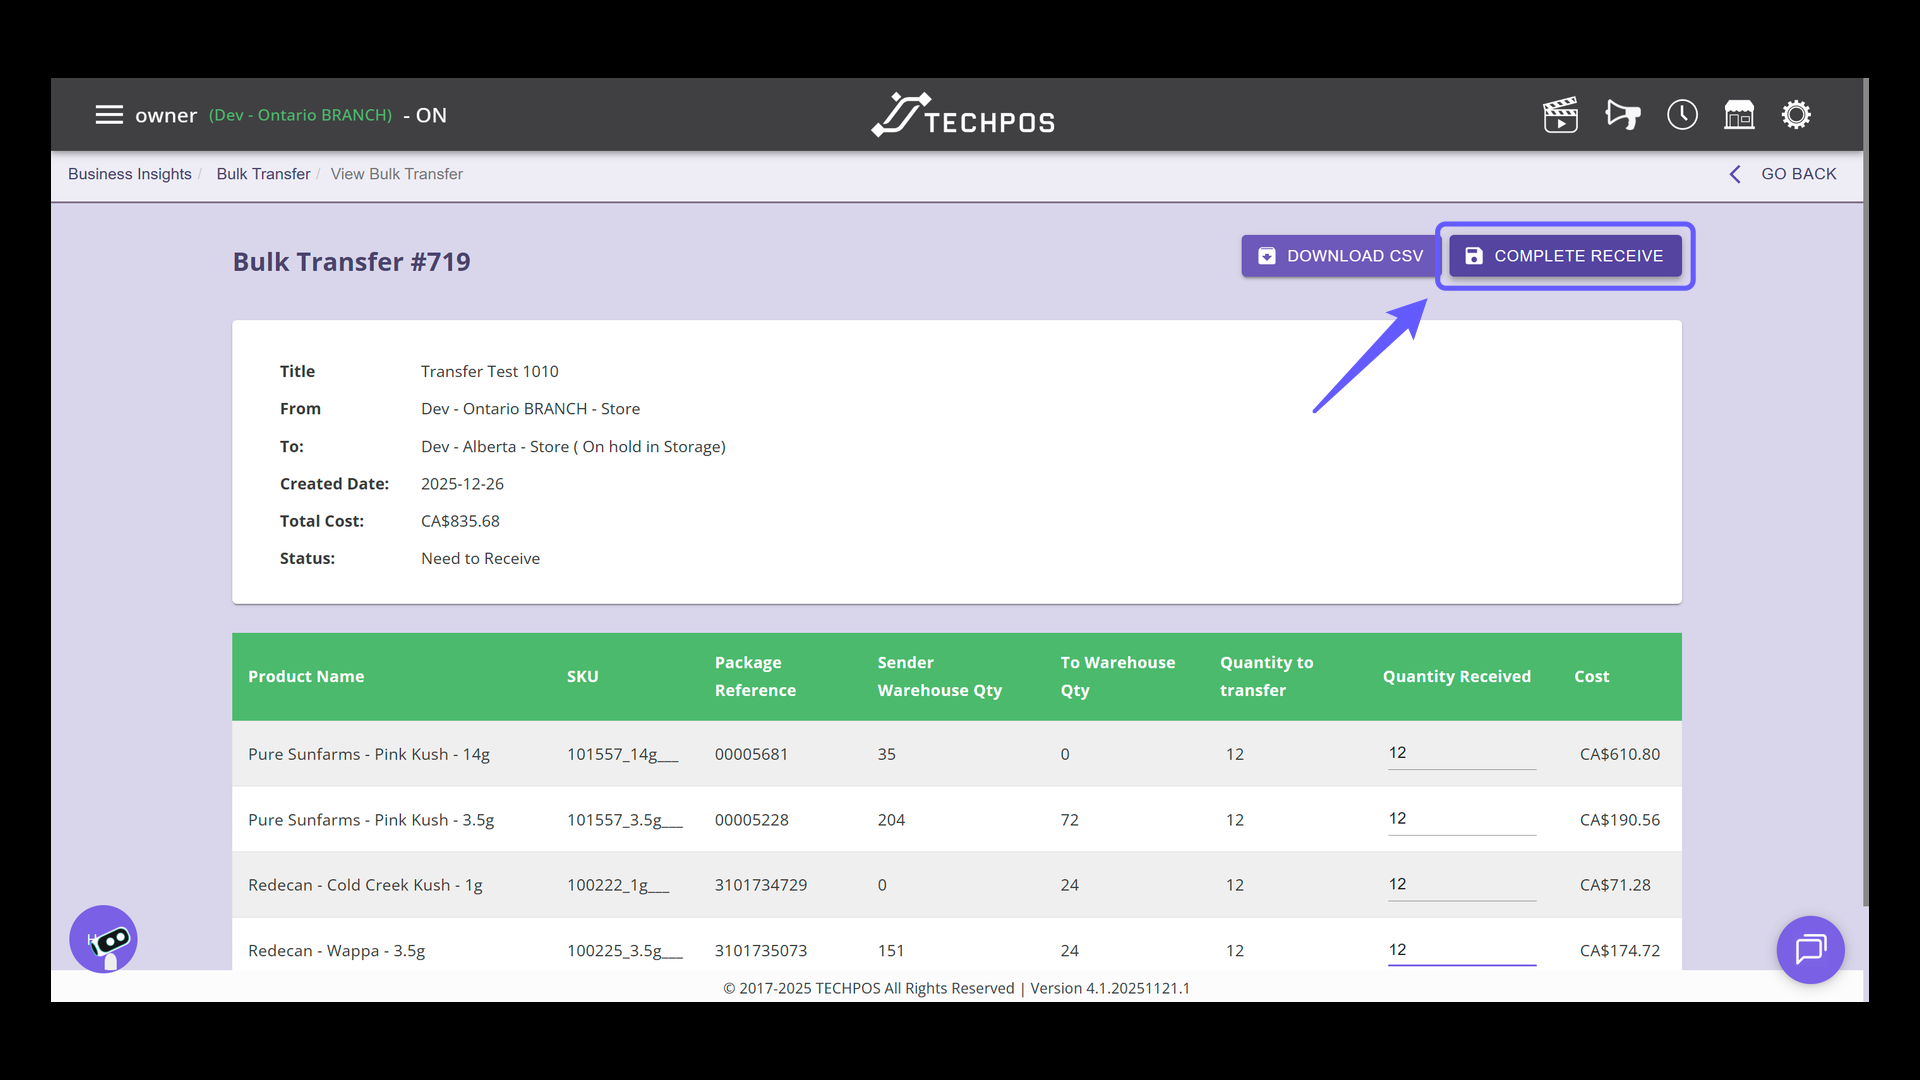
27. Complete the Receiving Process
Click 'Complete Receive' to finalize the transfer process.
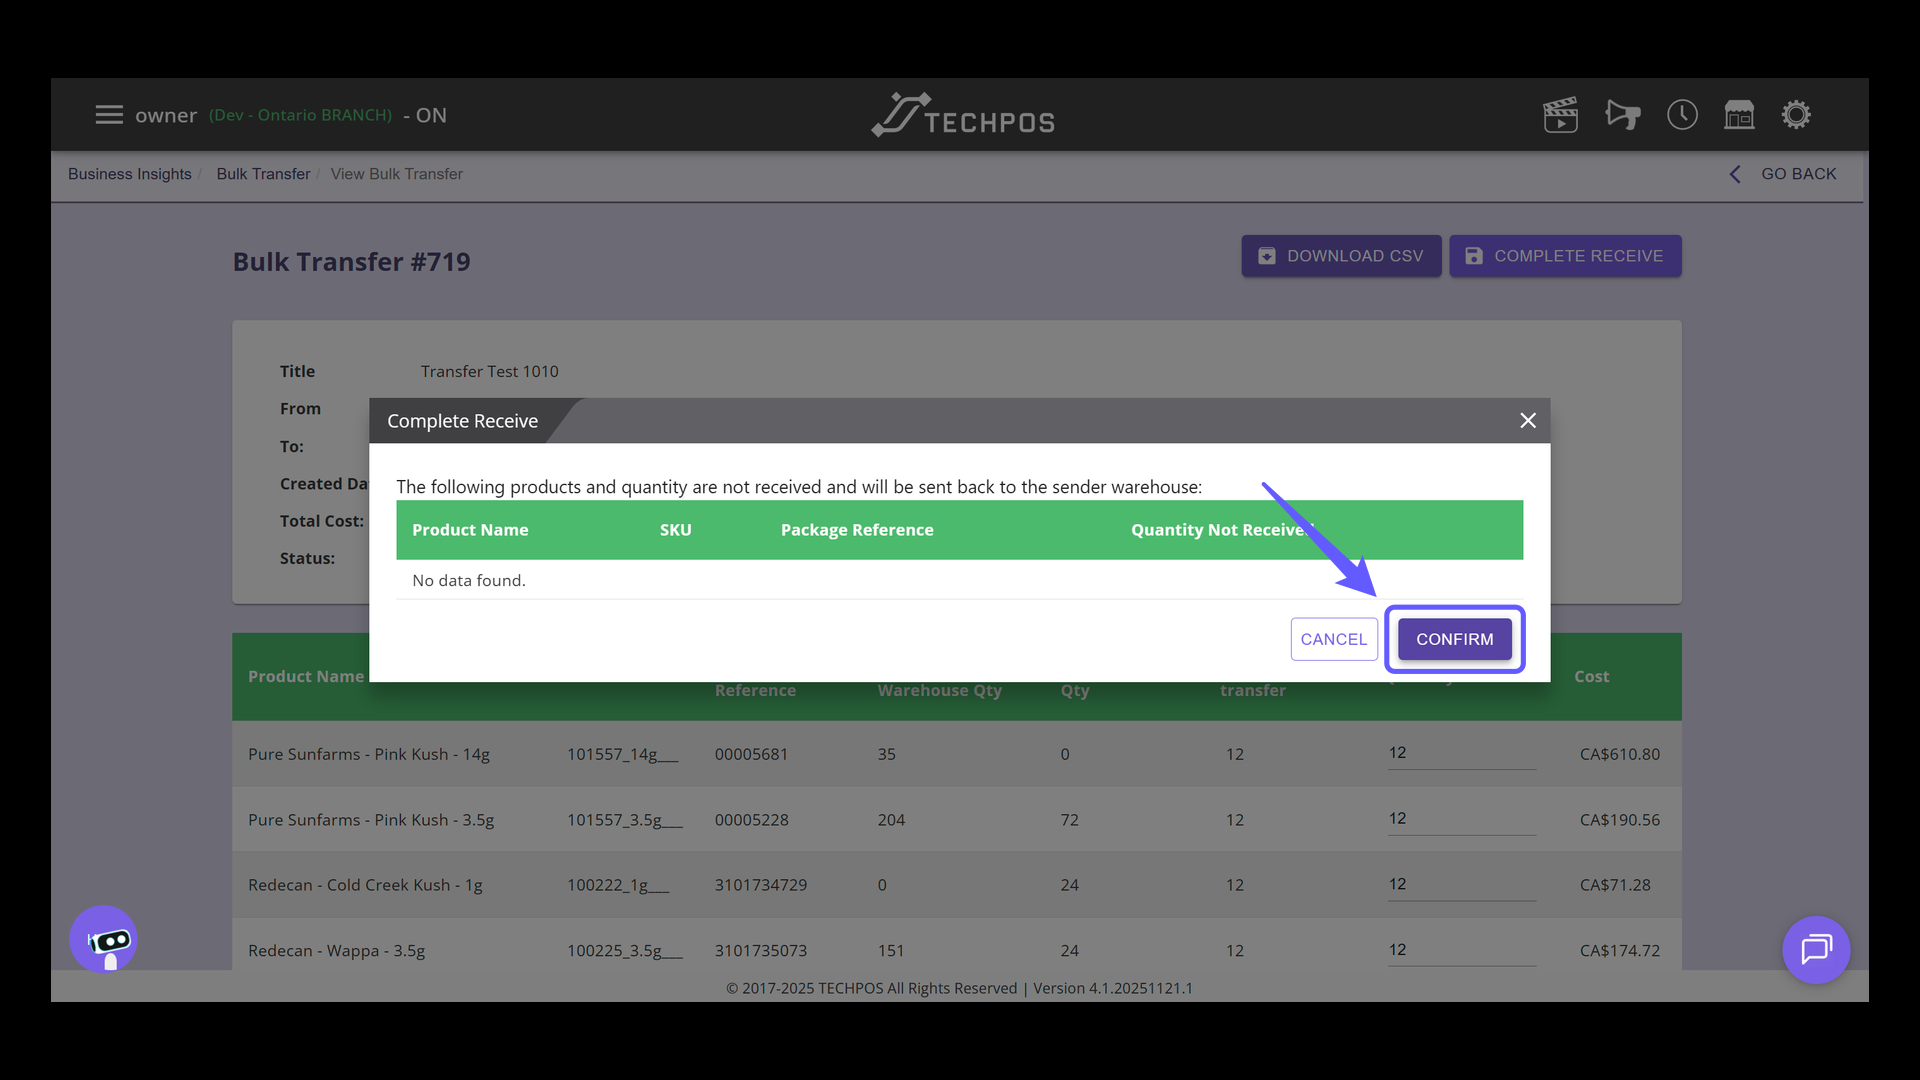
28. Confirm Completion
Press the 'CONFIRM' button to finalize the receive process.
29. Transfer Completed
Transfer now completed. Click the 'VIEW' button to access the details of the specific bulk transfer transaction.
