Main Behavior
When Incremental Discount is enabled, admins can activate Apply to Pricing Group Only.
With this setting:
- Products and categories can no longer be added directly to the campaign.
- Only pricing groups can be used.
- Each pricing group now has its own Minimum Quantity requirement.
The campaign will only activate if all pricing group minimums are satisfied at the same time.
Example
Campaign configuration:
- Group A → minimum 2 products
- Group B → minimum 3 products
- Discount → 10% OFF
Scenario 1
- 1 product from Group A
- 3 products from Group B
Result:
- Campaign does not activate because Group A minimum was not met.
Scenario 2
- 2 products from Group A
- 3 products from Group B
Result:
- Campaign activates.
- All 5 products receive the 10% discount.
Scenario 3
- 4 products from Group A
- 3 products from Group B
Result:
- Only the first valid combination (2A + 3B) receives the discount.
- Remaining products stay at regular price.
Scenario 4
- 4 products from Group A
- 6 products from Group B
Result:
- Campaign applies twice using incremental logic.
- All 10 products receive the discount.
Discount Logic
The feature supports both:
- Percentage discounts
- Fixed amount discounts
For fixed discounts (example: $10 OFF), the discount amount is distributed proportionally across all eligible products in the matched combination.
Configuration Steps:
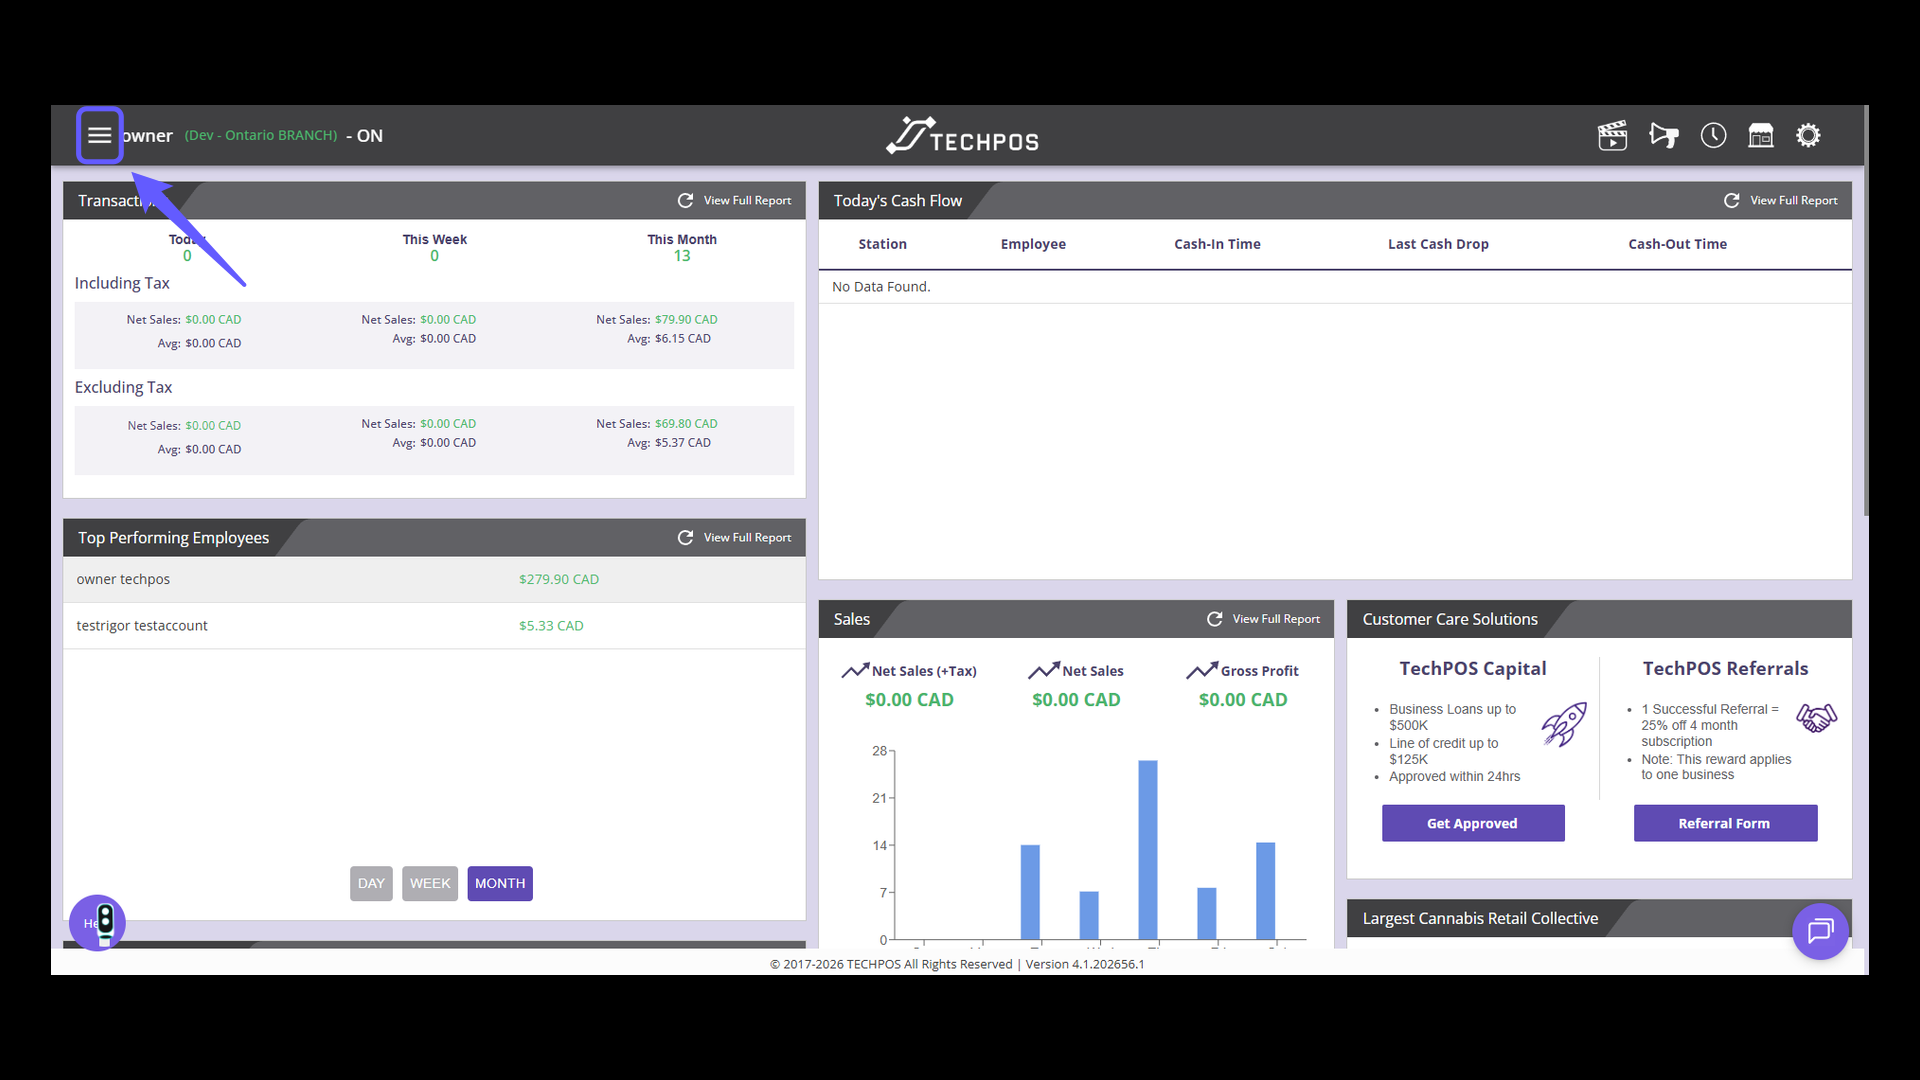
1. Open Main Menu
Tap the menu icon to explore more options.
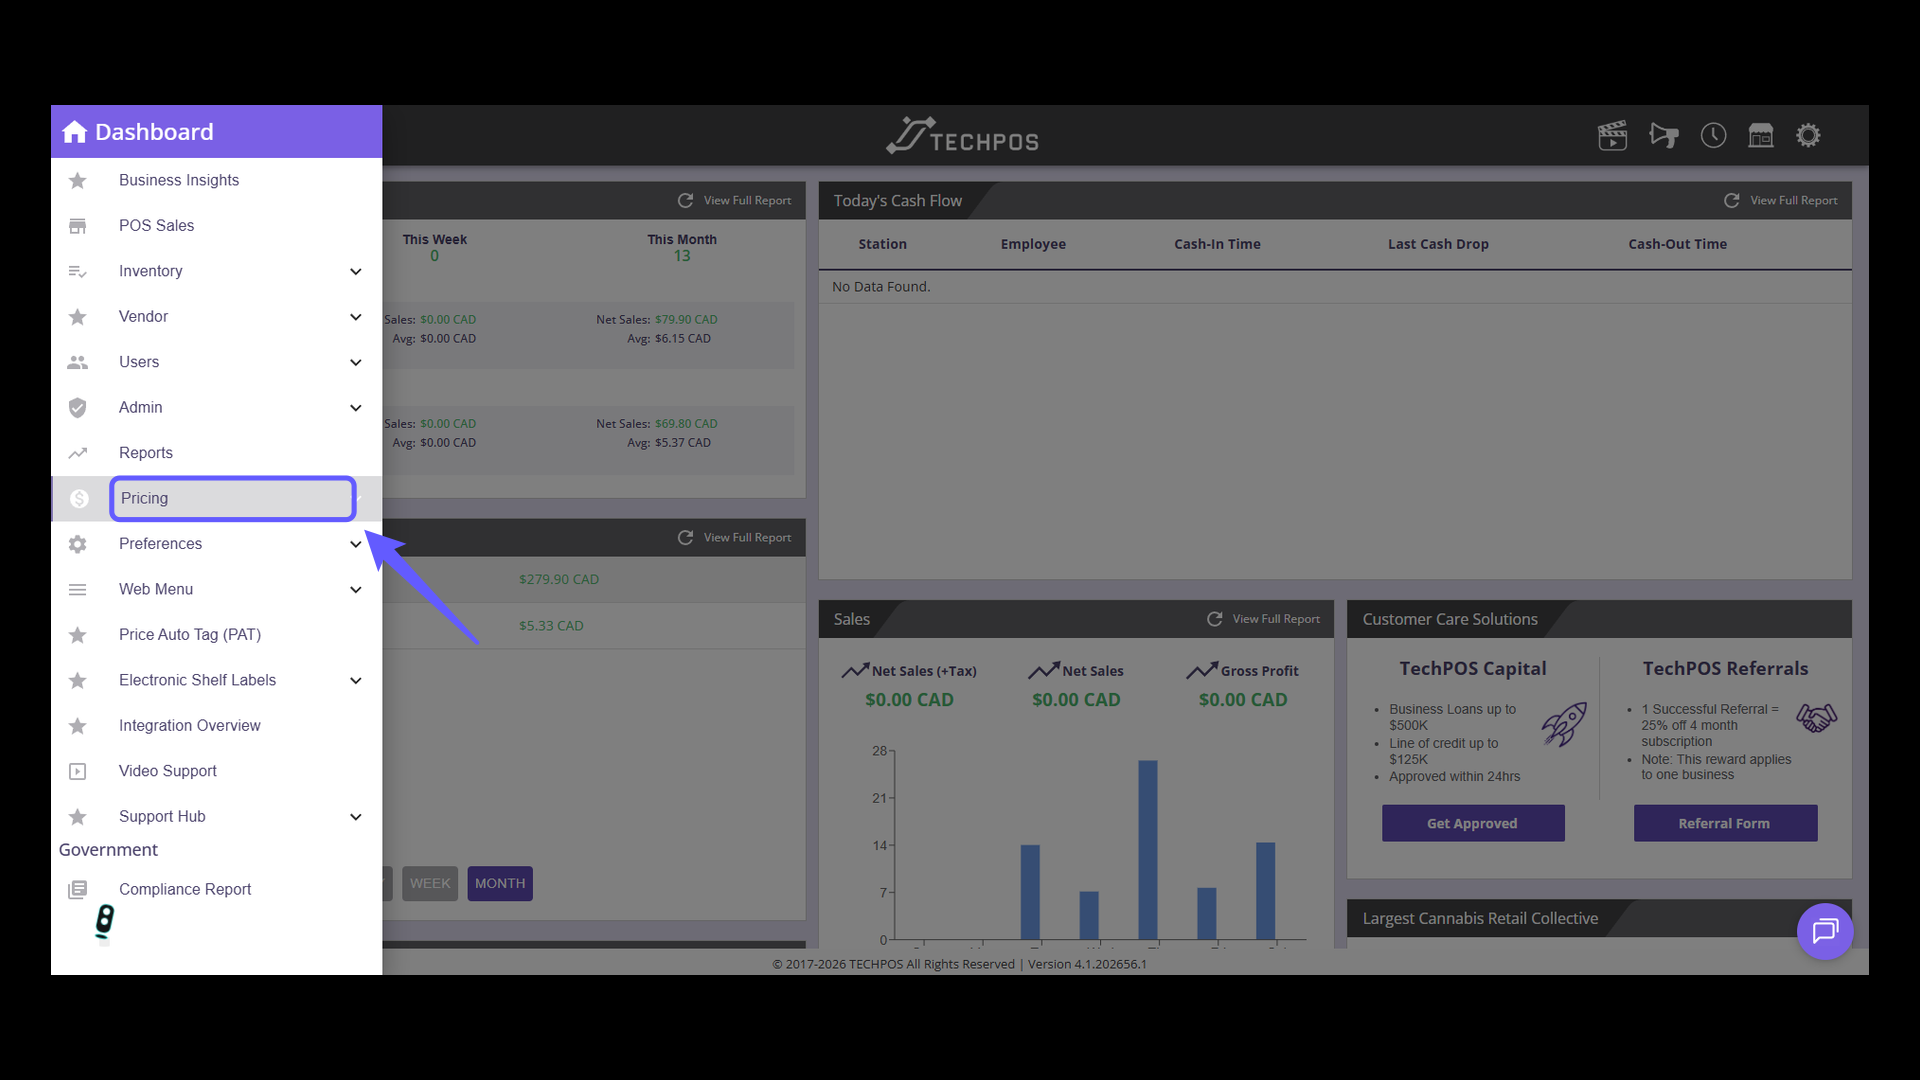
2. Access Pricing Options
Select 'Pricing' from the menu to configure cost settings.
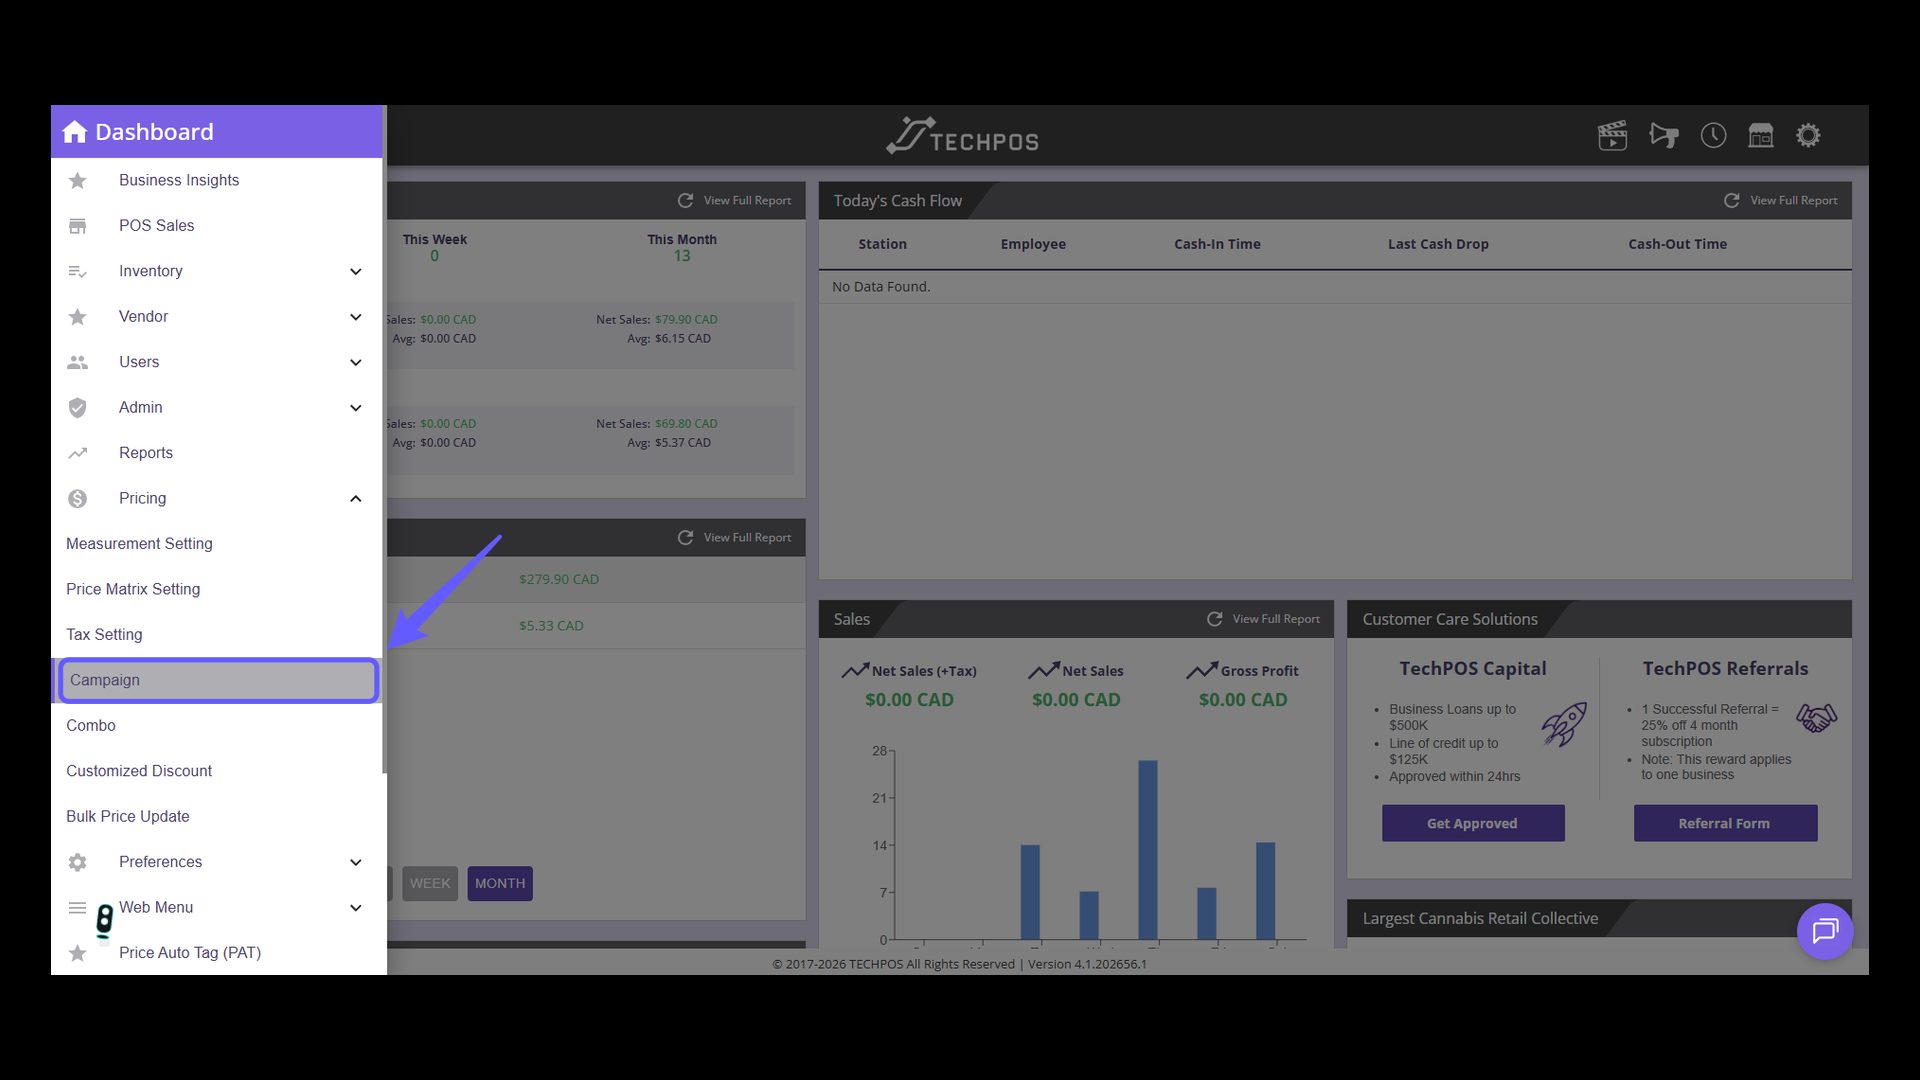
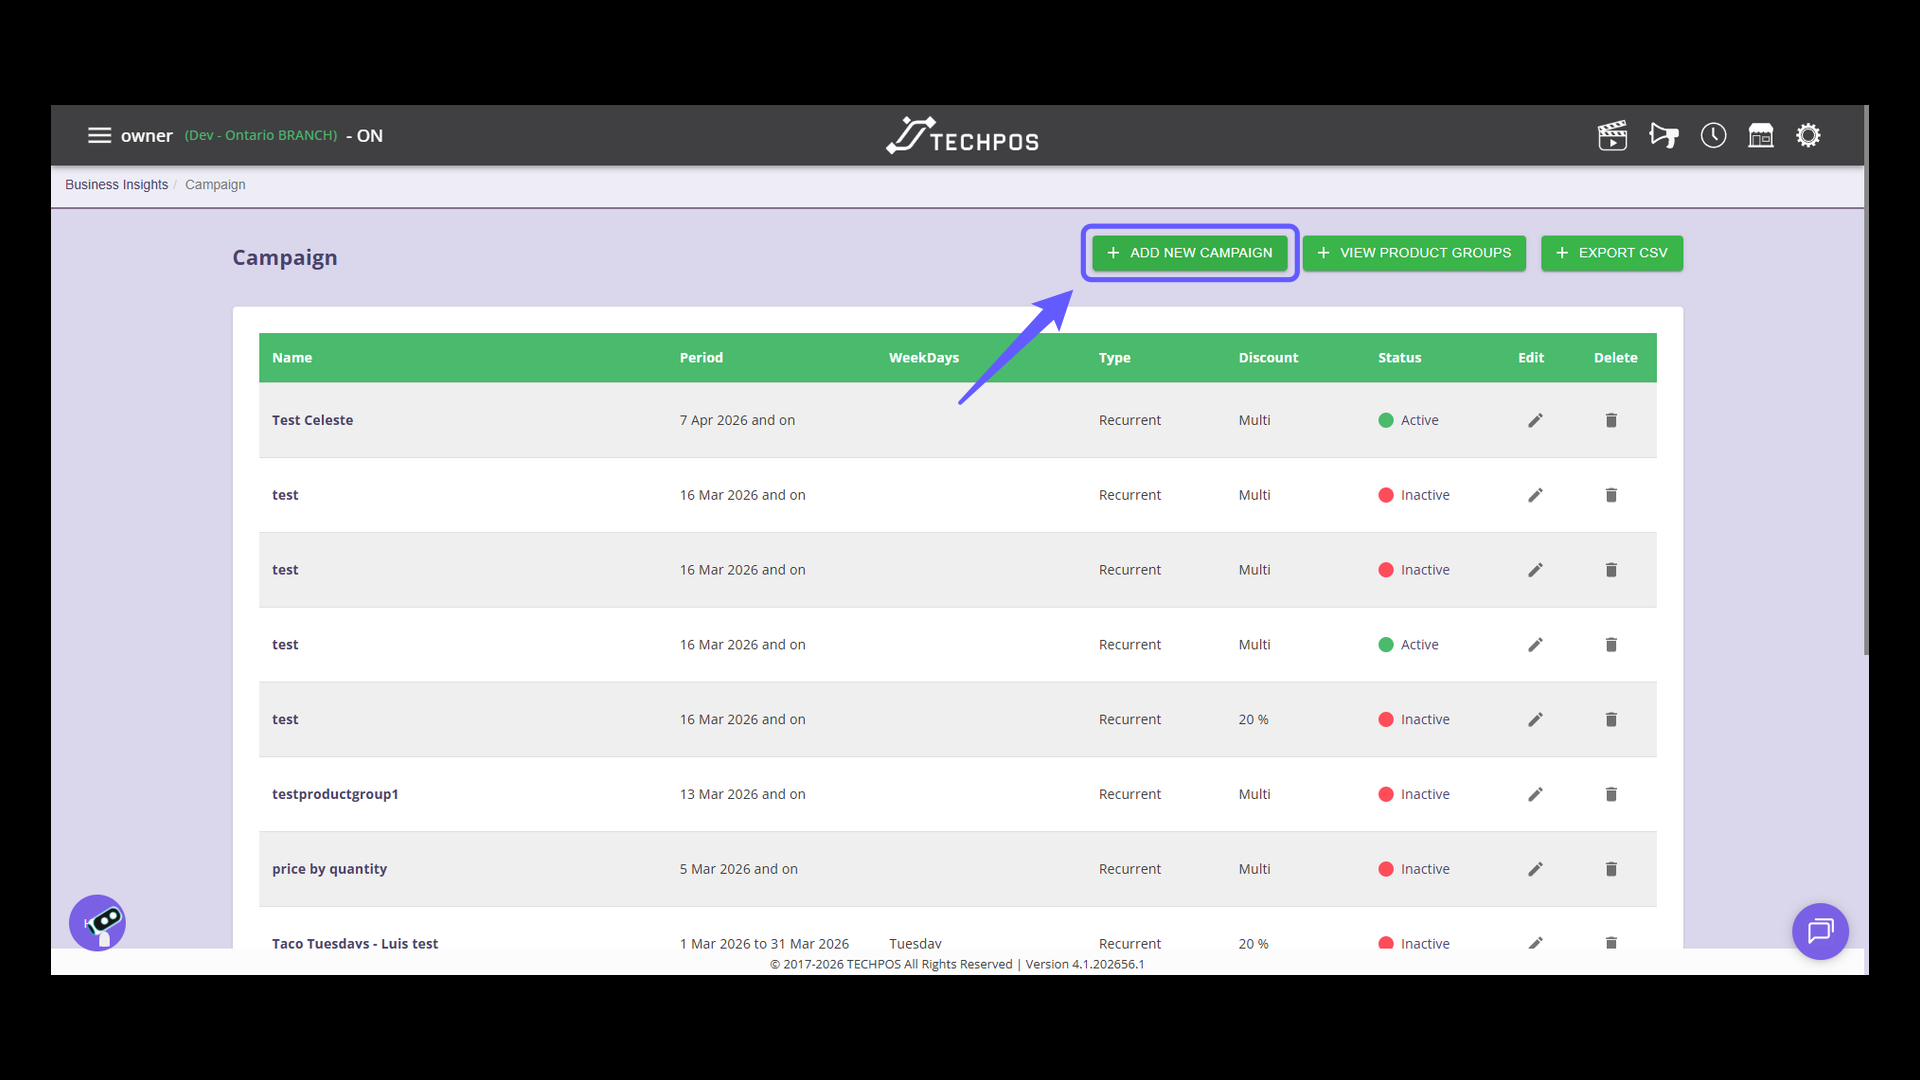
3. Access the Campaign Page
Click to efficiently manage and organize your campaigns with ease.
4. Initiate a New Campaign
Simply click 'Add New Campaign' to begin crafting your new pricing campaign.
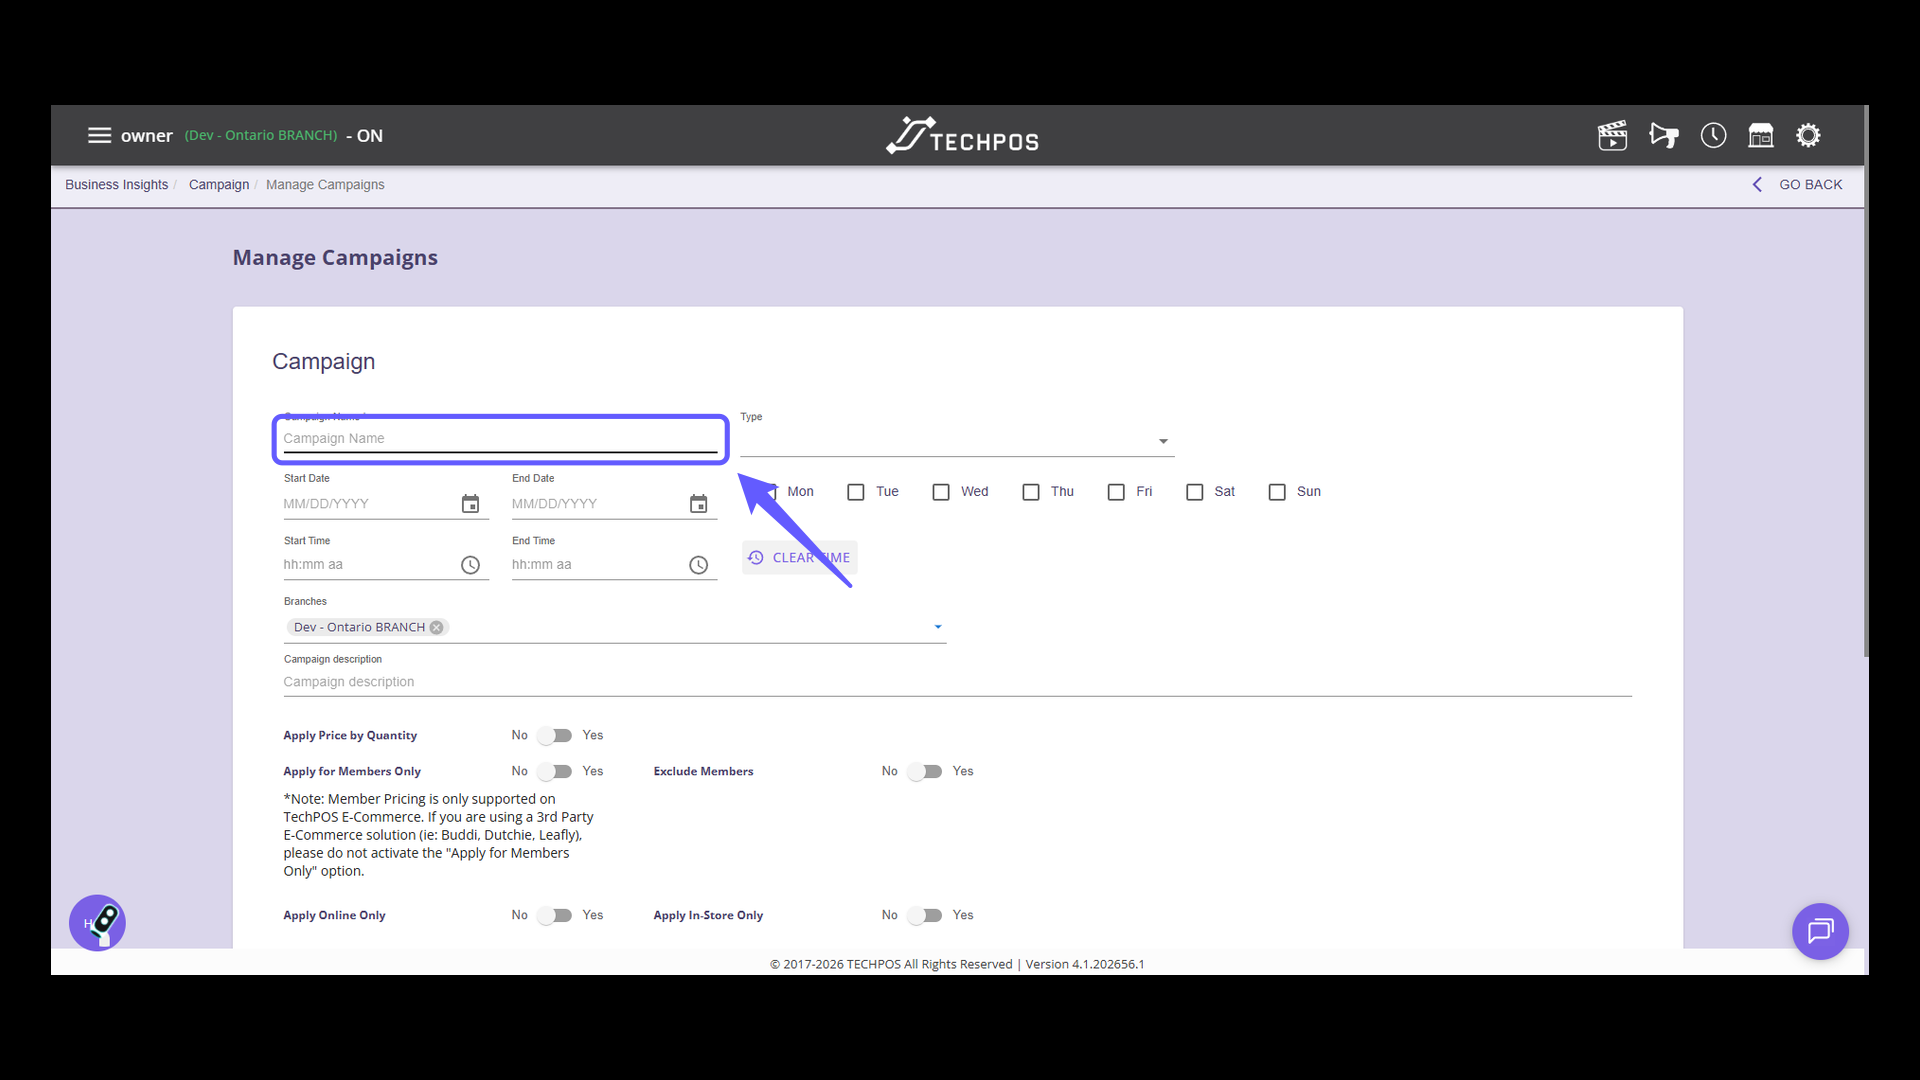
5. Enter Campaign Name
Enter a name for the campaign in the designated field.
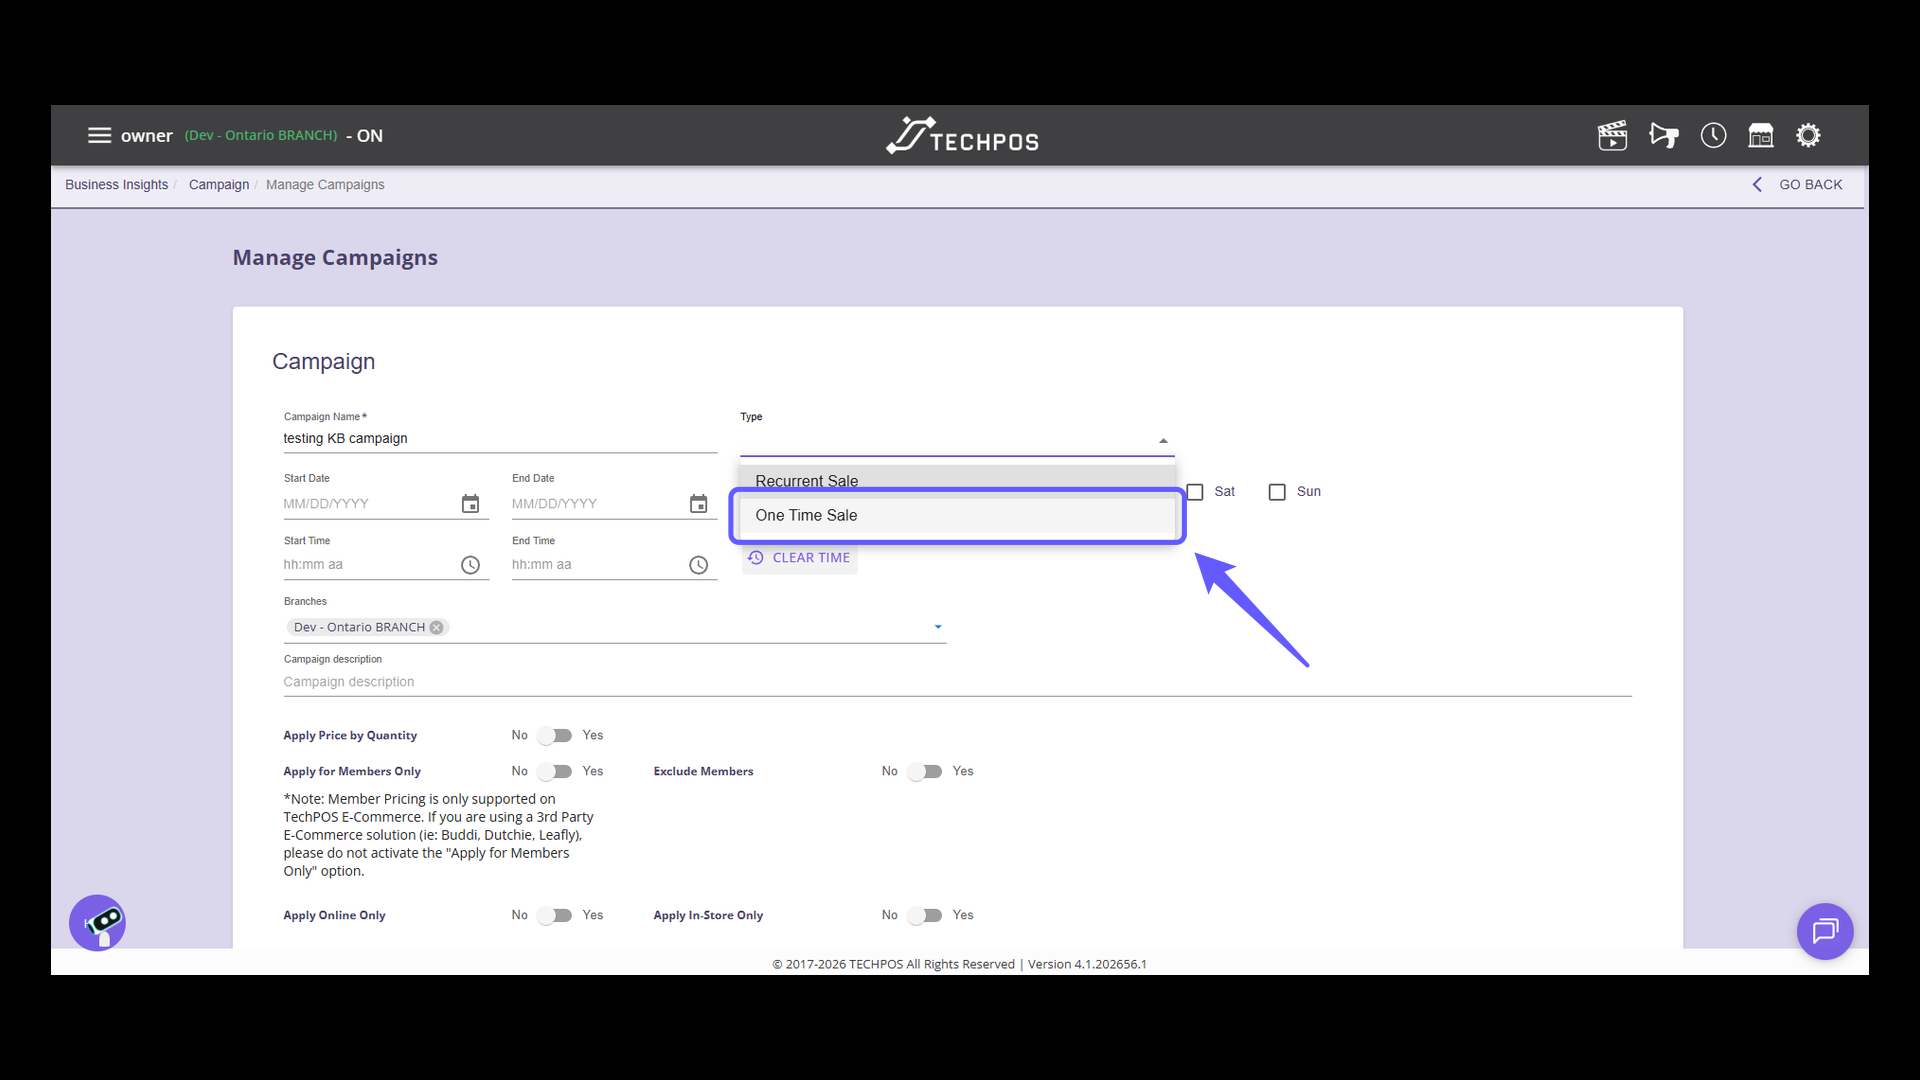
6. Select the Sale Type
Select your campaign type from the dropdown to configure it.
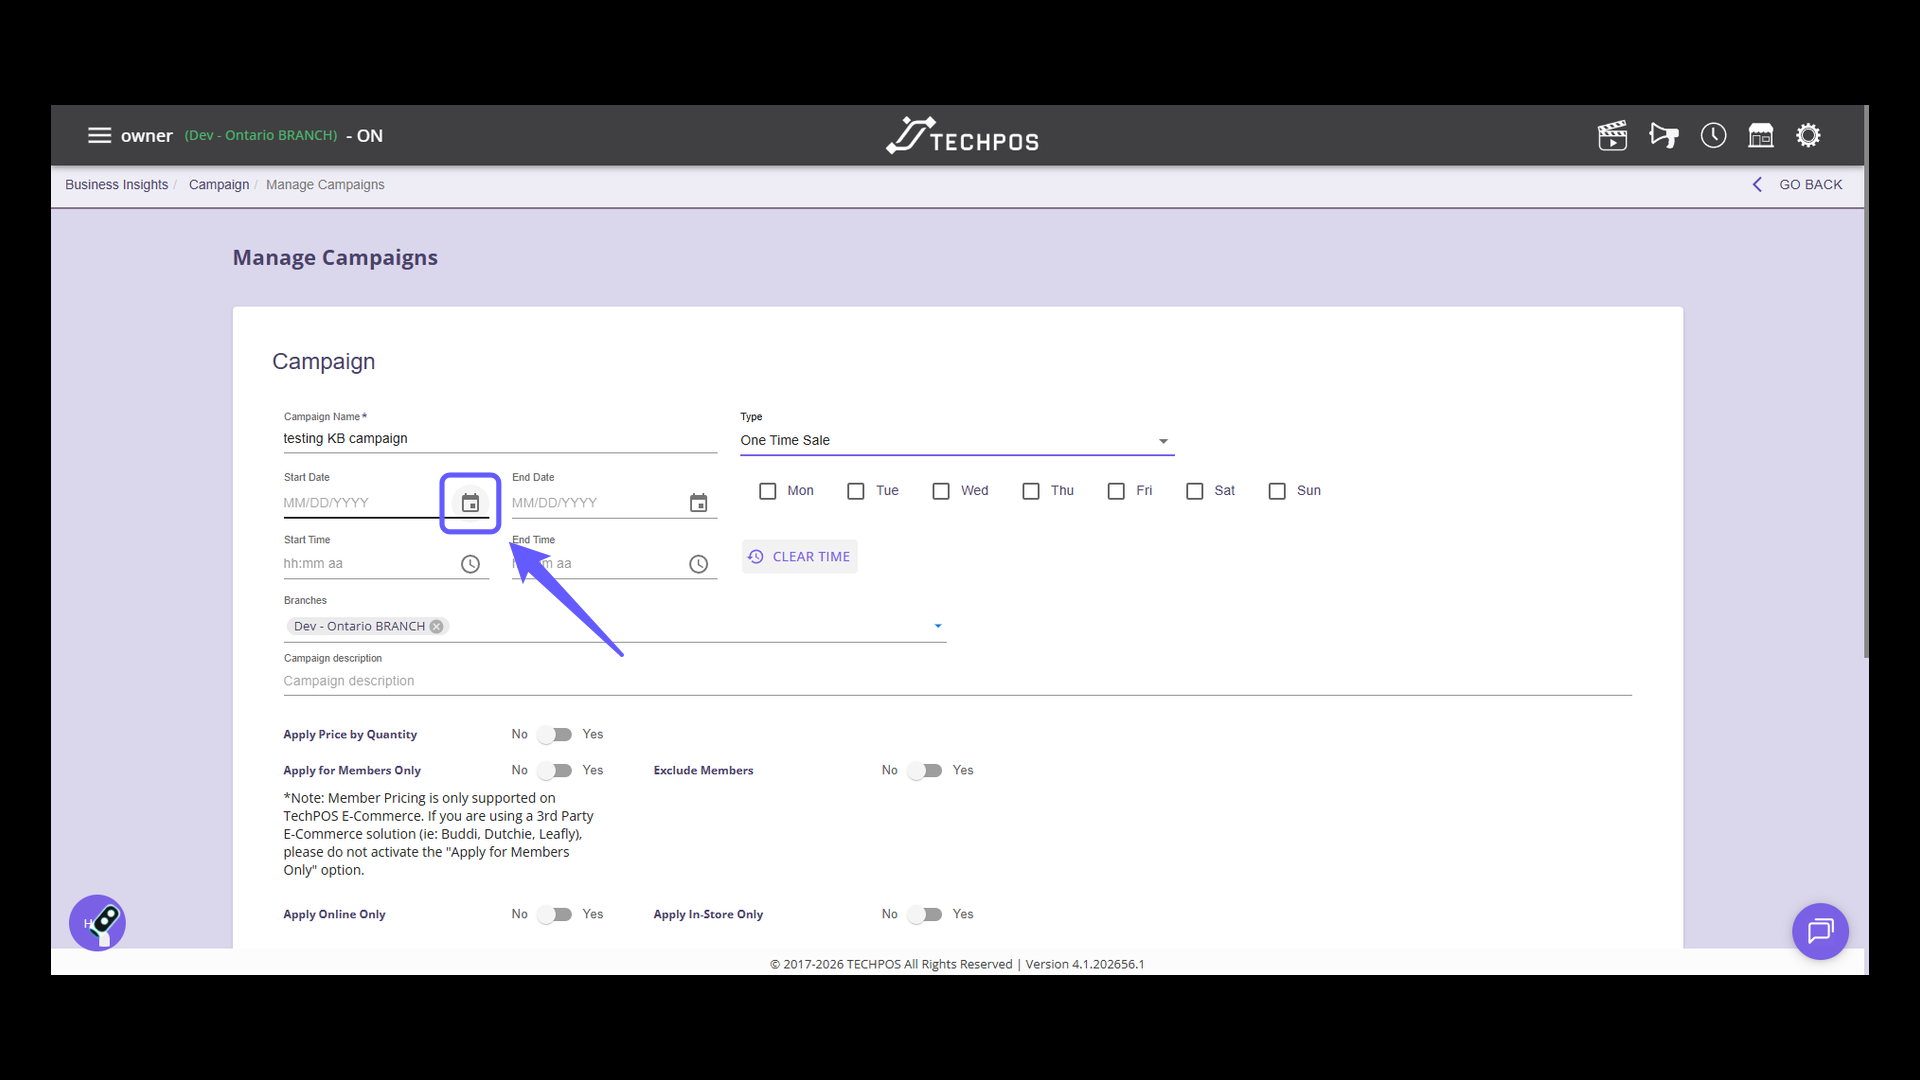
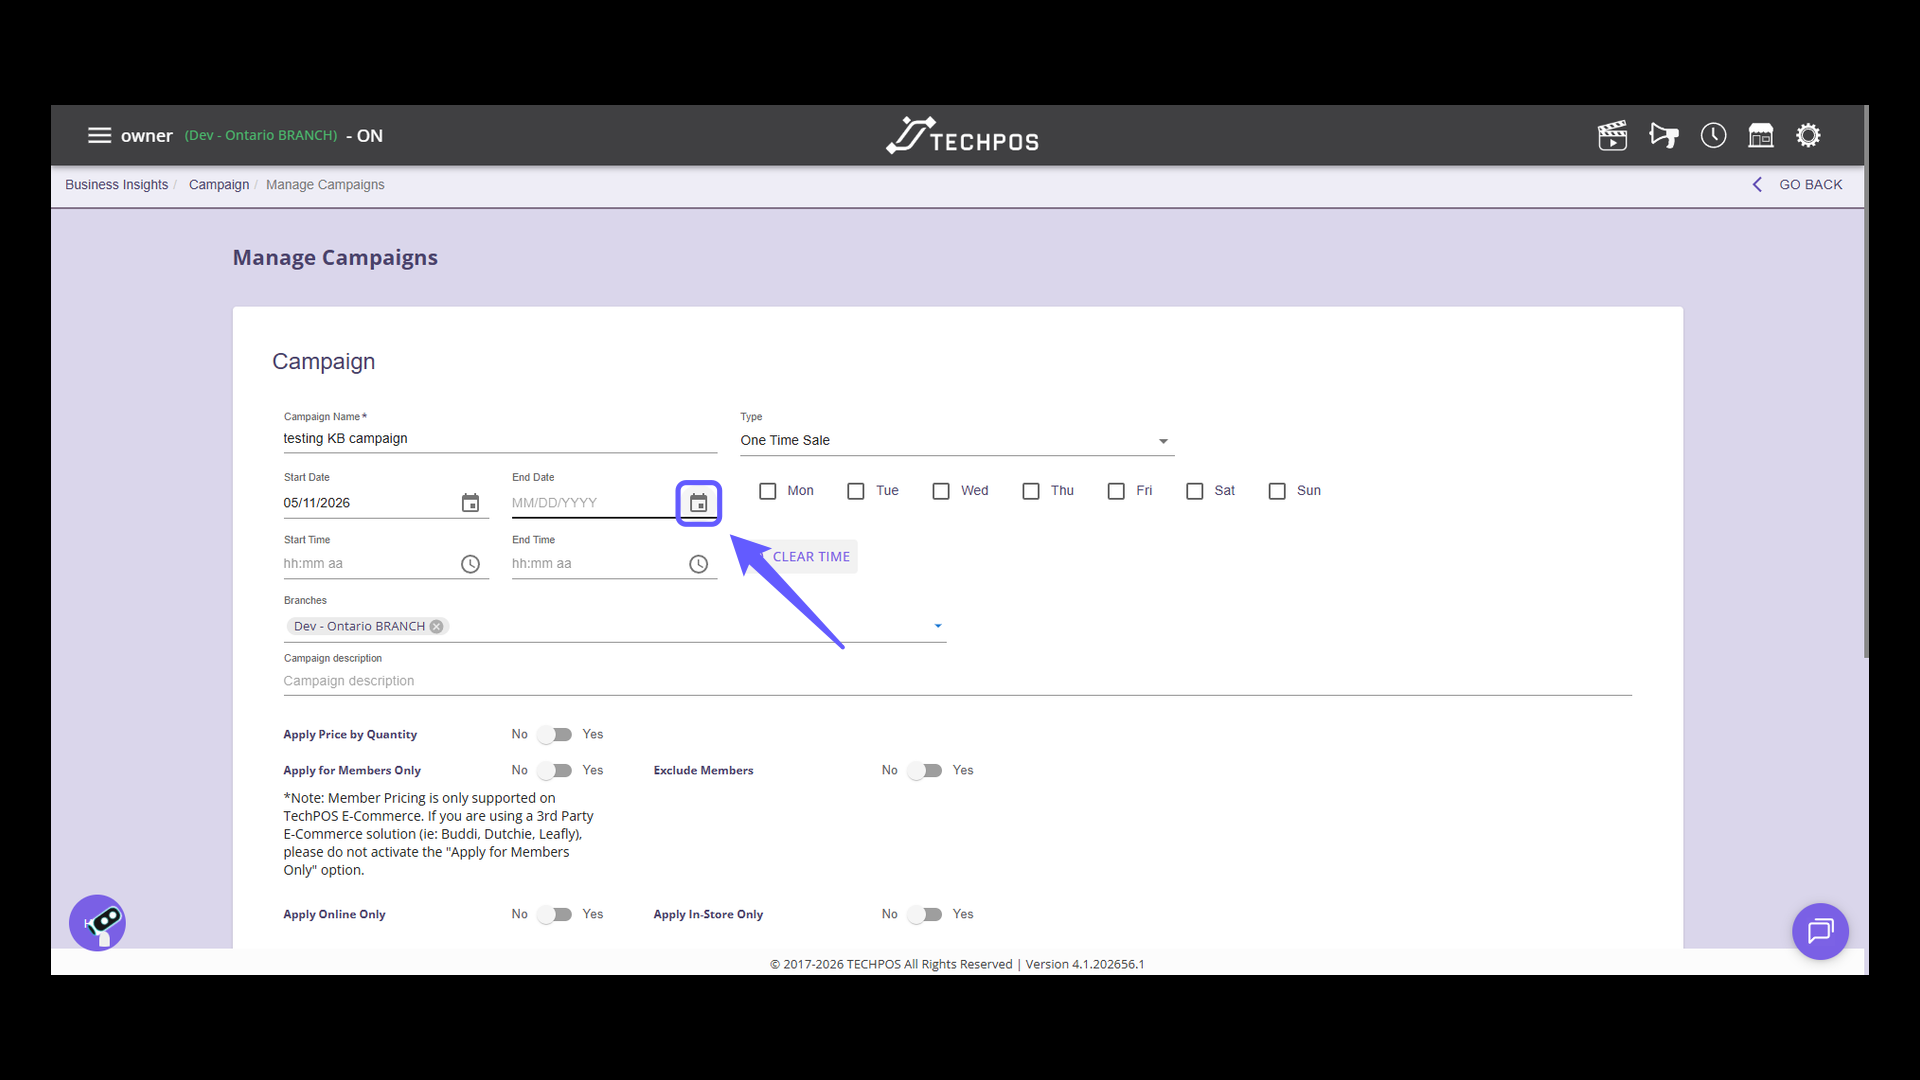
7. Select Start Date
Click the calendar icon to choose the start date for your campaign.
8. Select End Date
Click the calendar icon to choose an end date for your campaign.
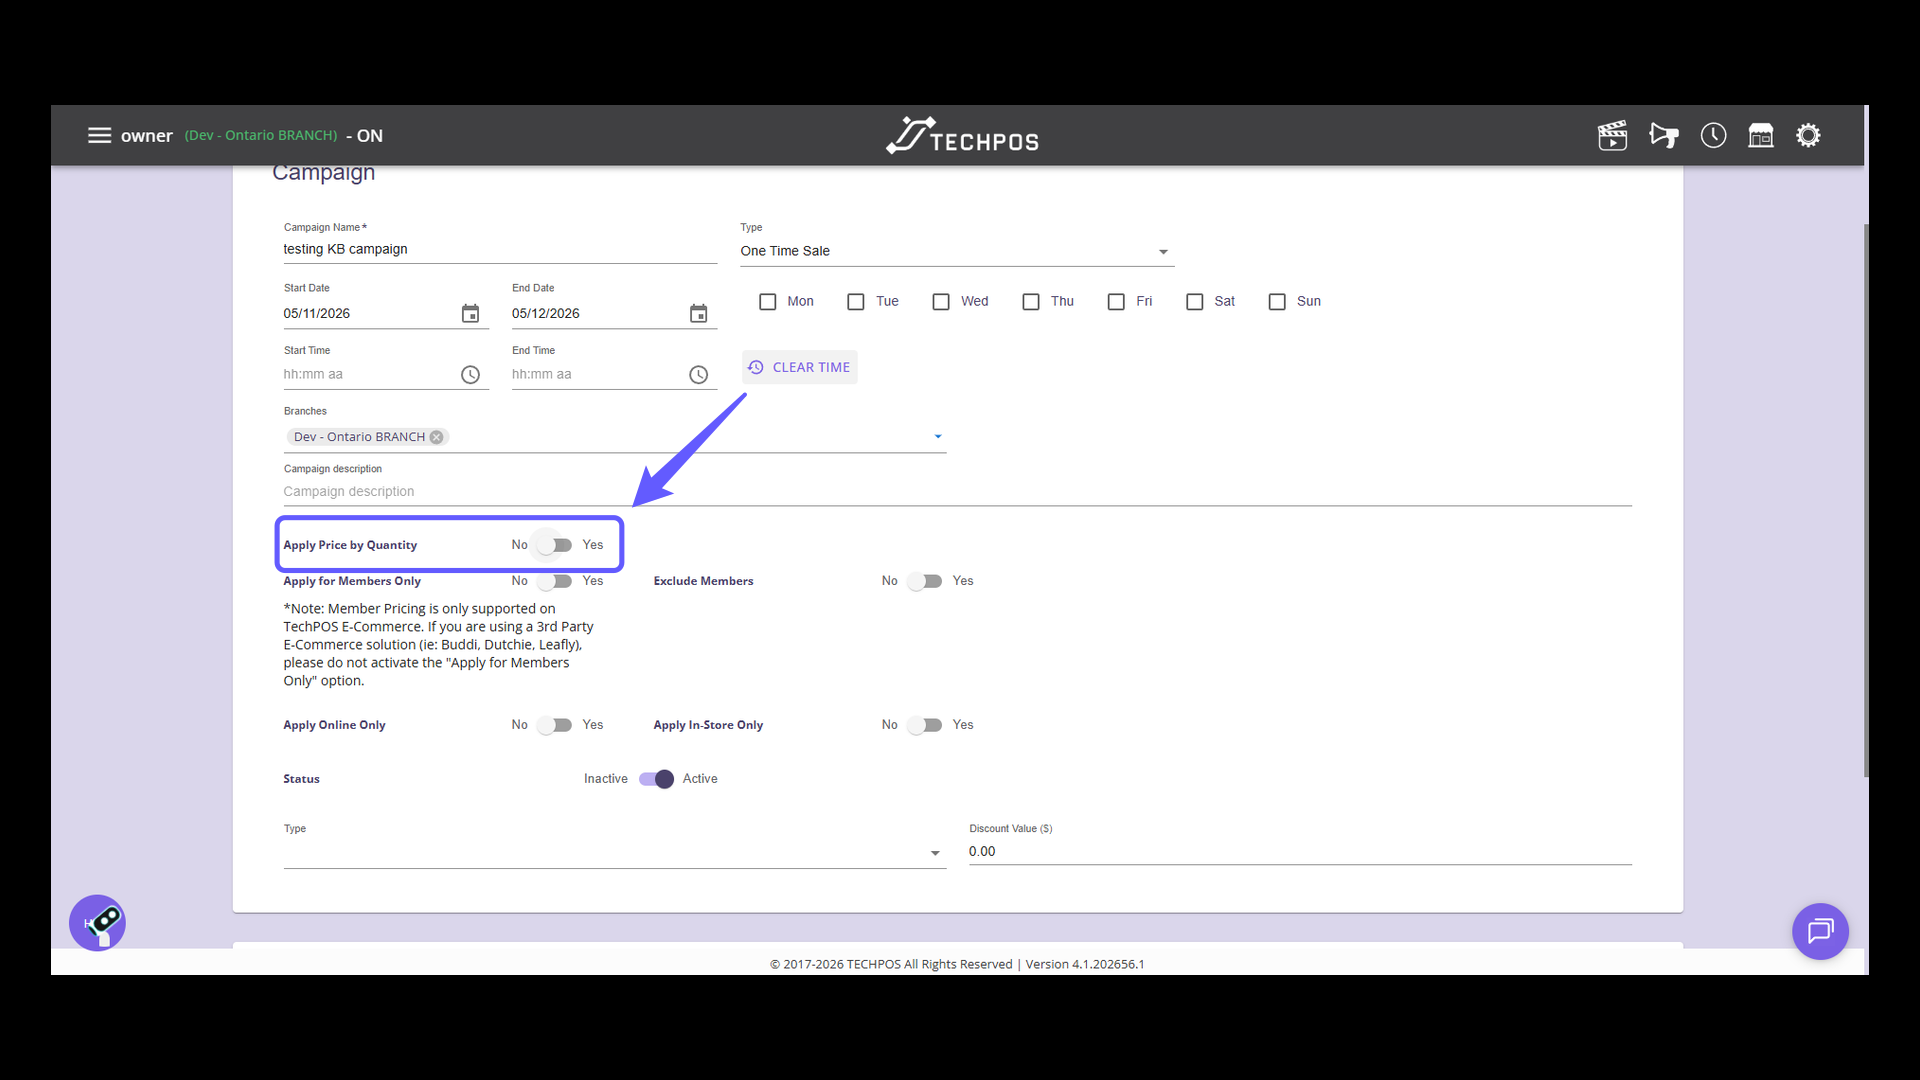
9. Enable Quantity Pricing
Switch to 'Yes' to enable quantity-based pricing.
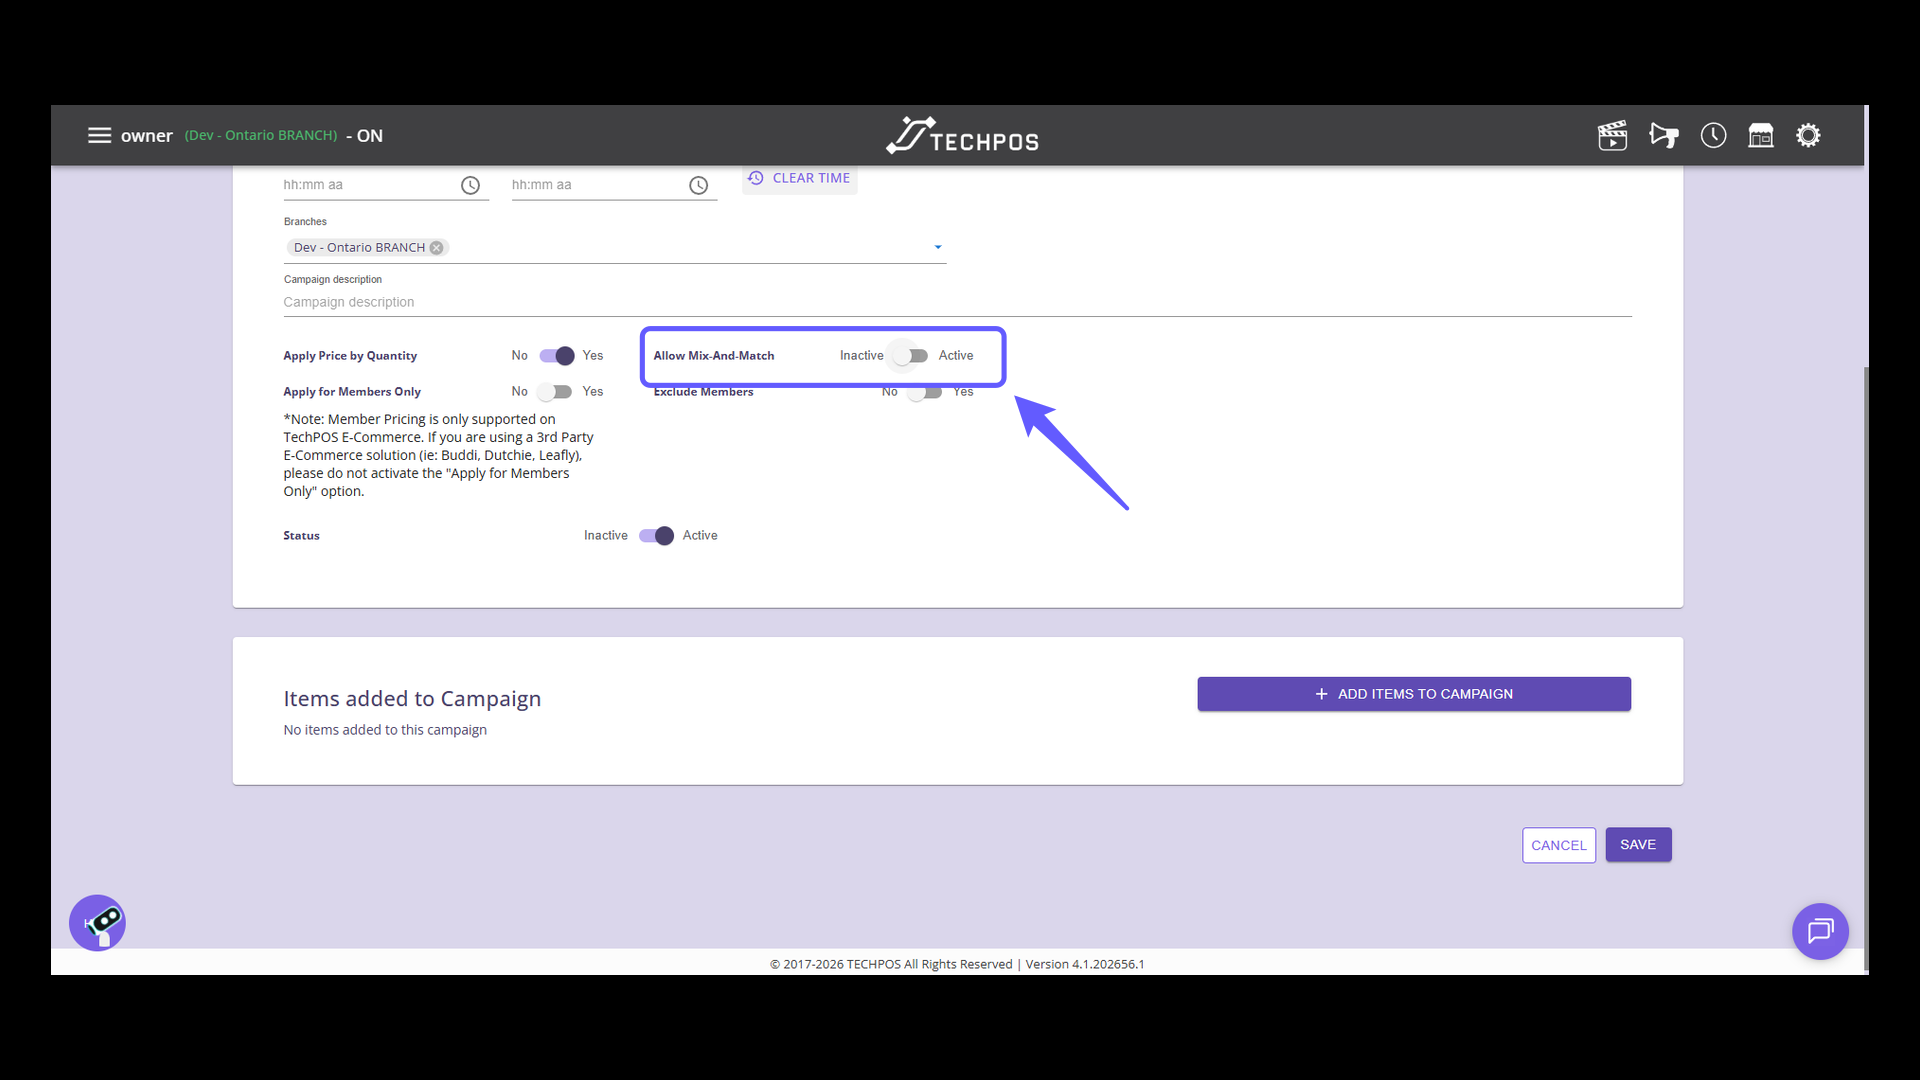
10. Click on Allow Mix-And-Match toggle button
Flip the switch to activate the Mix-And-Match feature.
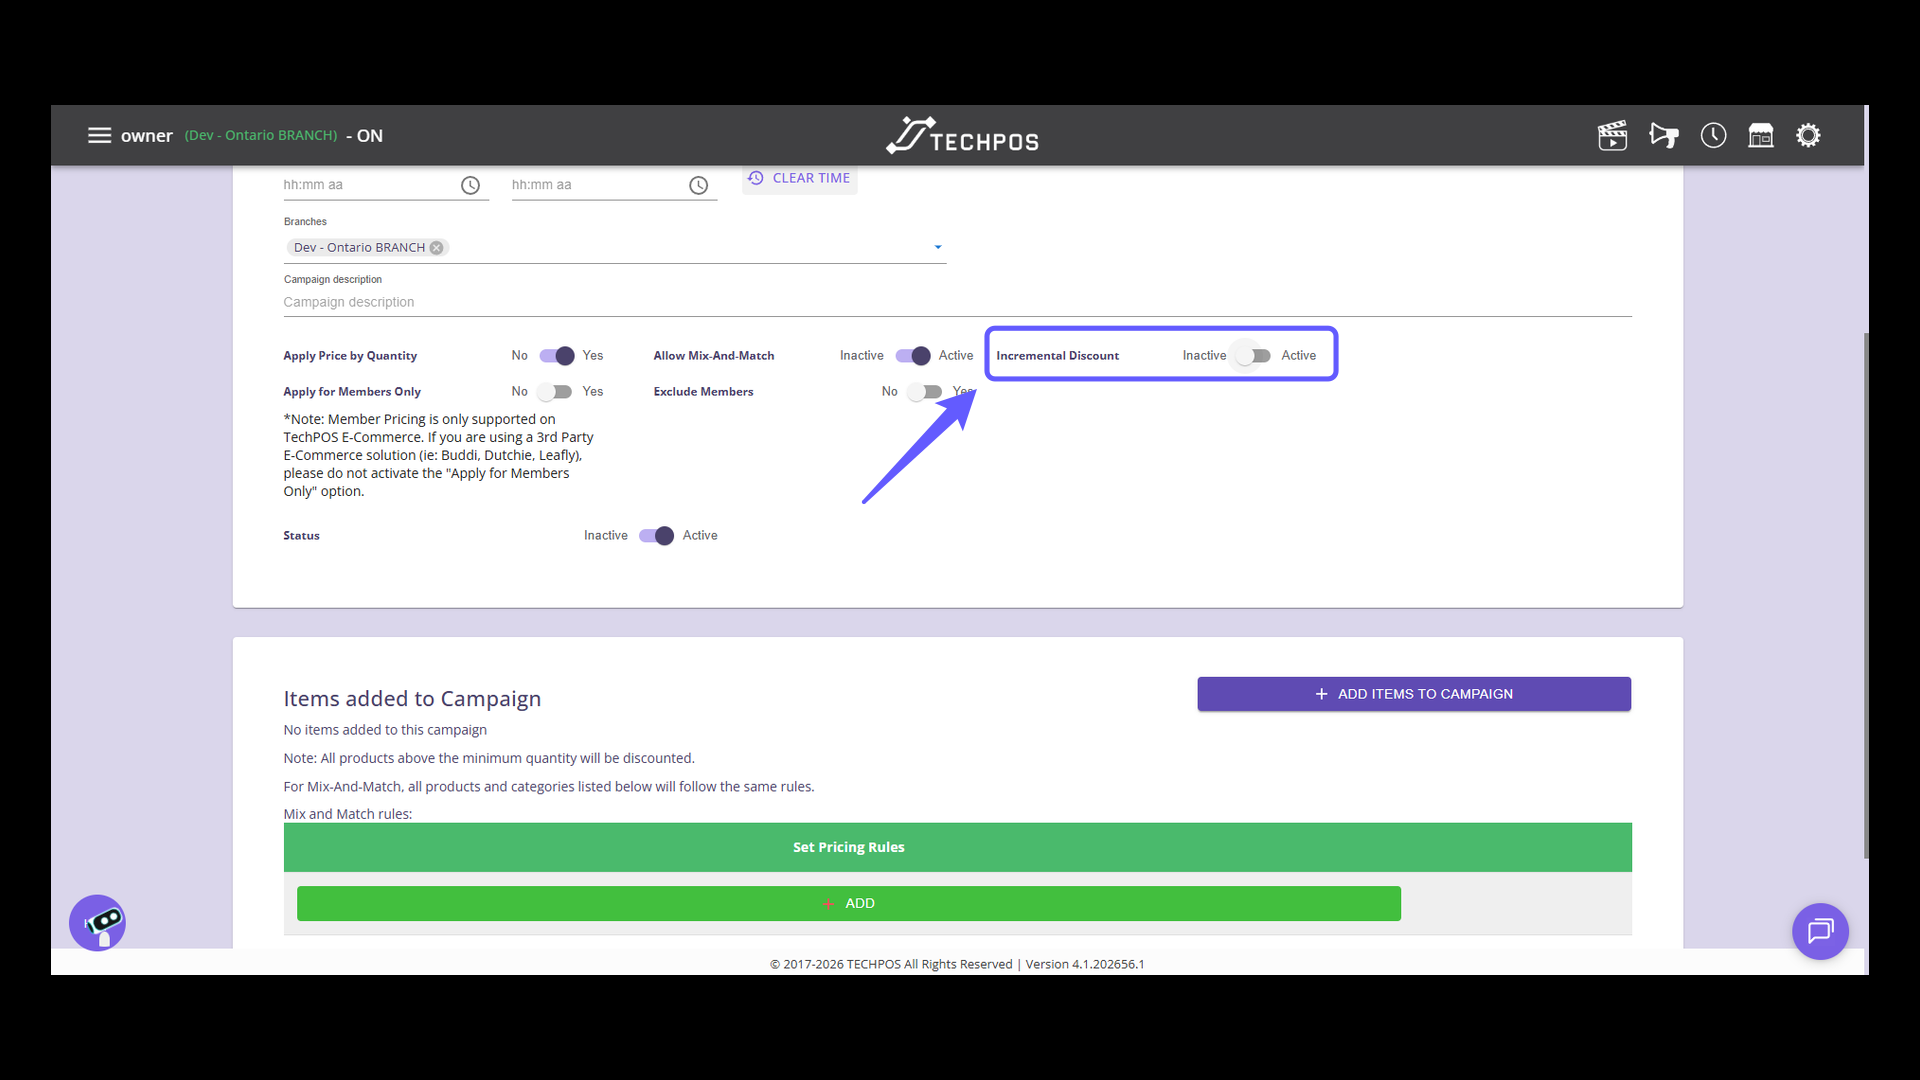
11. Toggle Incremental Discount Status
Toggle the Incremental Discount switch to easily turn the feature on or off according to your campaign's needs. This option enables discounts to be applied when specific product quantities are purchased.
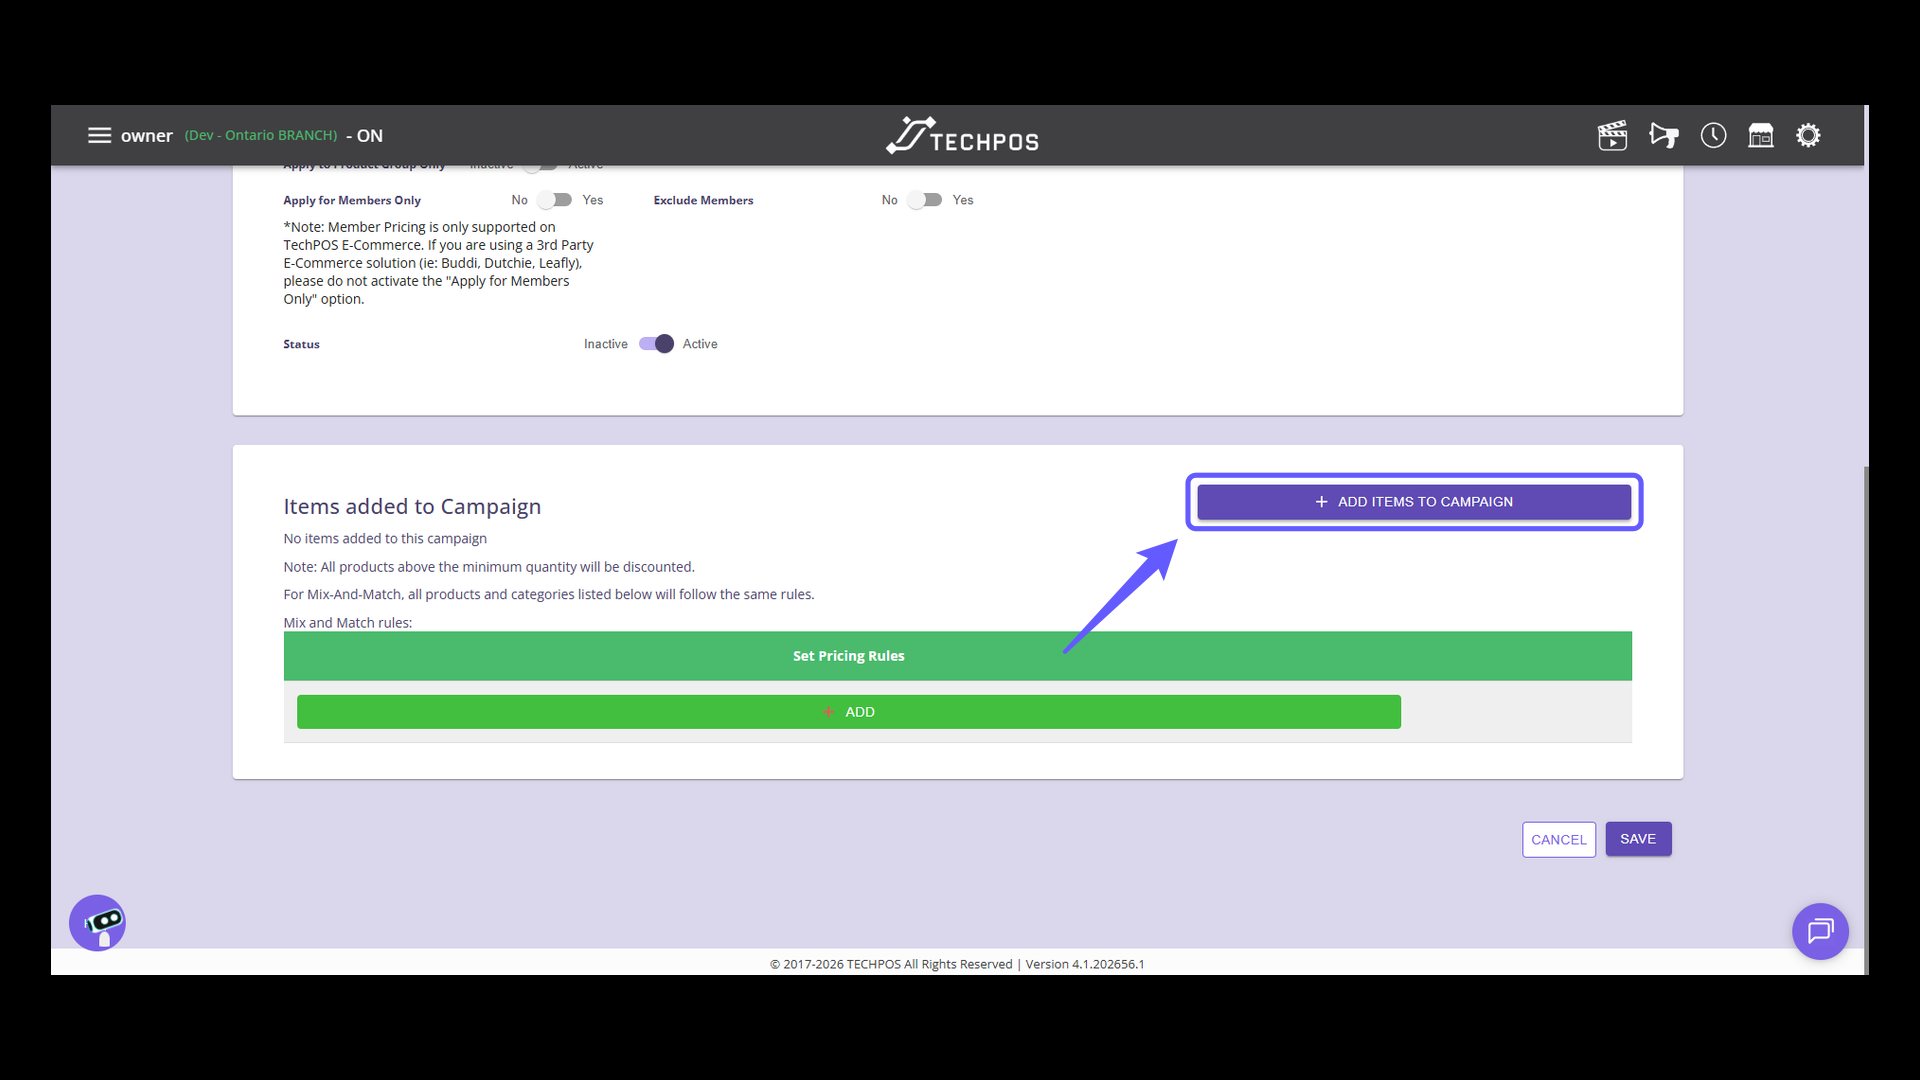
12. Add Items to Campaign
Click 'Add Items to Campaign' to include products in the current campaign.
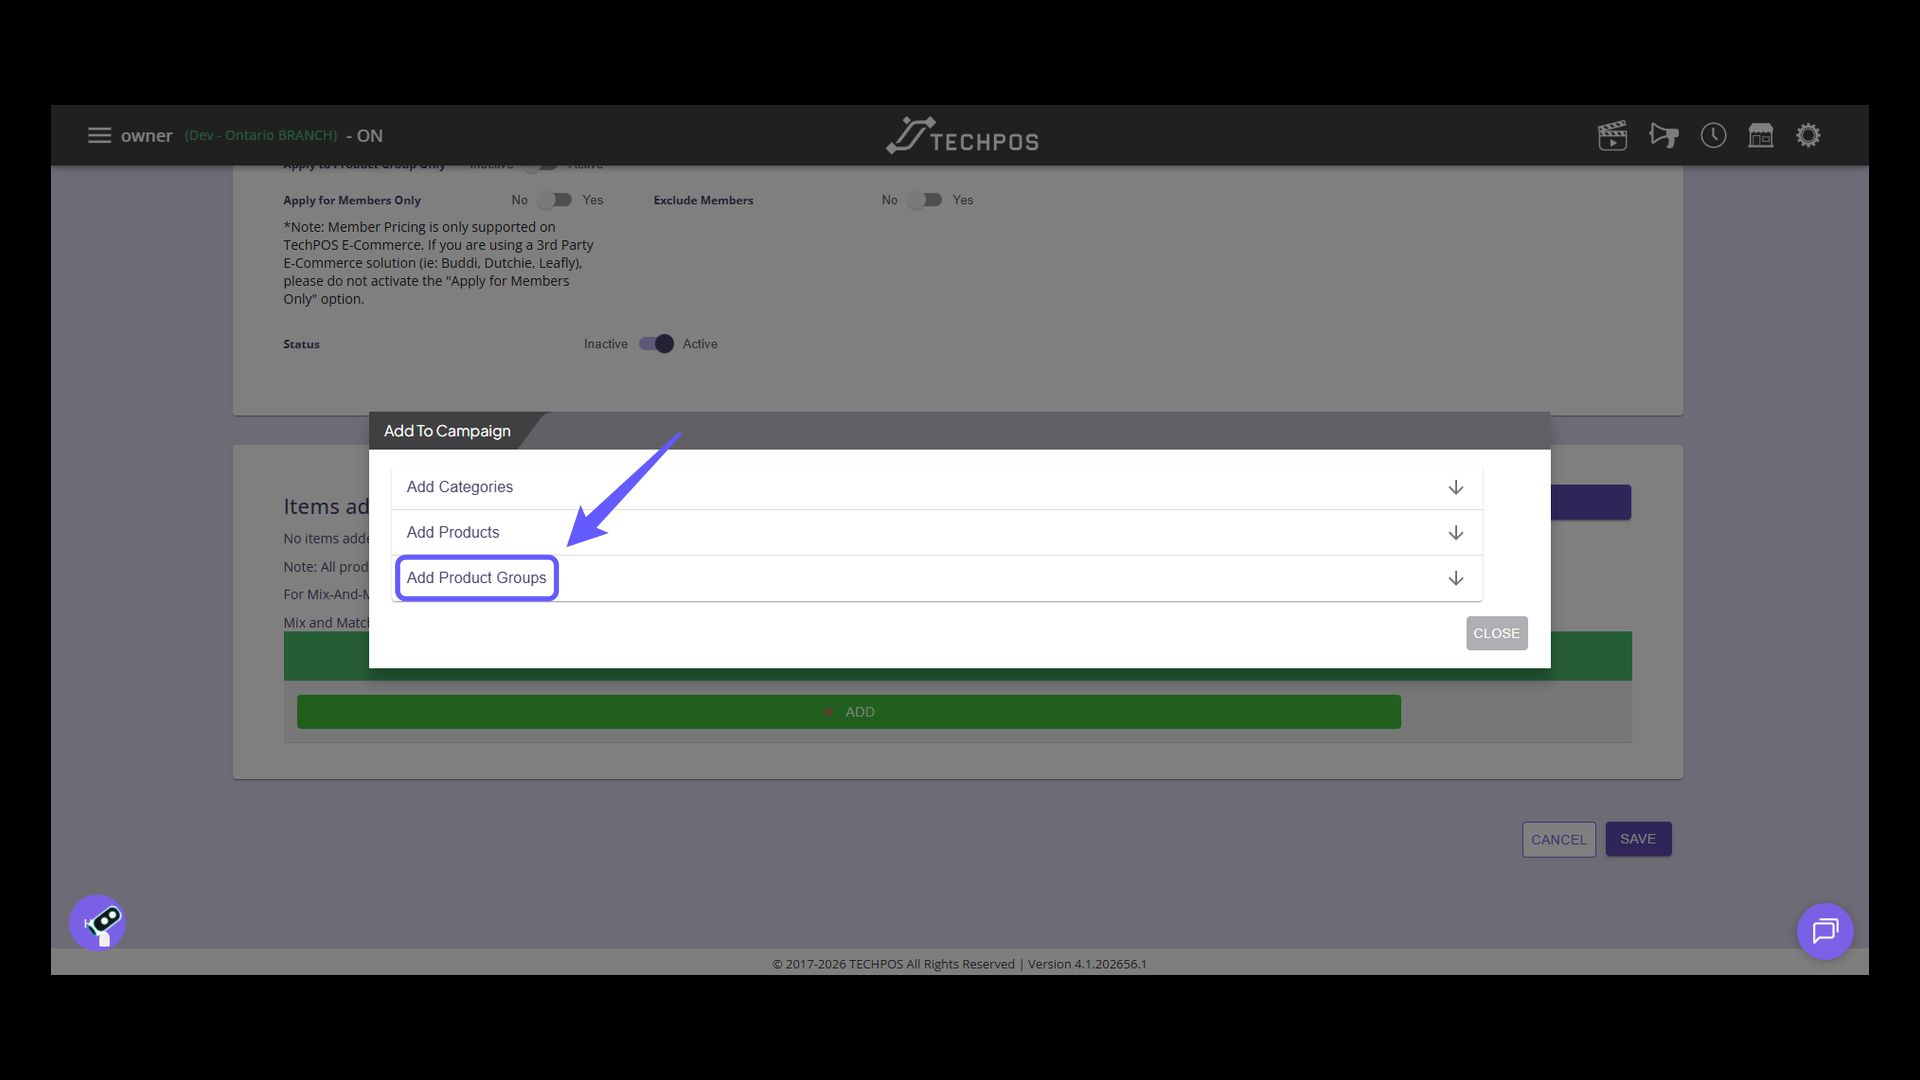
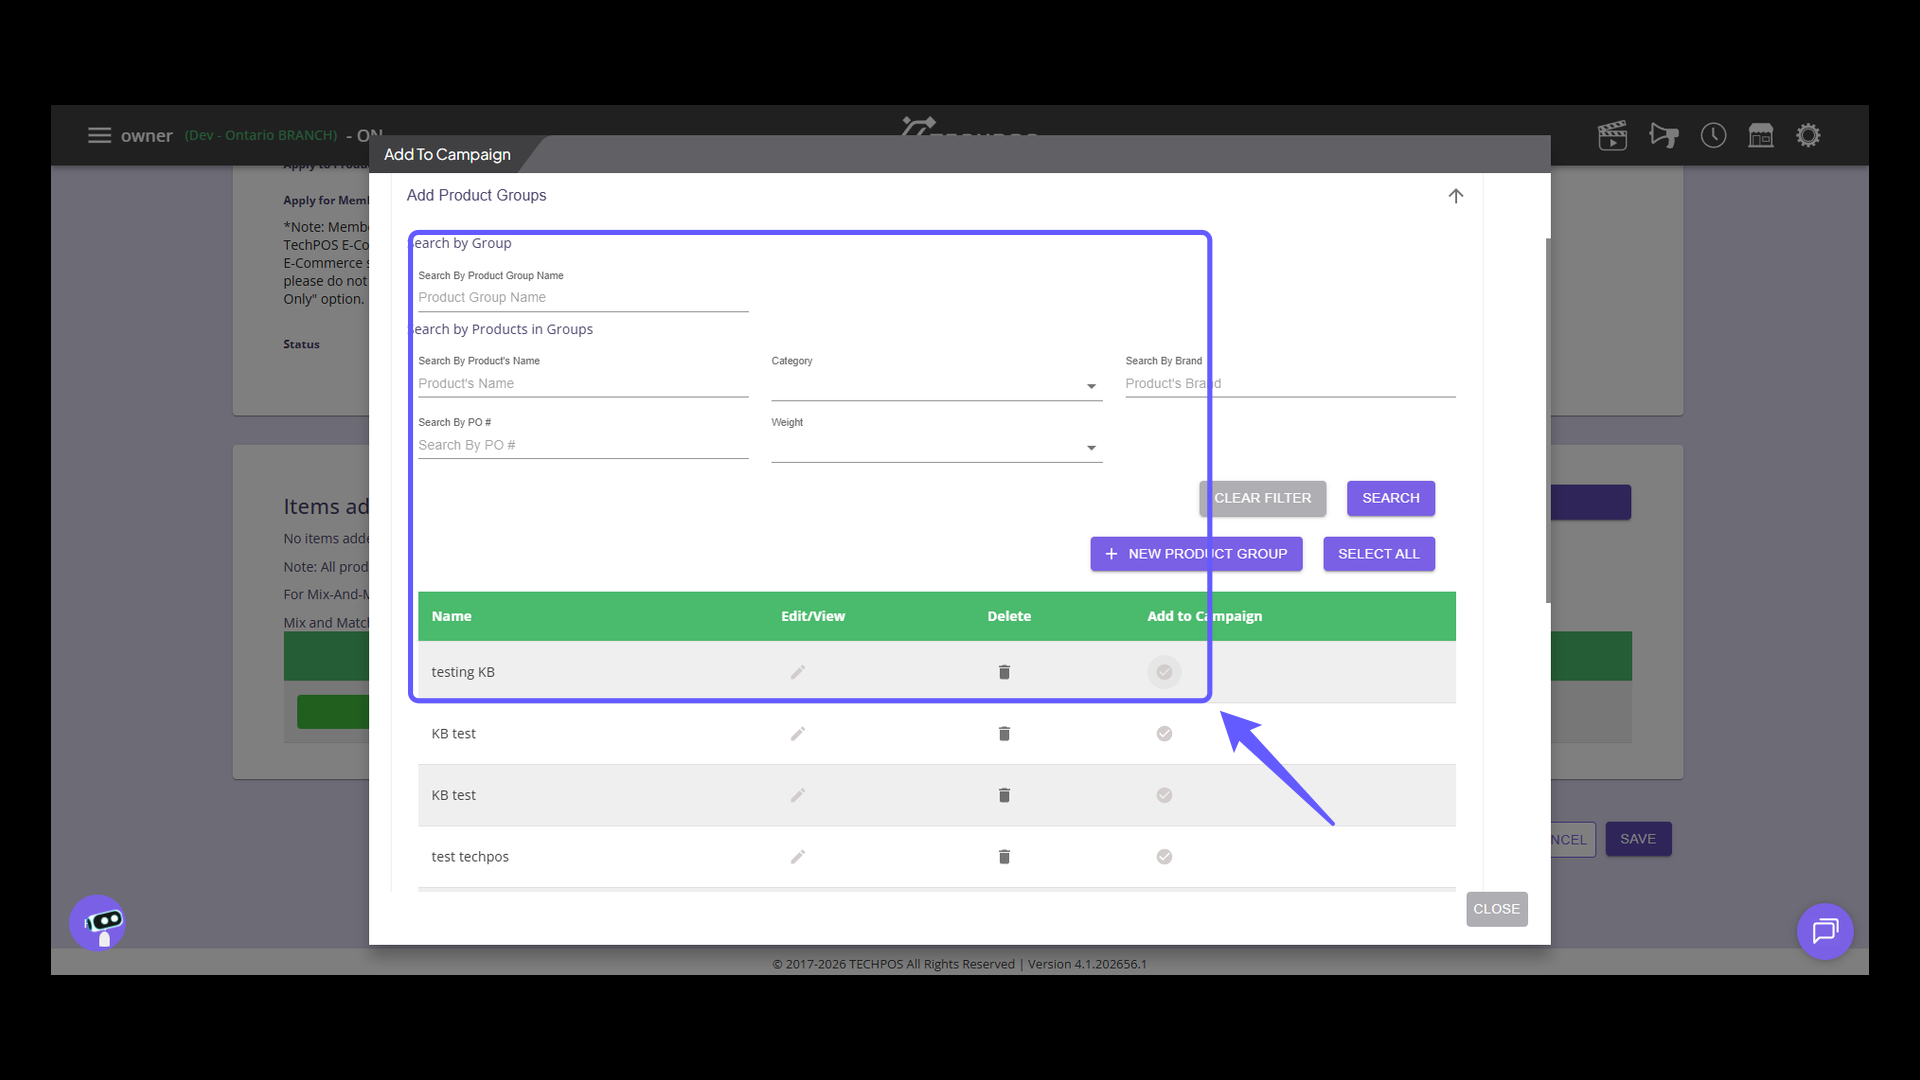
13. Select Product Groups
Click 'Add Product Groups' to include specific product categories in your campaign.
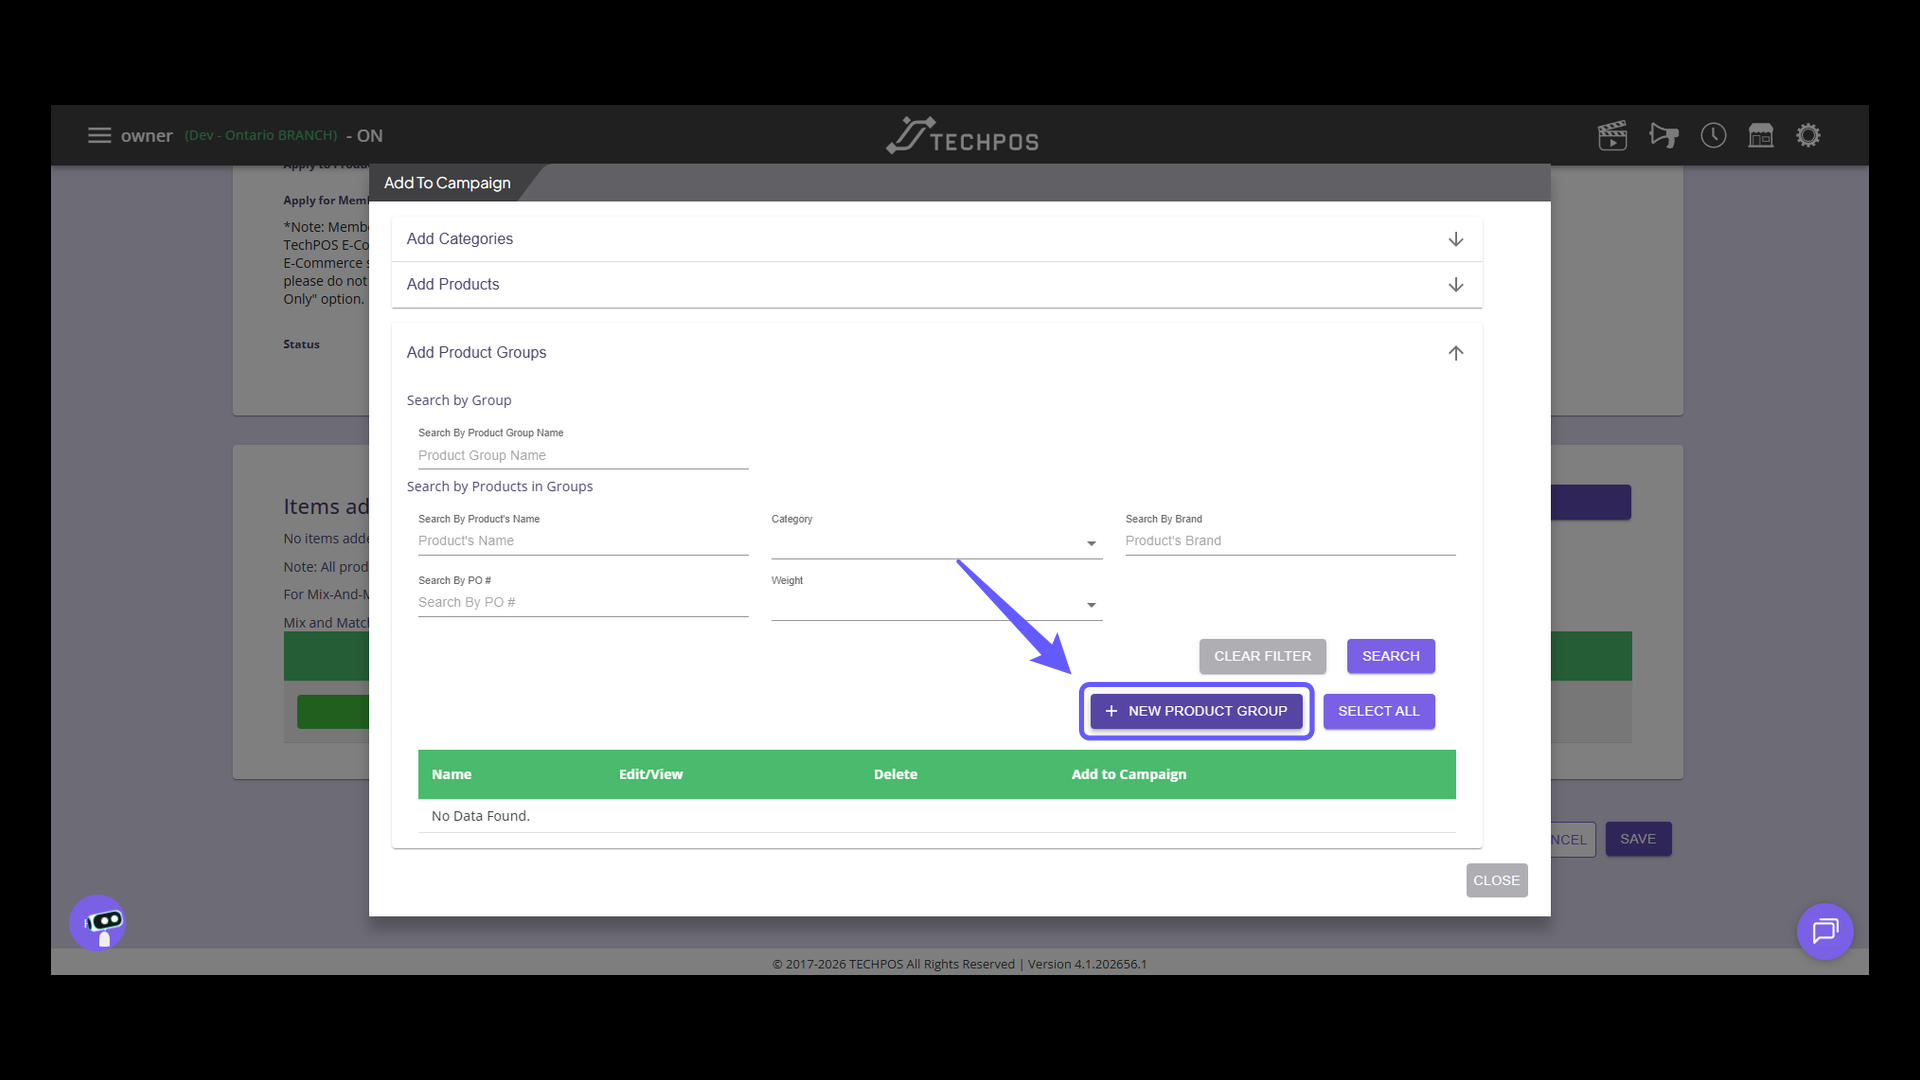
14. Create a New Product Group
Click the '+ New Product Group' button to add a new product group to your campaign. This allows you to customize product groups to your liking and save them for use in other campaigns or future updates.
15. Enter Group Name
Enter the group name in the designated input field to create a new product group.
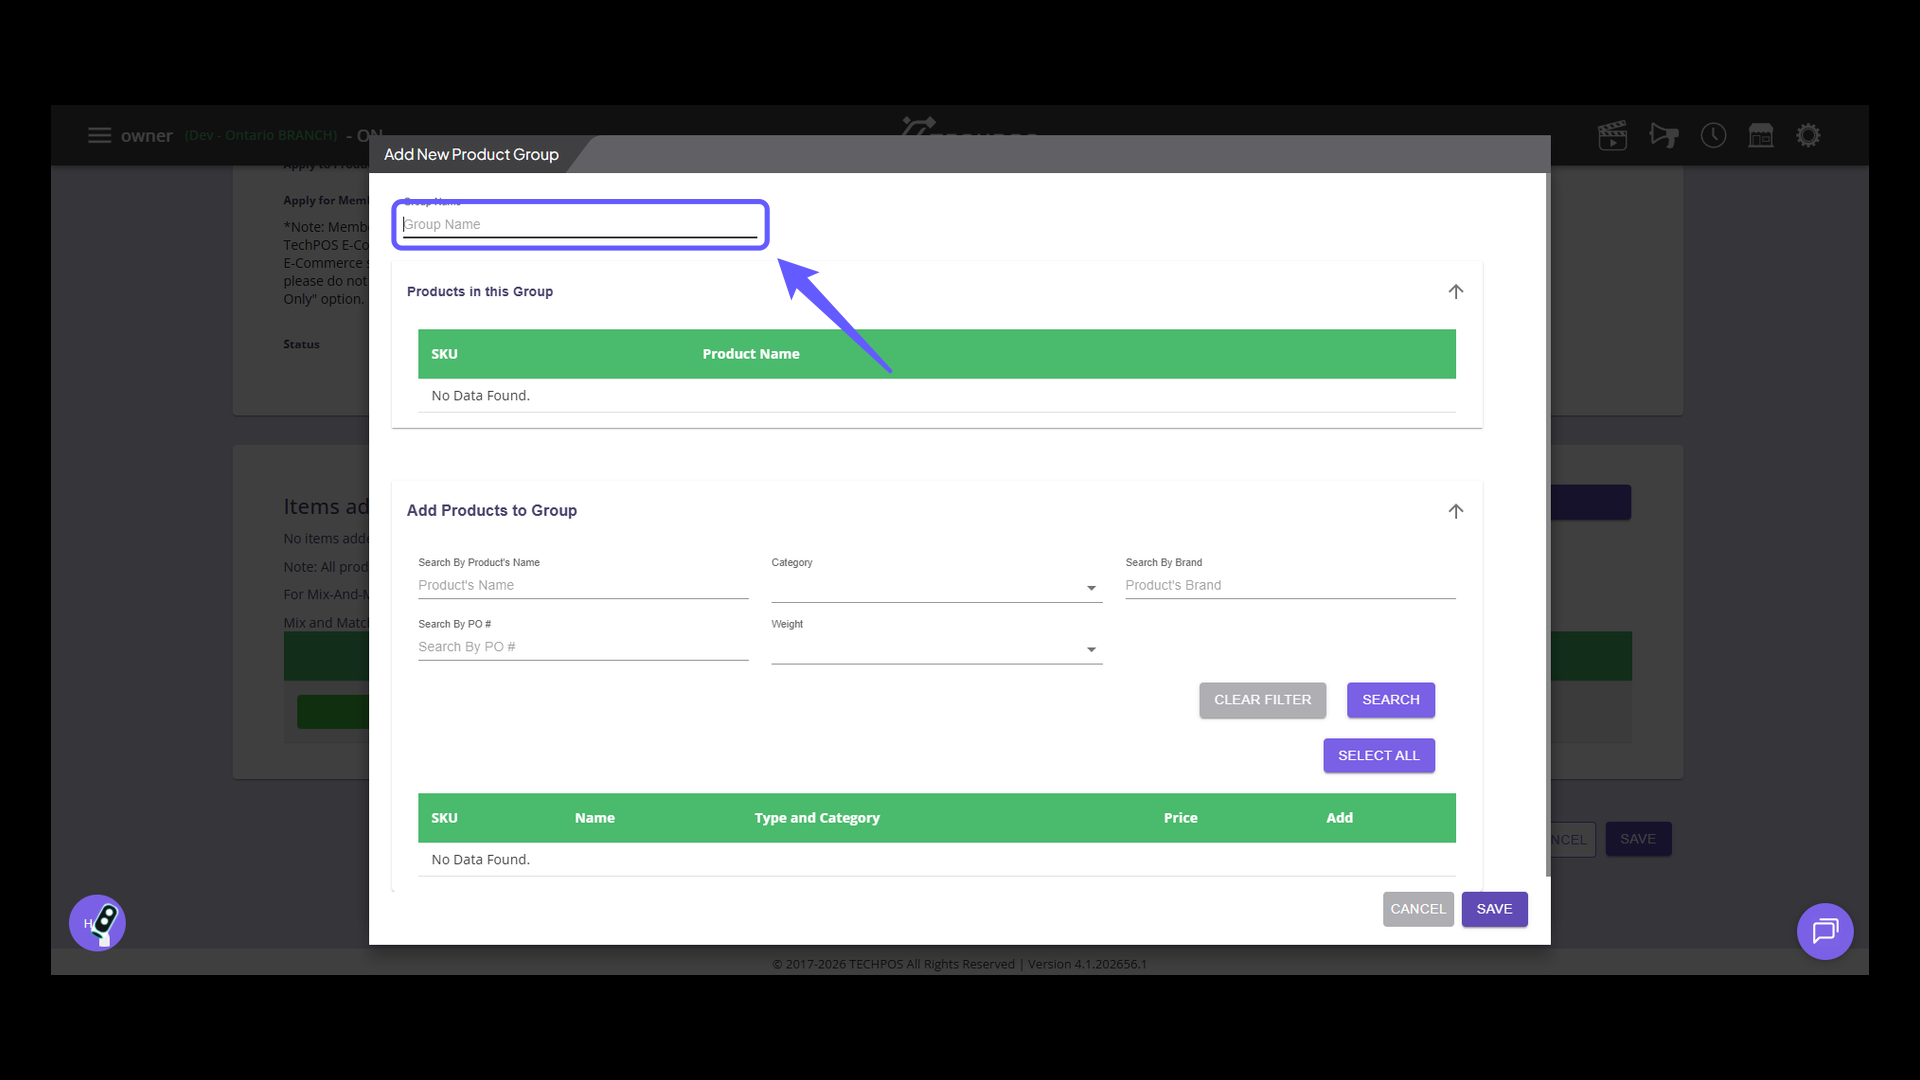
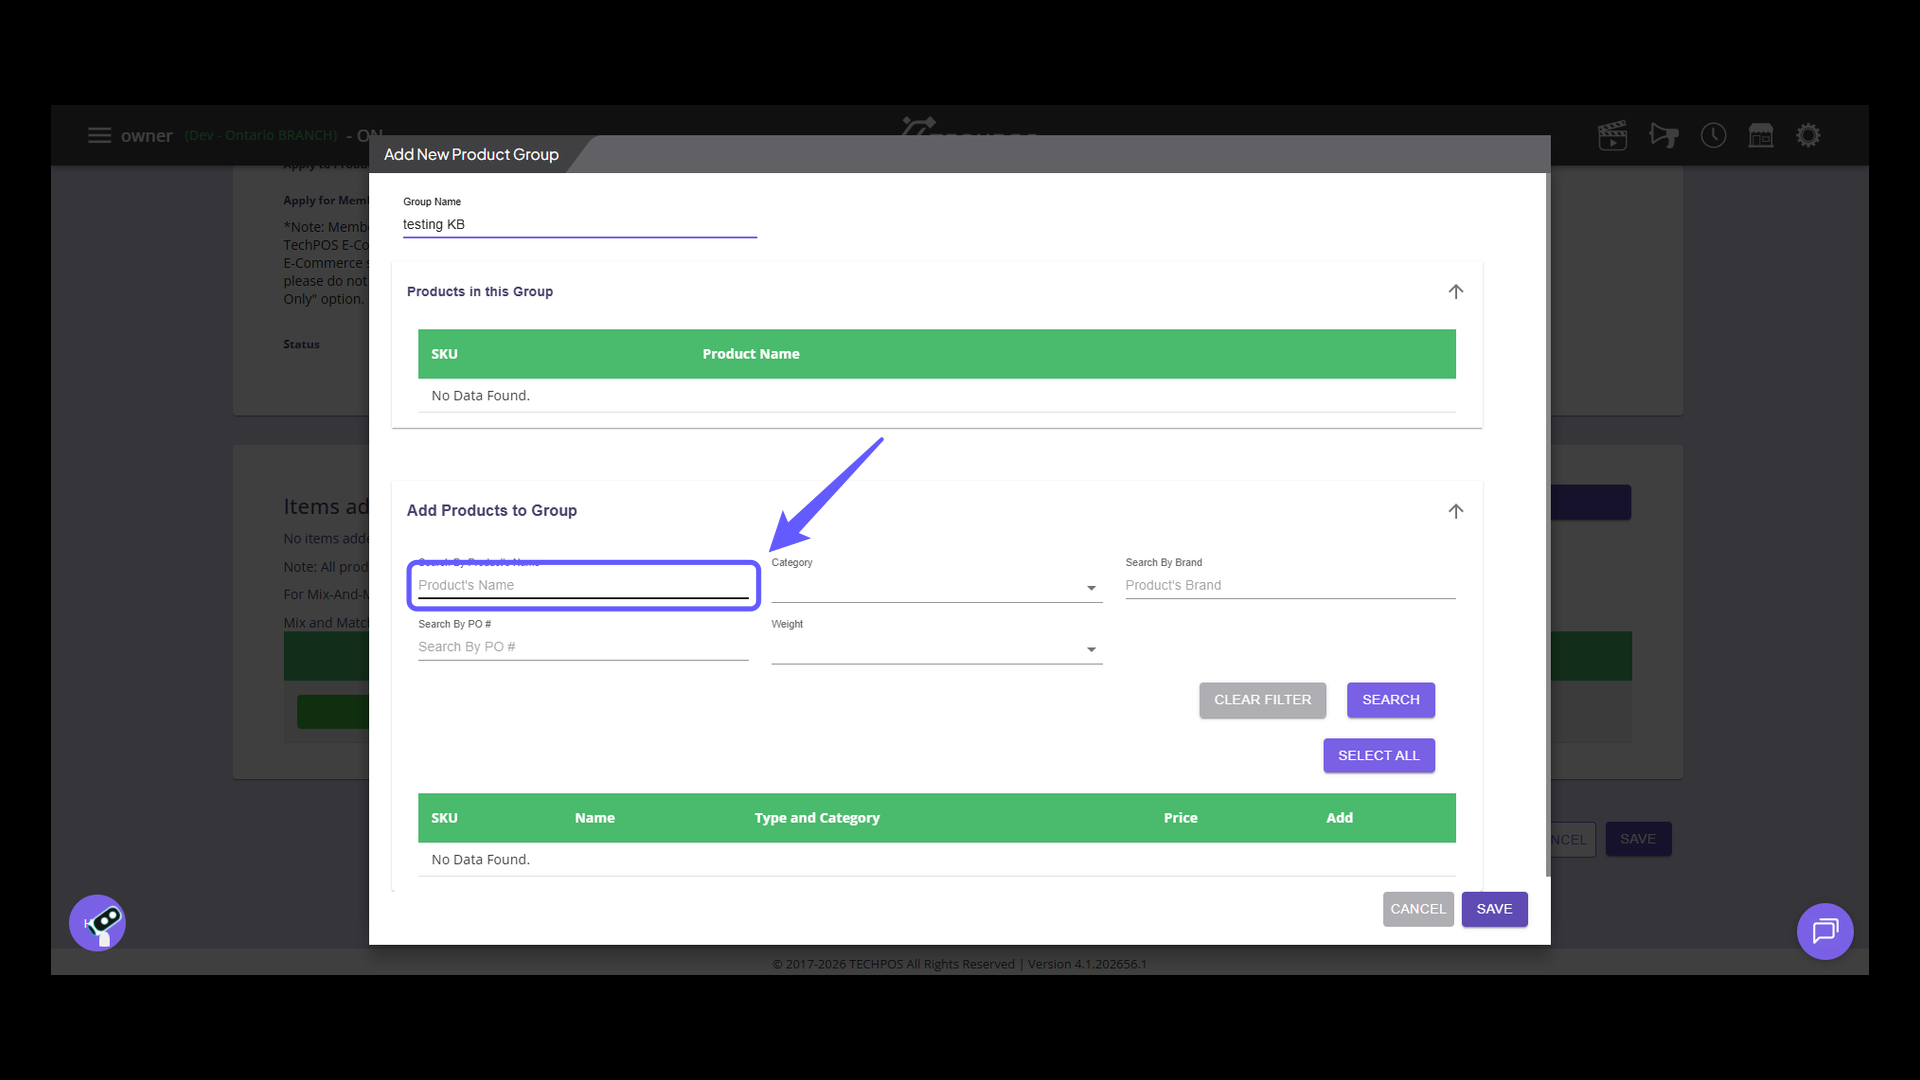
16. Search by Product Name
Browse and choose the products you'd like to add to the group. You can find them by searching through name, category, brand, previous purchase orders, or weight.
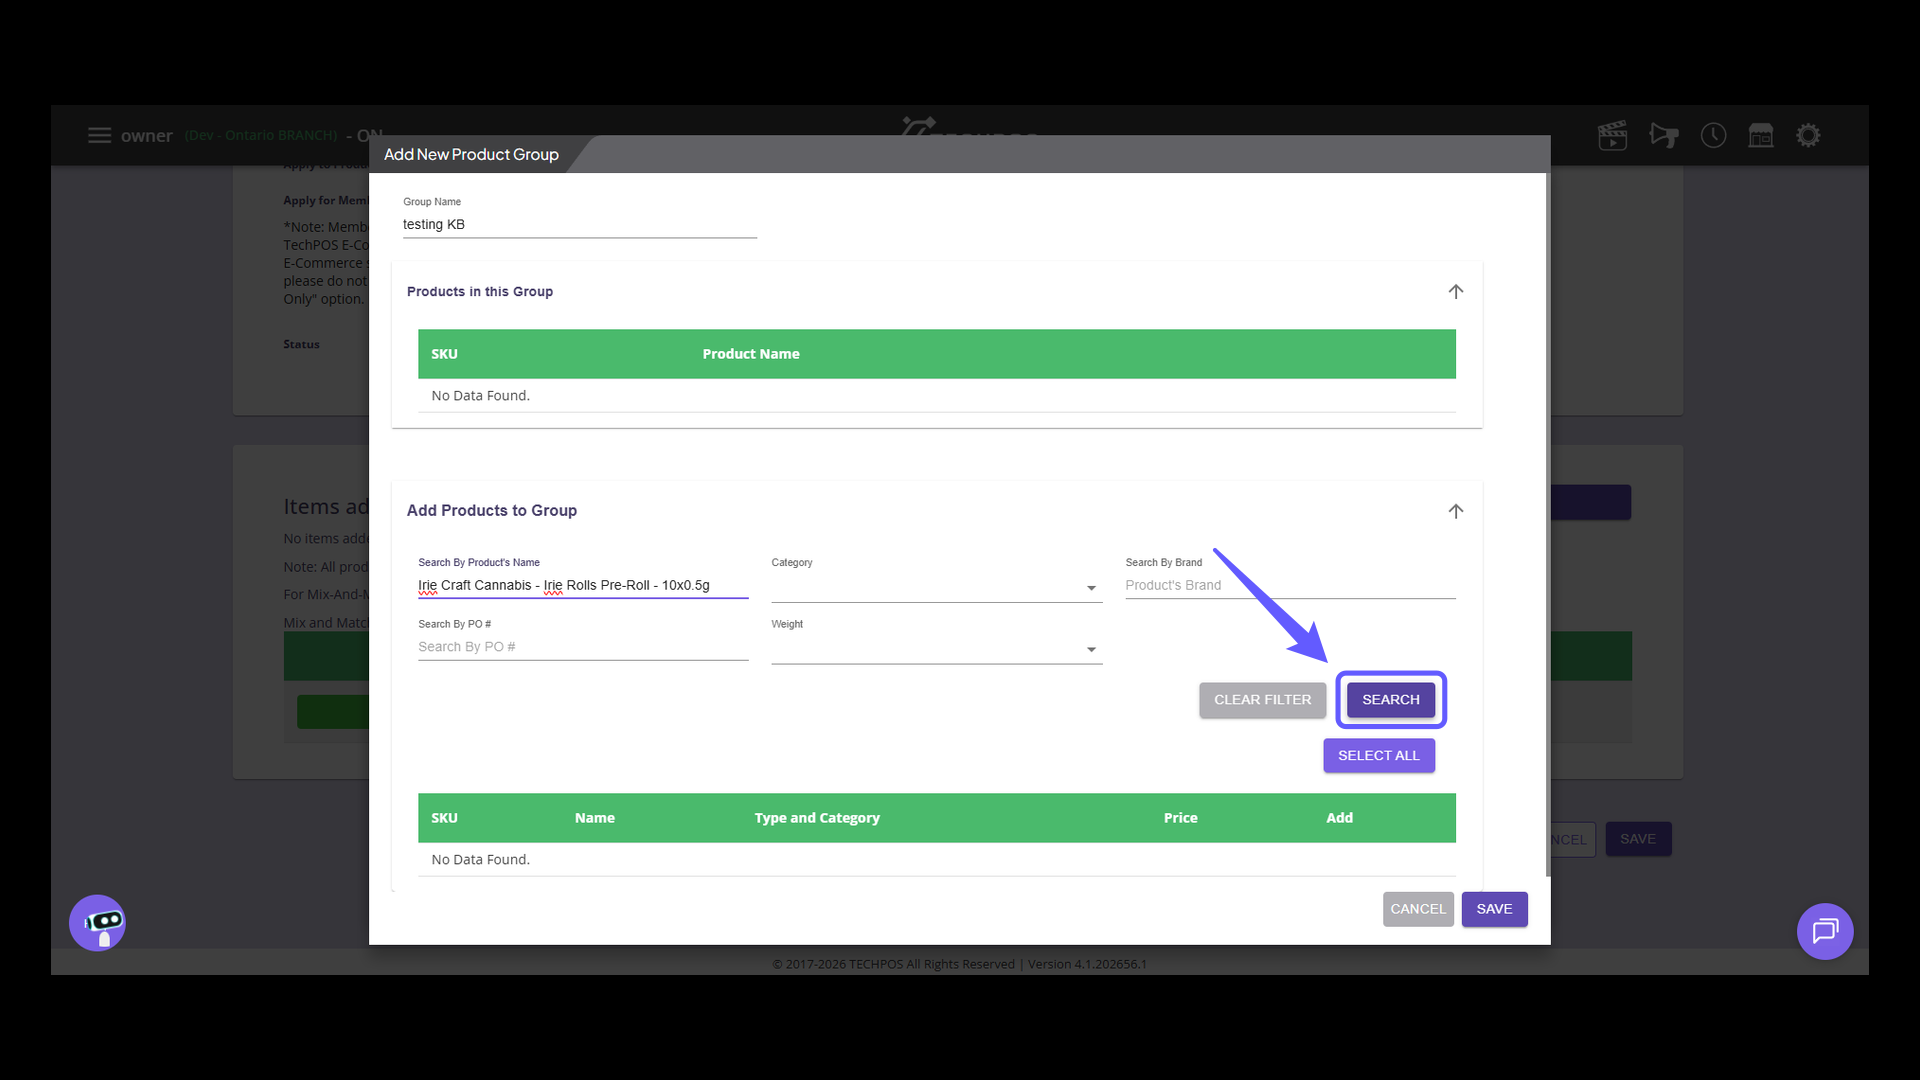
17. Search for Products
Enter the product name and category, then click the "Search" button to retrieve products and add them to the group.
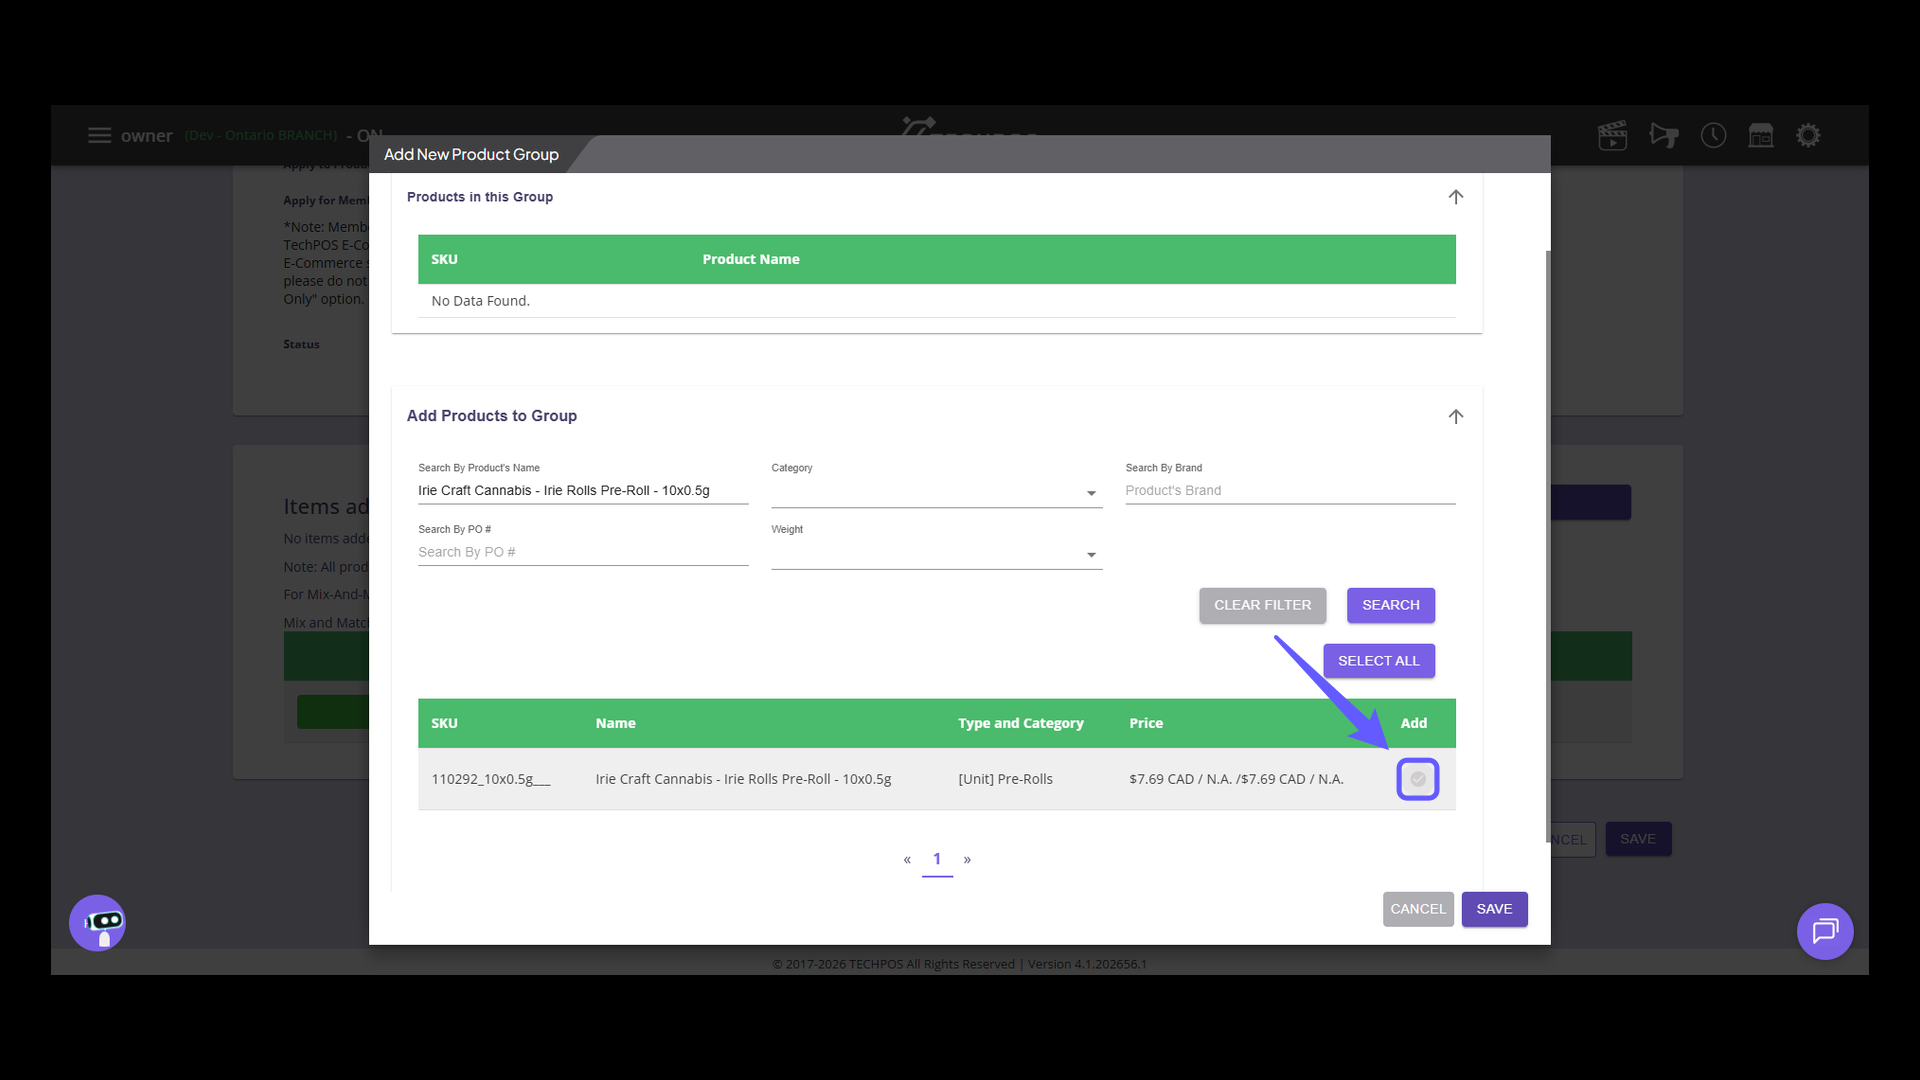
18. Add Product
Click 'Add' to include the selected product in the group.
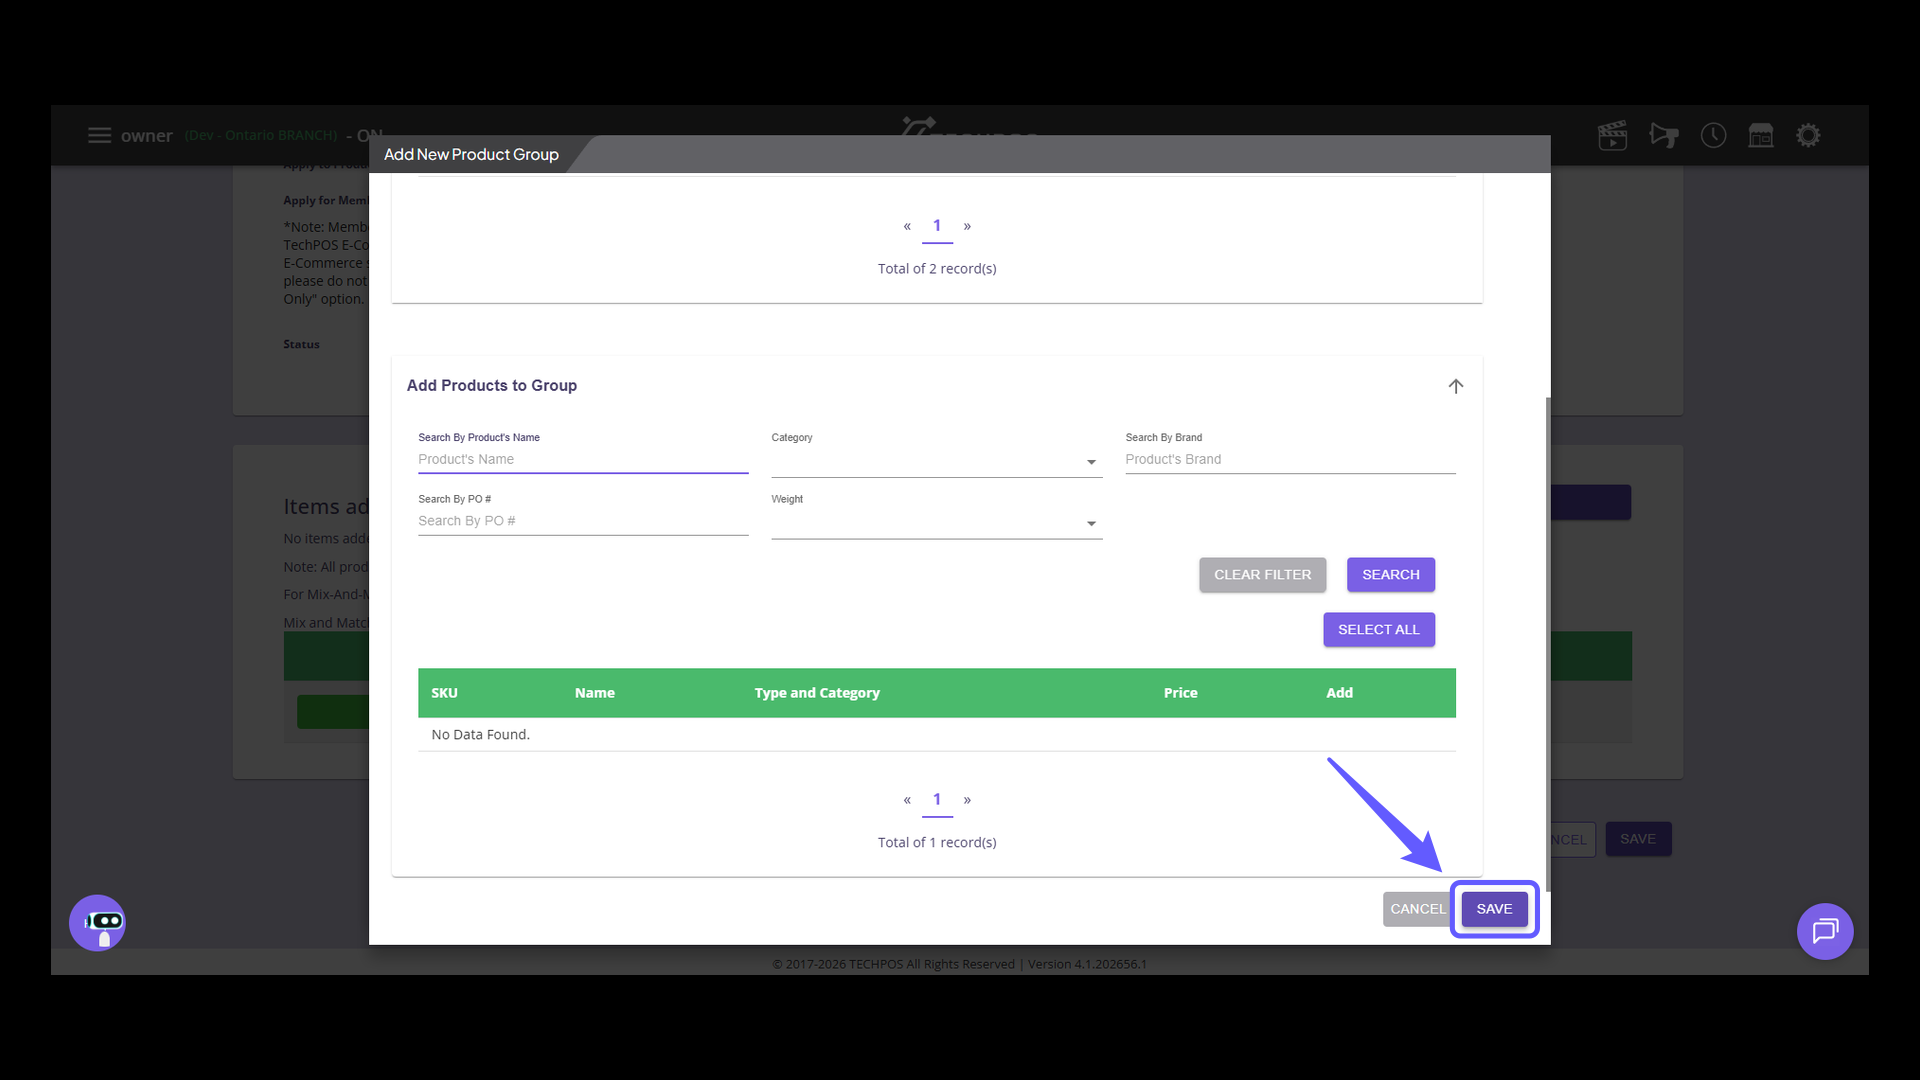
19. Save Product Group
After selecting all the products you want to include in the group, click the "Save" button.
20. Search for the created product group
Search for the created product groups and click the select button in front of them to add them to the campaign.
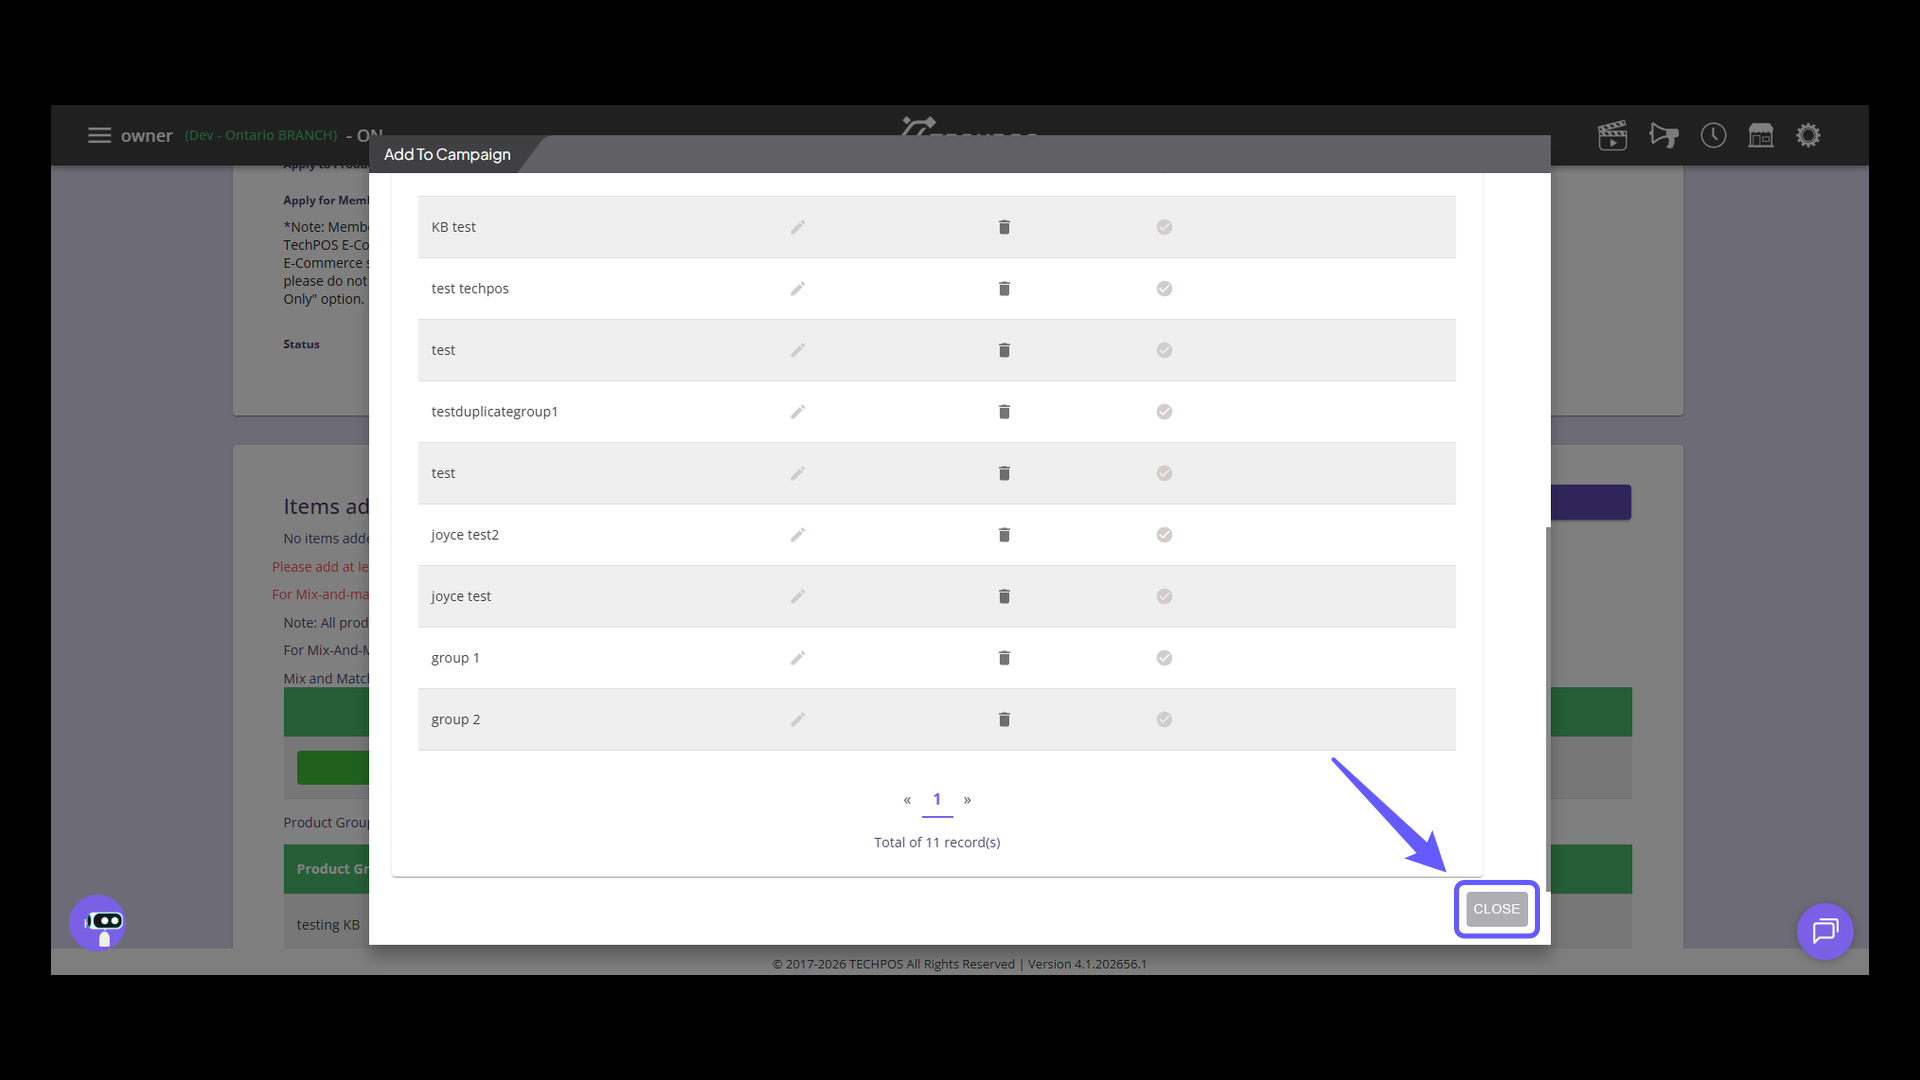
21. Click to Exit
Press 'Close' to exit the current window and return to the previous screen.
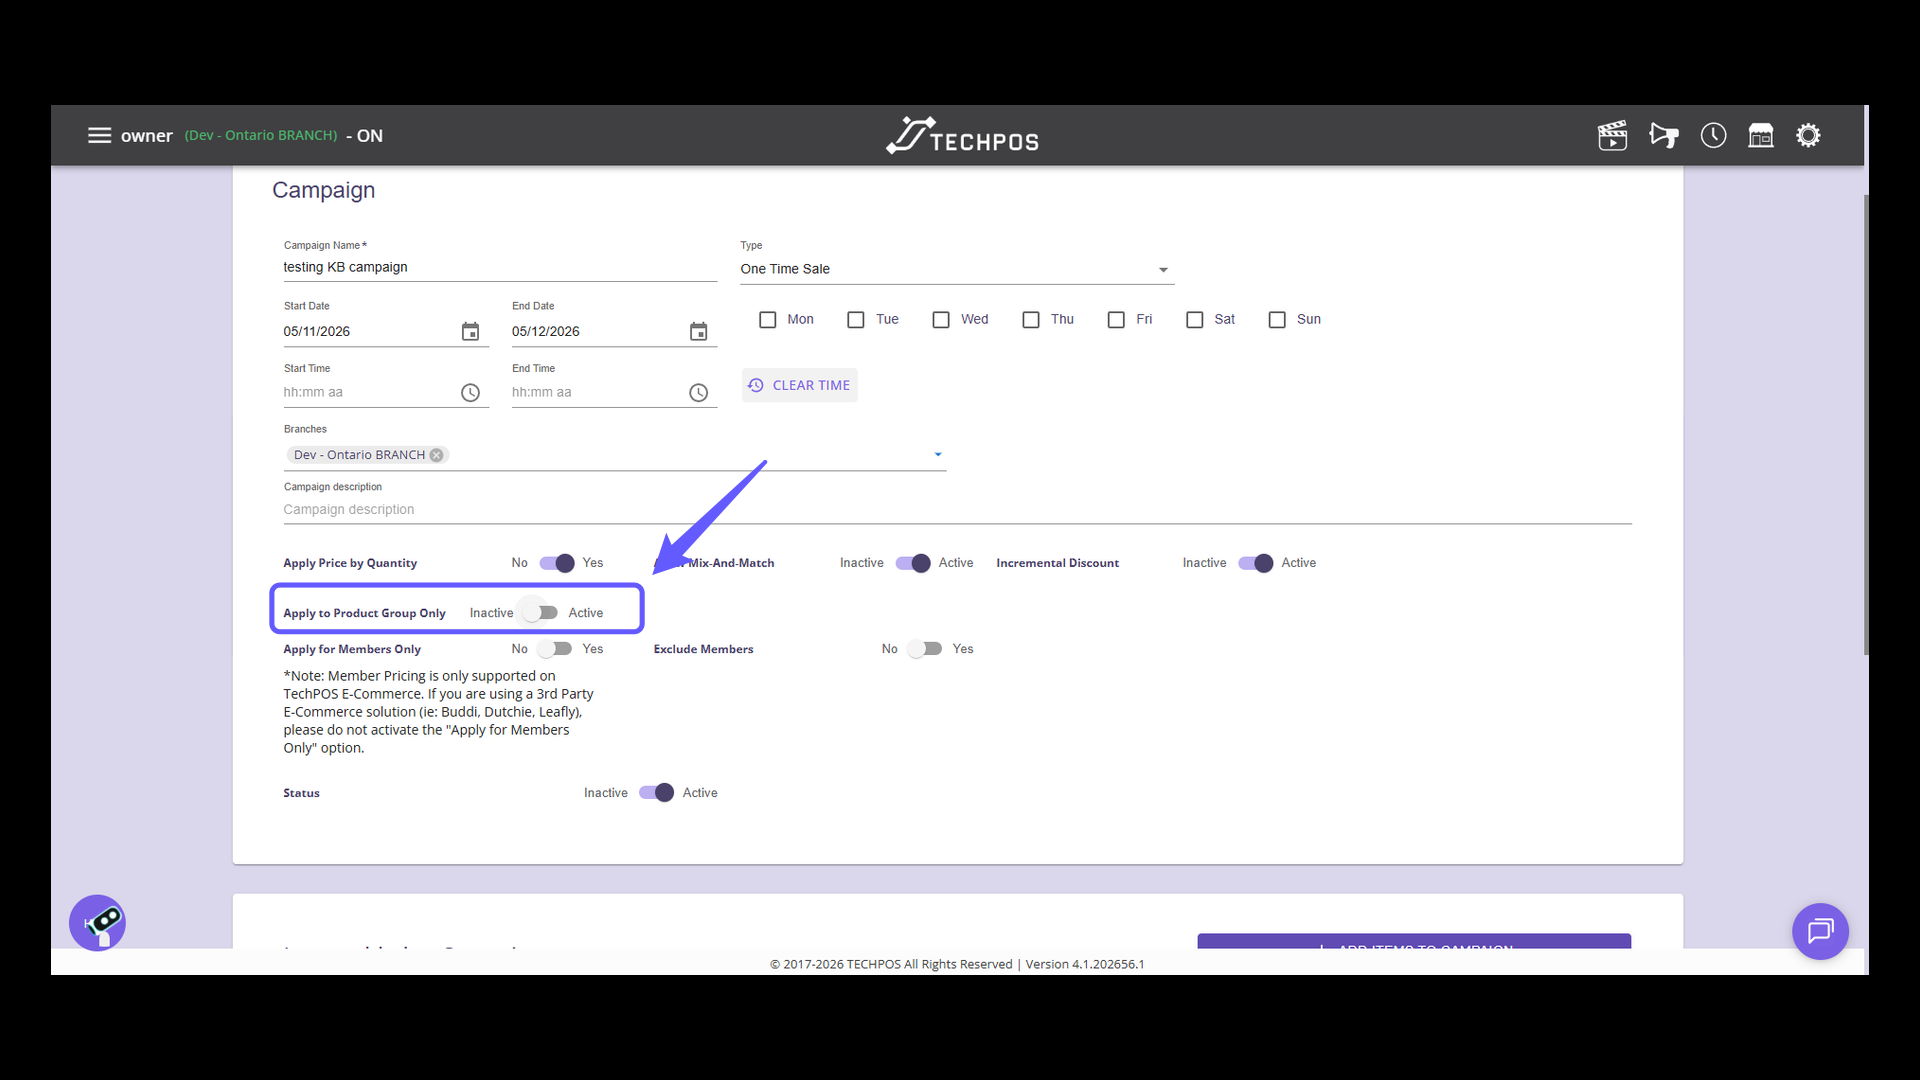
22. Toggle Product Group Application
Enable Incremental Discount for admins to activate the "Apply to Pricing Group Only" feature. This function ensures that the campaign discount is applied exclusively to the designated product group.
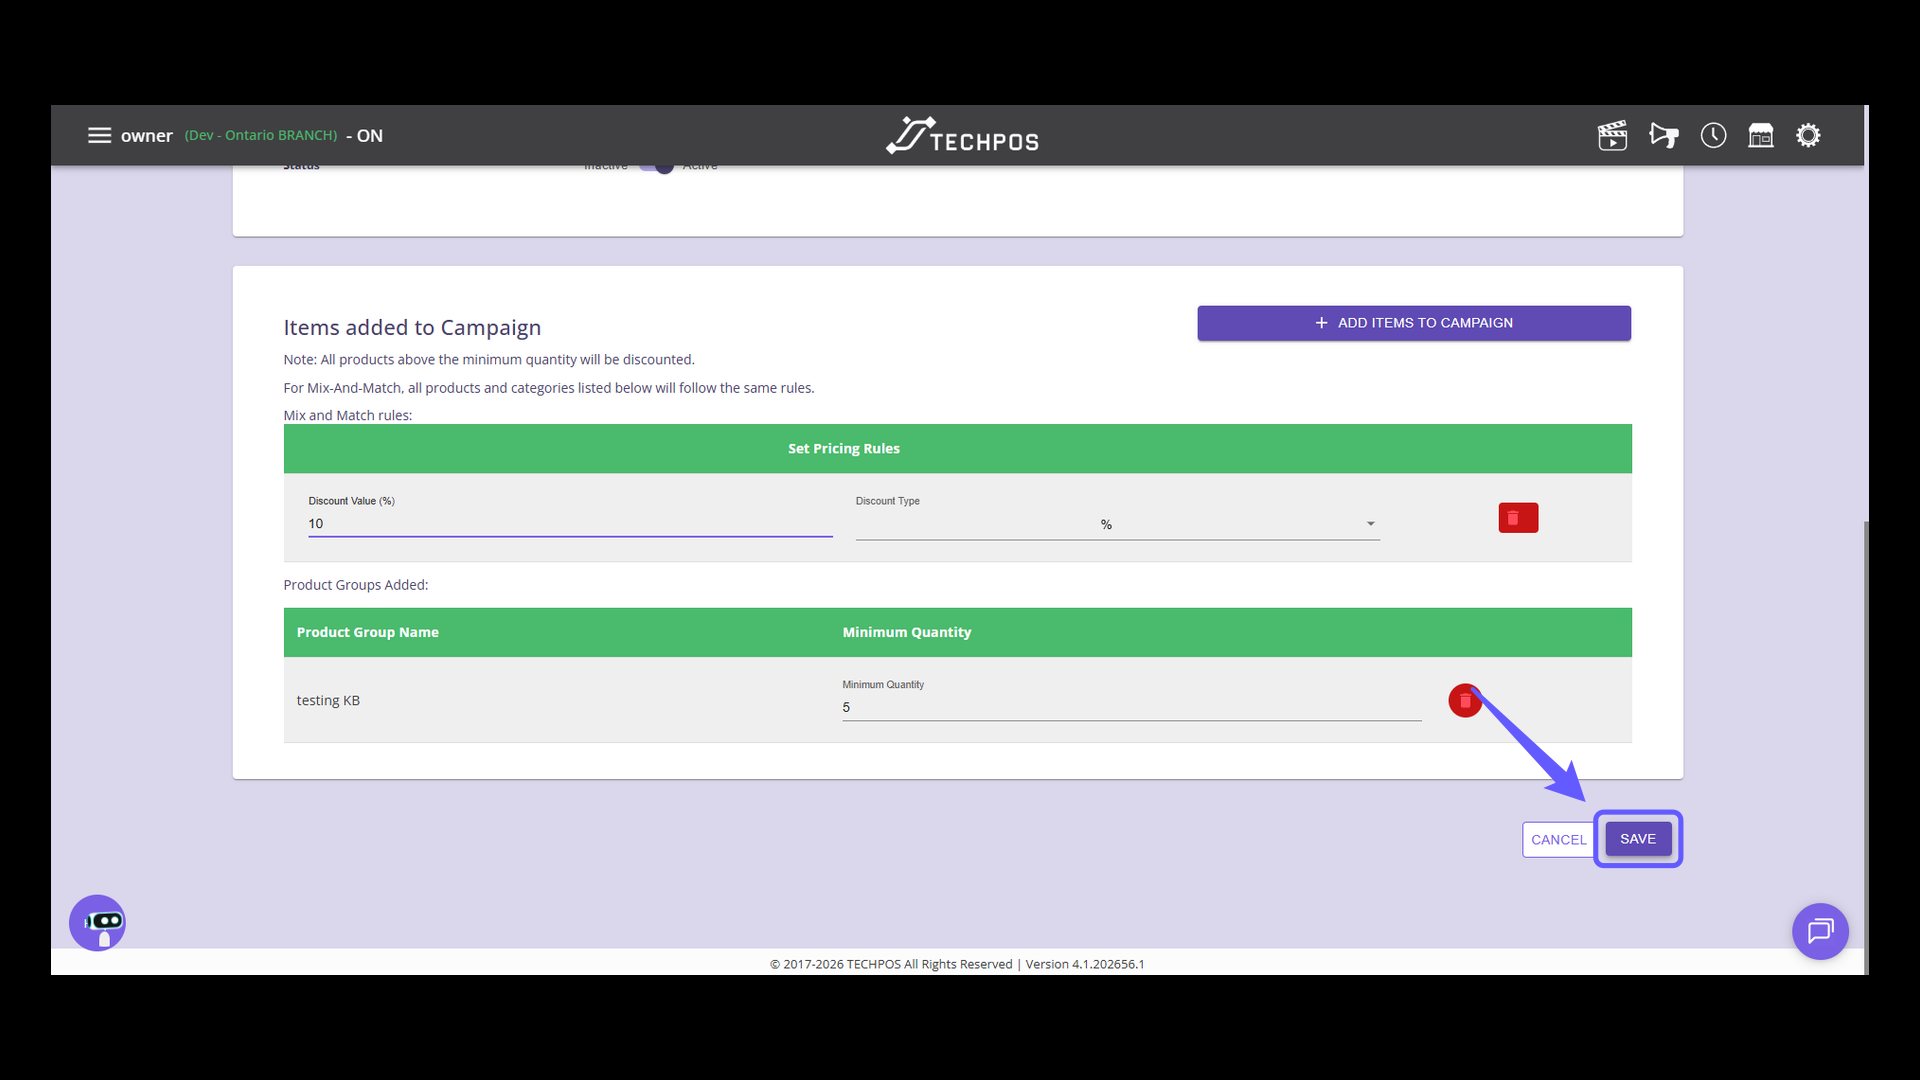
23. Set Minimum Quantity
Enter the minimum quantity required for the campaign in the input field provided.
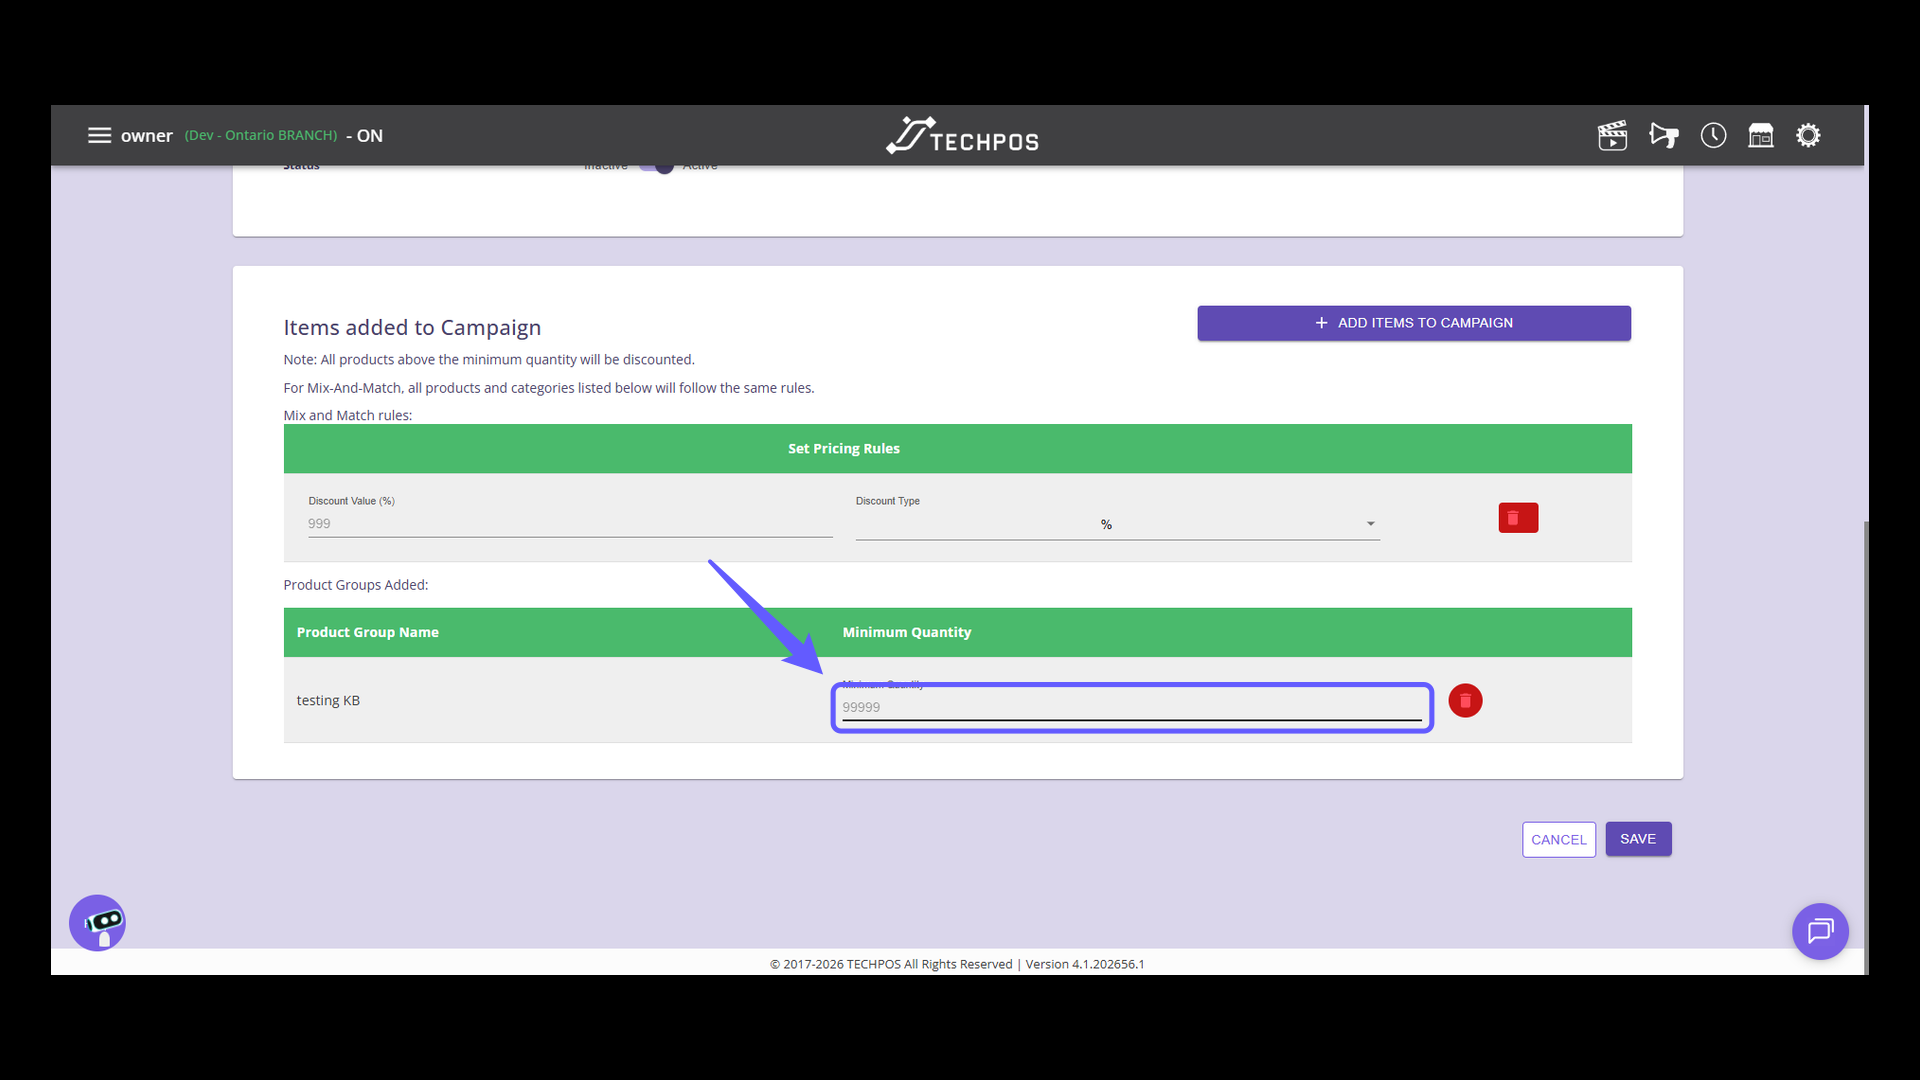
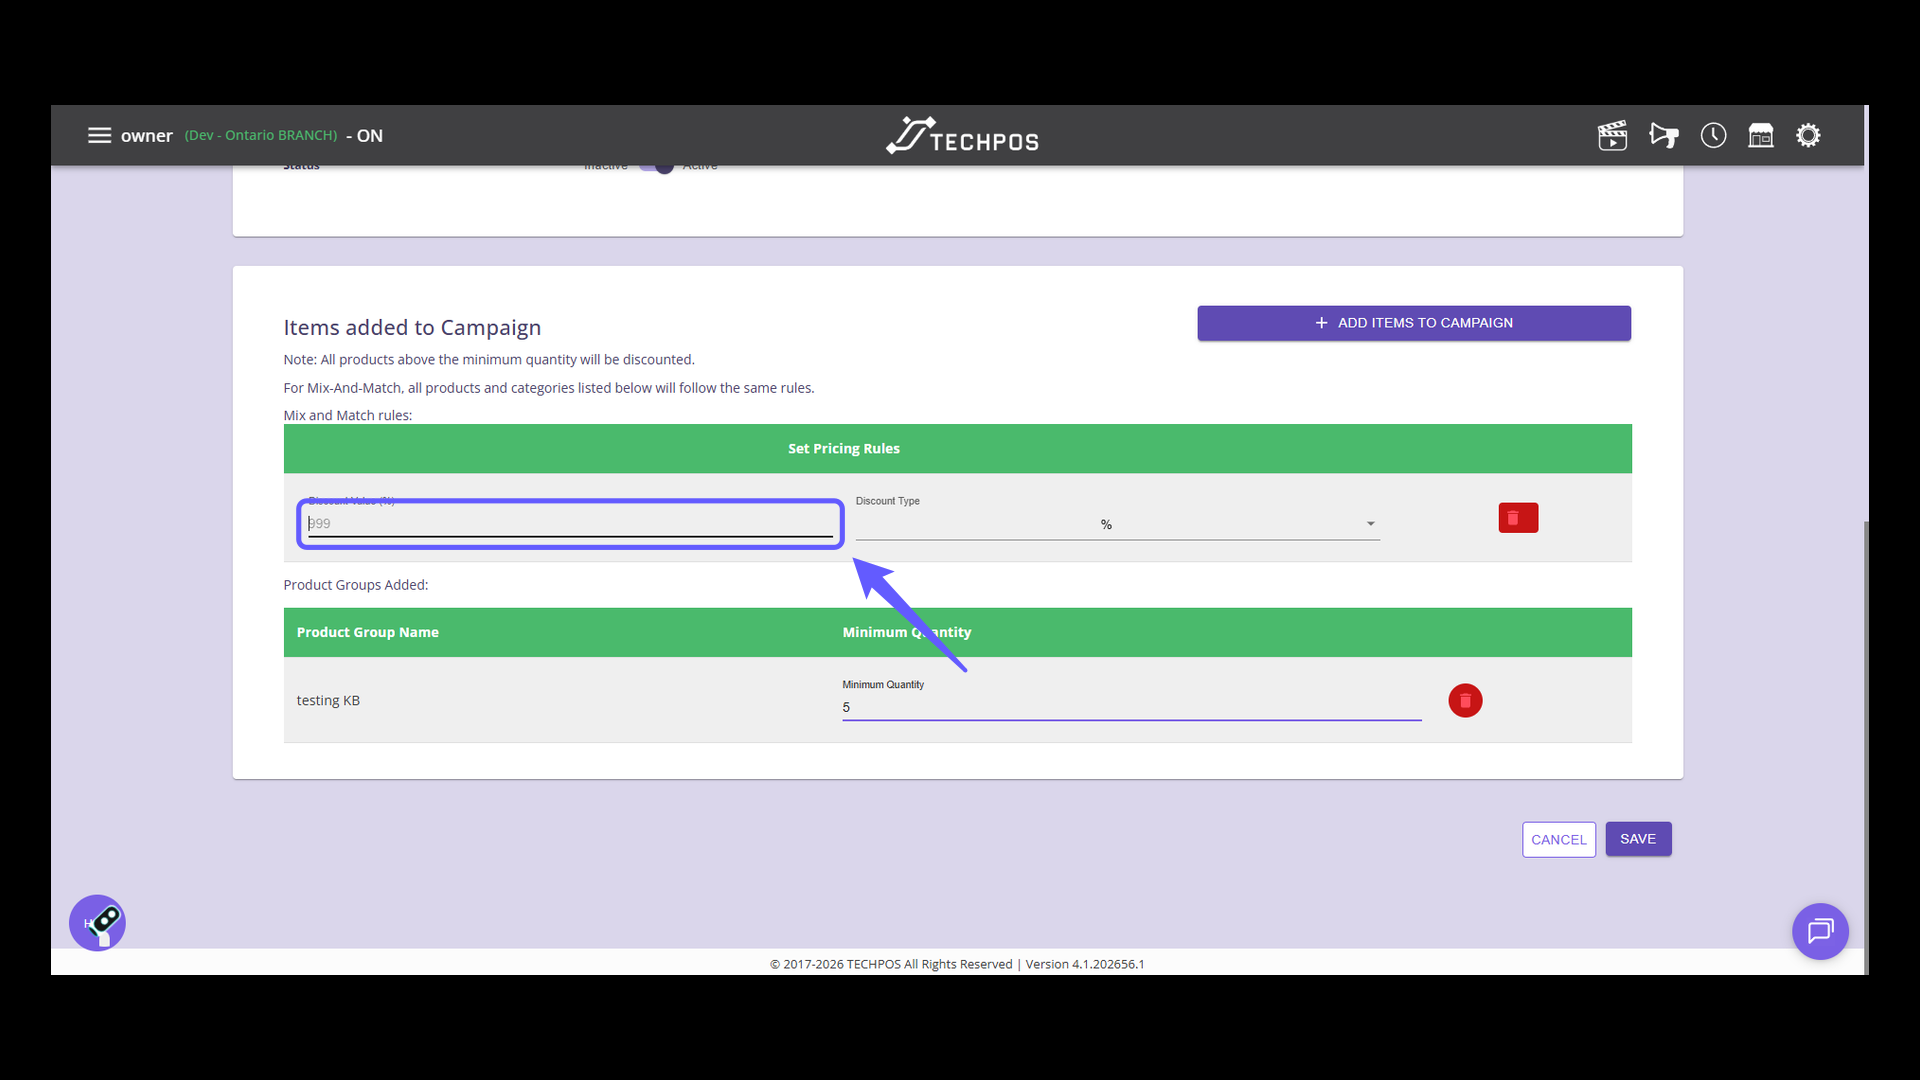
24. Set Discount Value
Enter a discount value as a percentage to apply to the campaign items.
25. Save Campaign Settings
Click the 'SAVE' button to apply changes and save the campaign settings.