Inventory Audit Page
Navigation Steps: Go to Menu > Inventory > Inventory Audit
January 21, 2026 UPDATE:
Inventory Audit - Bulk Adjust All Discrepancies Feature
- A new button for Adjust All in the audit page has been added.
- It will only show if:
- at least 1 product has entered count
- at least 1 product has expected quantity =/= counted quantity
- lock expected qty setting is OFF for the audit
- It will only show if:
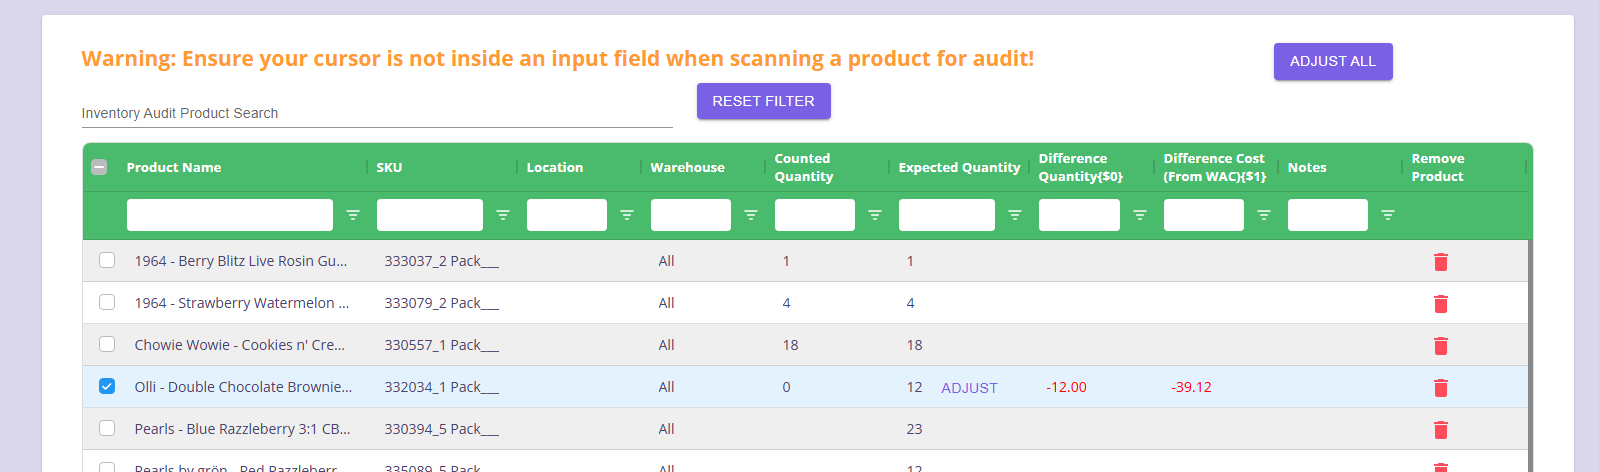
- When you click Adjust All, a new dialog will show
- You can enter optional notes for the bulk adjustment
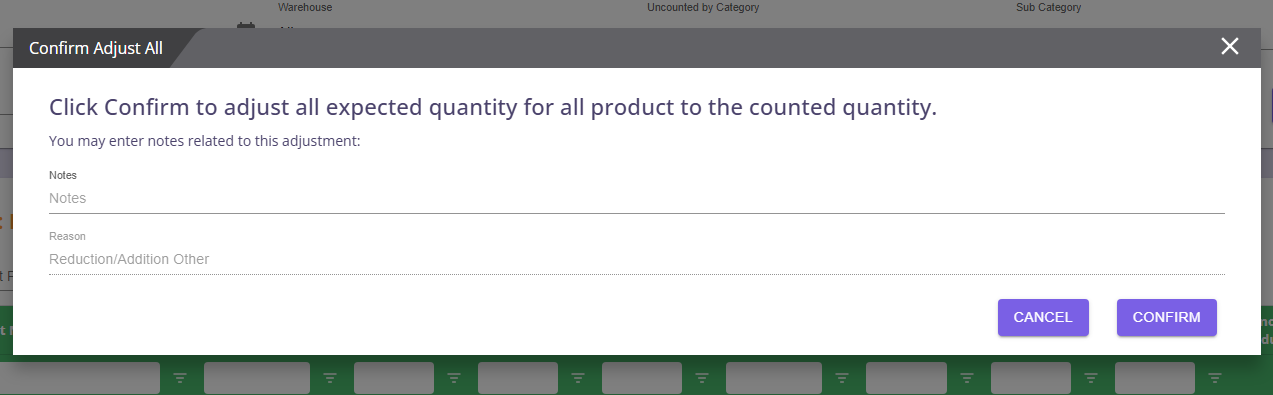
- Once you click confirm, it will start the adjustment for all products
- Note that you cannot use Adjust All to adjust products of the following condition:
- "All" warehouse selected in the audit product list
- The product has never been received through Purchase Order or Transfers in the warehouse selected
- Note that you cannot use Adjust All to adjust products of the following condition:


- If there is no error, it will adjust only the products that have counted quantity =/= expected quantity
- Adjustment will automatically pick lot numbers according to the following:
- If adjusting up, use LIFO
- If adjusting down, use FIFO
Create Inventory Audit
Step 1: Click on Add New Audit Button

Step 2: Enter the Audit Name, and choose if you prefer to lock expected quantity, then click Confirm.

Note: Locking the Expected Quantity ensures that the expected quantity won't automatically adjust, even if a product is sold during the audit. This means if there are sales happening on the floor, the expected quantity will not change as long as the counted quantity is entered. For products without the expected quantity entered, it will continue adjusting based on sales.
Step 3: Add products to the audit. There are multiple ways to add products to the audit:
Keep in mind: When utilizing the import functions below (Category, Brand, Uncounted Products), the system will only import products that are in stock. Here are two situations concerning out of stock products:
- If the quantity in the Warehouse is out of stock (0 units), it won't appear on the import list.
- If the product isn't in the Warehouse, it indicates there's no prior history or record of a Purchase Order. In this case, a new Purchase Order must be initiated.
-
Option 1: Add by Category
You can import using the Main Category, Sub-Category, or Sub-Sub-Category. Sub-Category will be filtered based on the Main Category, and Sub-Sub-Category will be filtered based on the Sub-Category.

-
Option 2: Add by Brand

-
Option 3: Add by Name/SKU Number
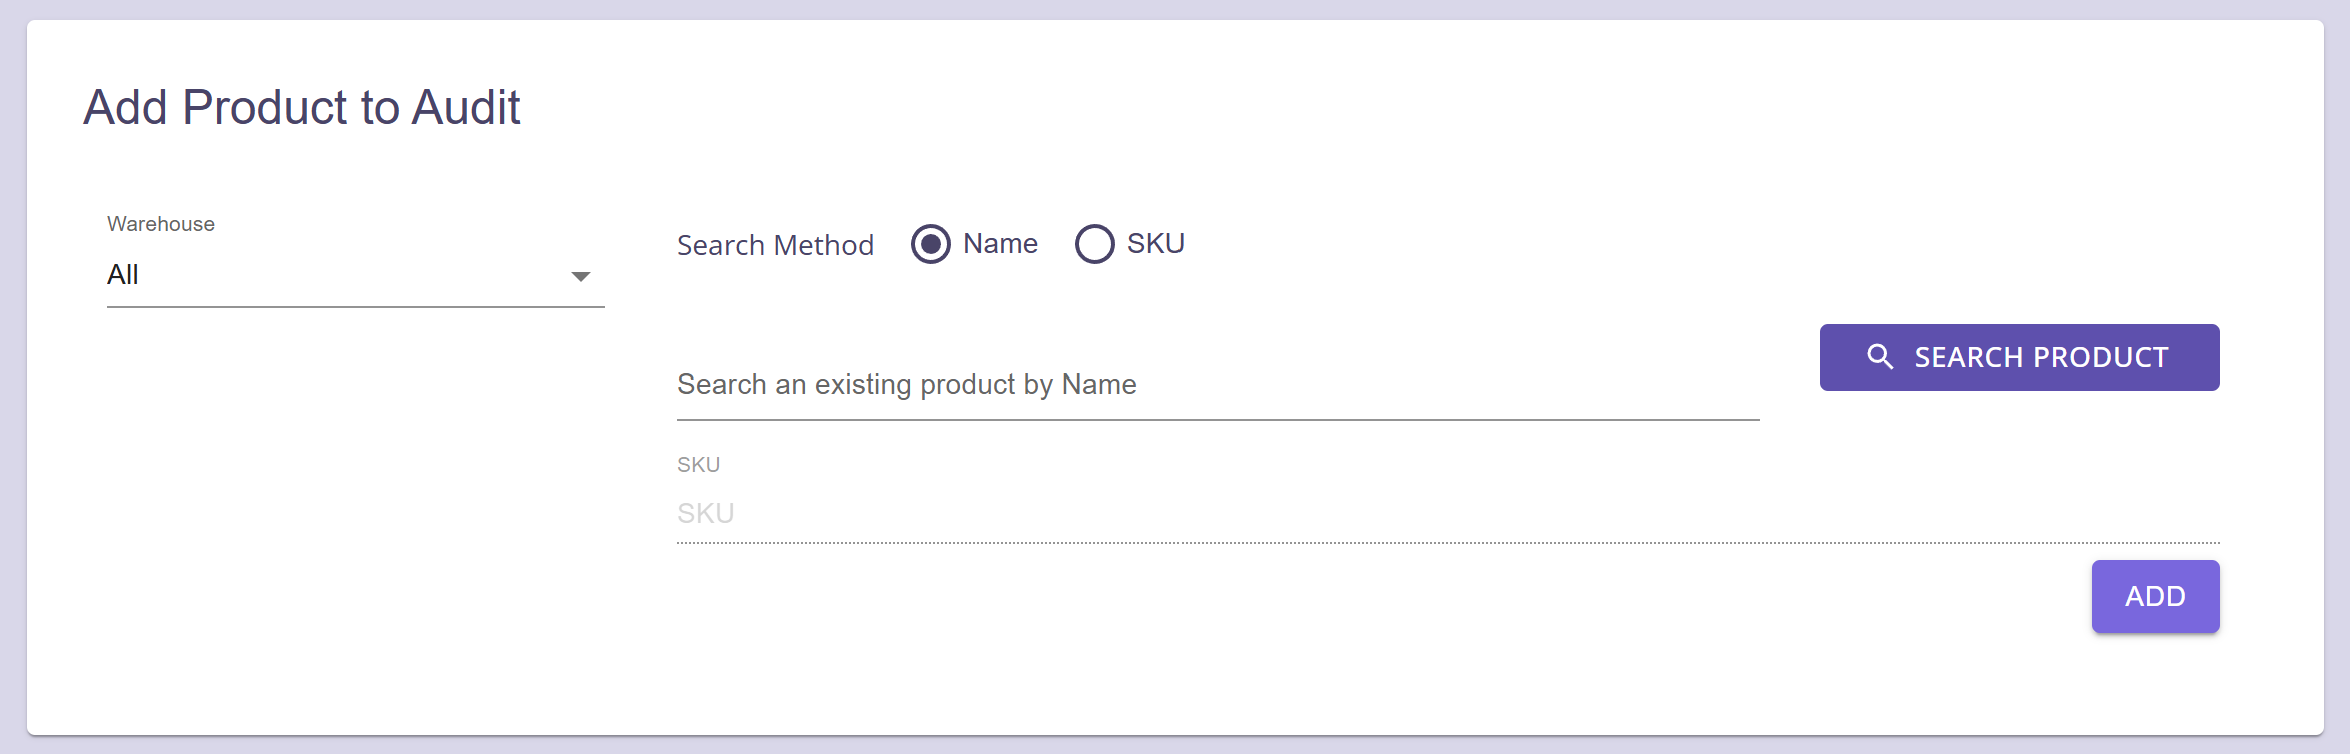
-
Option 4: Add by Uncounted Products
This feature allows you to choose a specific date. After selecting the date, you'll be able to choose a category for products that haven't been counted yet. Finally, it'll show you how many products in that category are still uncounted.

Entering Counted Quantity & Posting it for Review (Store Level)
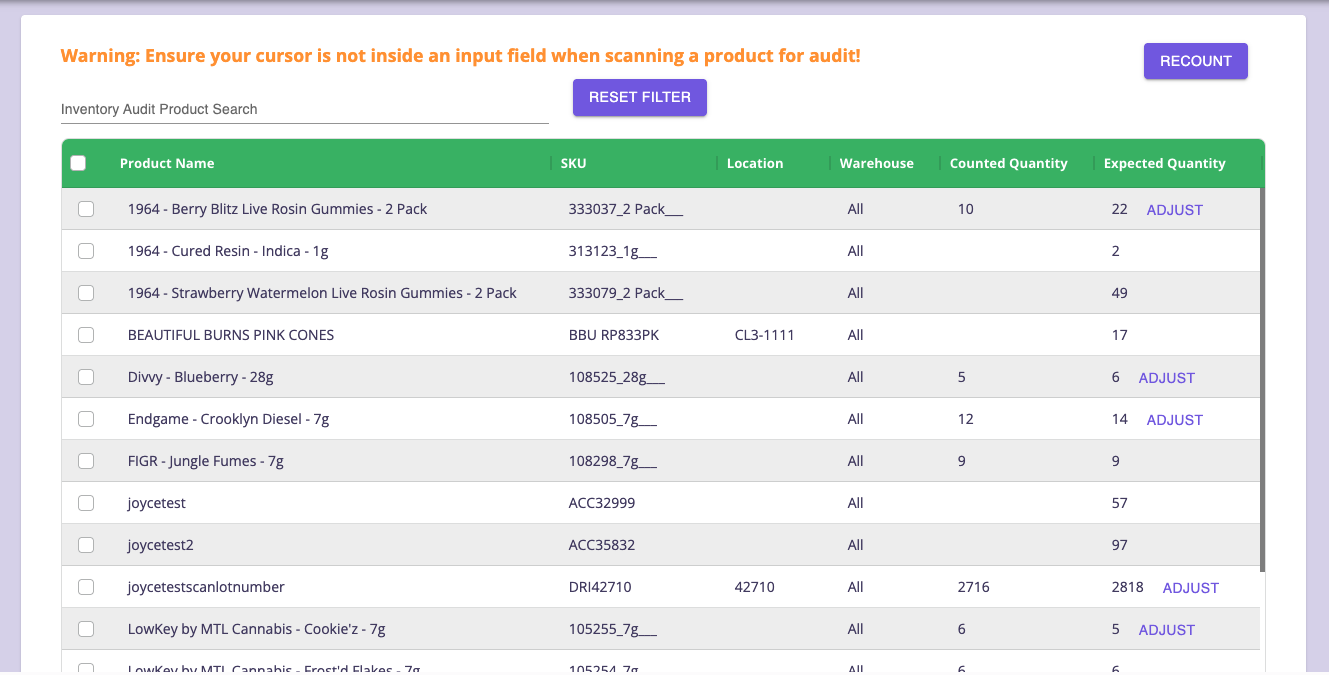
Step 1: After adding products to the audit, a field will appear for entering the Counted Quantity.
Step 2: You can find products in the audit either by searching manually or by scanning their barcodes.
Step 3: Input the counted quantity.
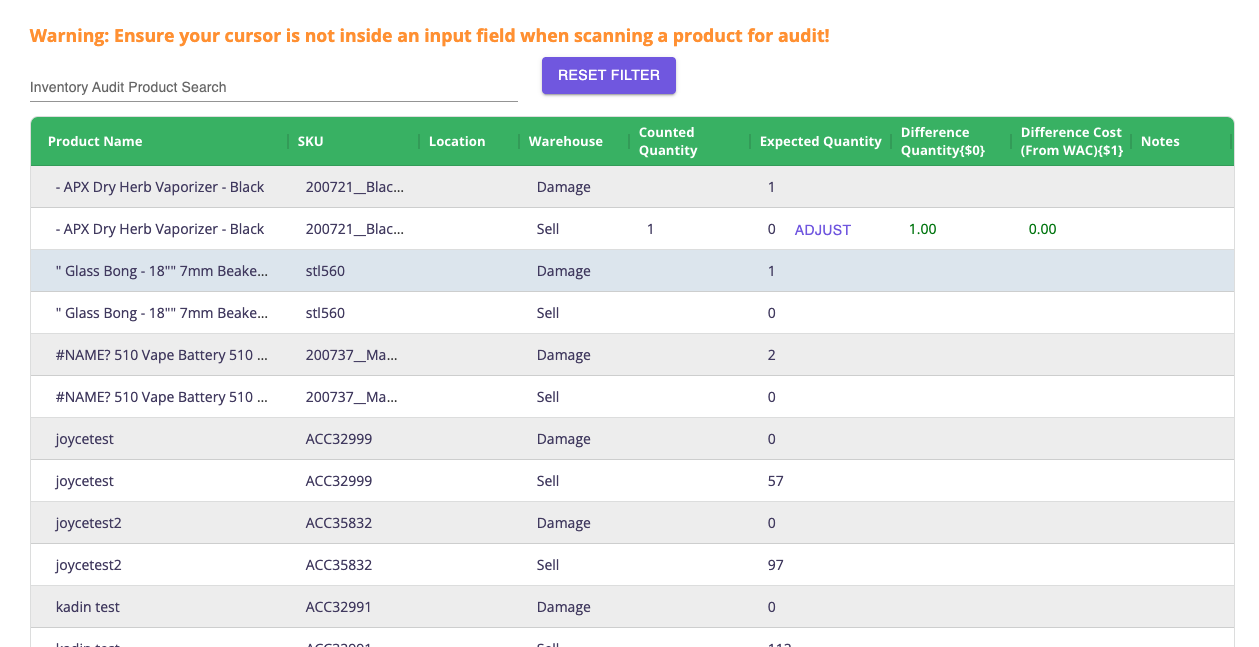
Store Level View: Please perform a blind count at the store level and input the counted quantity. For the store level view, please note that the expected quantity, adjust button, difference quantity, and difference cost will be hidden. (Jun 20 updated, Changed to AgGrid)
Step 4: Once you've finished the count, hit the Verify button at the top for the management team to review your audit.
Step 5: Once verified, status will now change. Click on Edit button if any changes needed.

Verifying the Audit and Submitting for Review (Management Level)
Step 1: Go to click on Verify Button. Audit can only be verified if the status is set to “Verify”.

Step 2: Review the discrepancies.
Management Team View: Should there be a discrepancy between the counted and expected quantities, an adjustment button, Difference Quantity, and Difference Cost will show up.
Step 3: Review which products are eligible for recount, or use the 'select all' option to include all products with discrepancies.
Step 4: After your review, please select 'Recount' button to forward it to the store for further verification.
Audit Recount (Store Level)
Step 1: At the store level, the status will now transition to 'Recount'.

Step 2: The system will now display items that are prepared for recounting. The store level can input the recounted quantity in the "New Quantity" field.
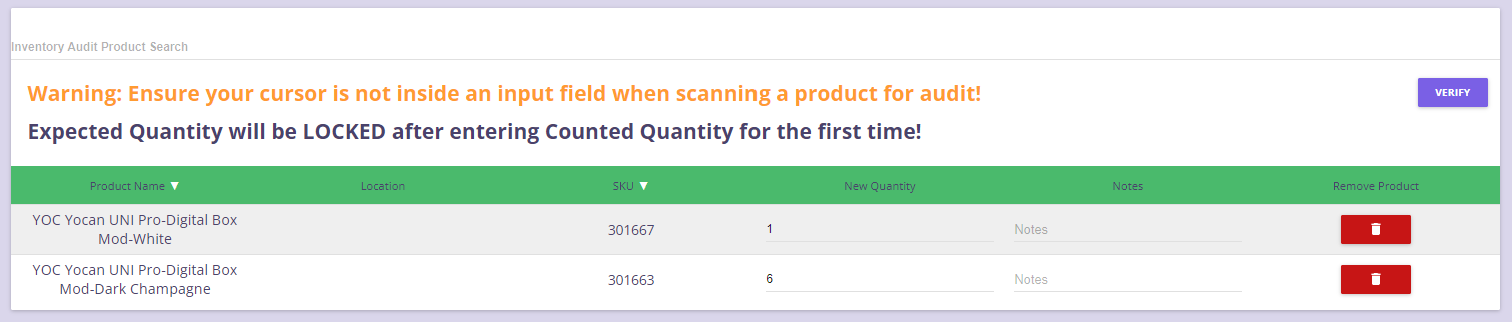
Step 3: Click on Verify to post the recounted quantity.
Adjusting Inventory Quantity (Management Level)
Step 1: To adjust inventory, click on Adjust Button.

Step 2: Choose the warehouse and lot number that need adjustment.
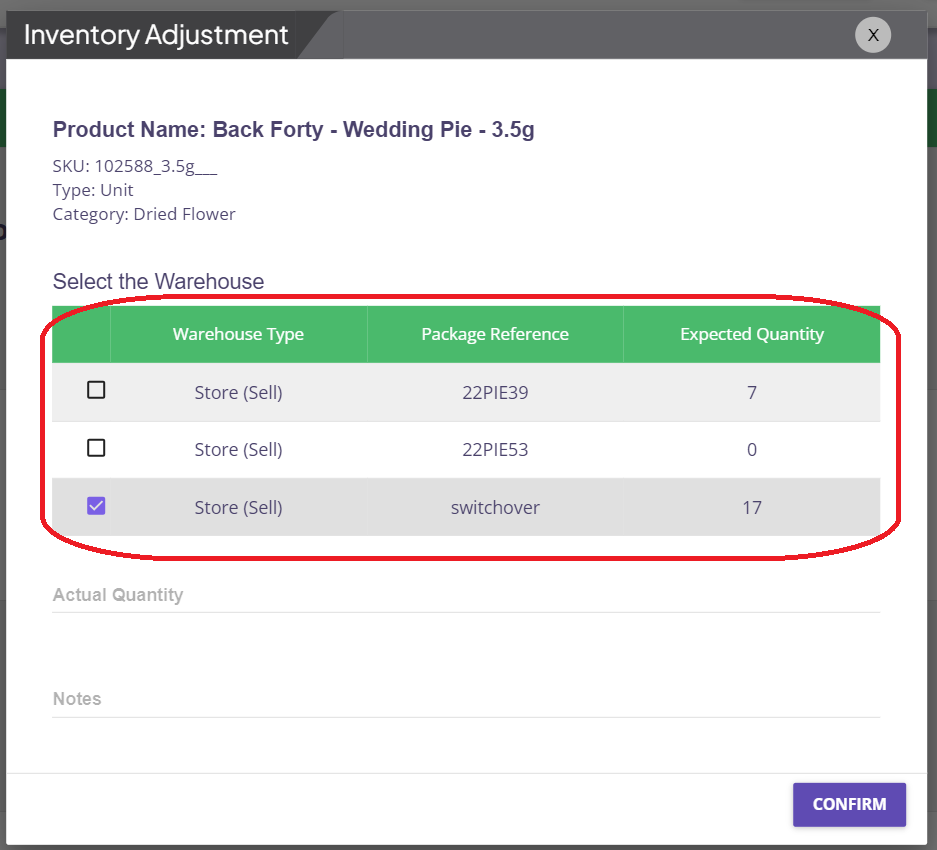
Step 3: Enter the actual quantity for the specified lot and warehouse.
Step 4:The Adjustment Reason code needs to be selected based on the quantity entered. Extra notes can be entered too for tracking.
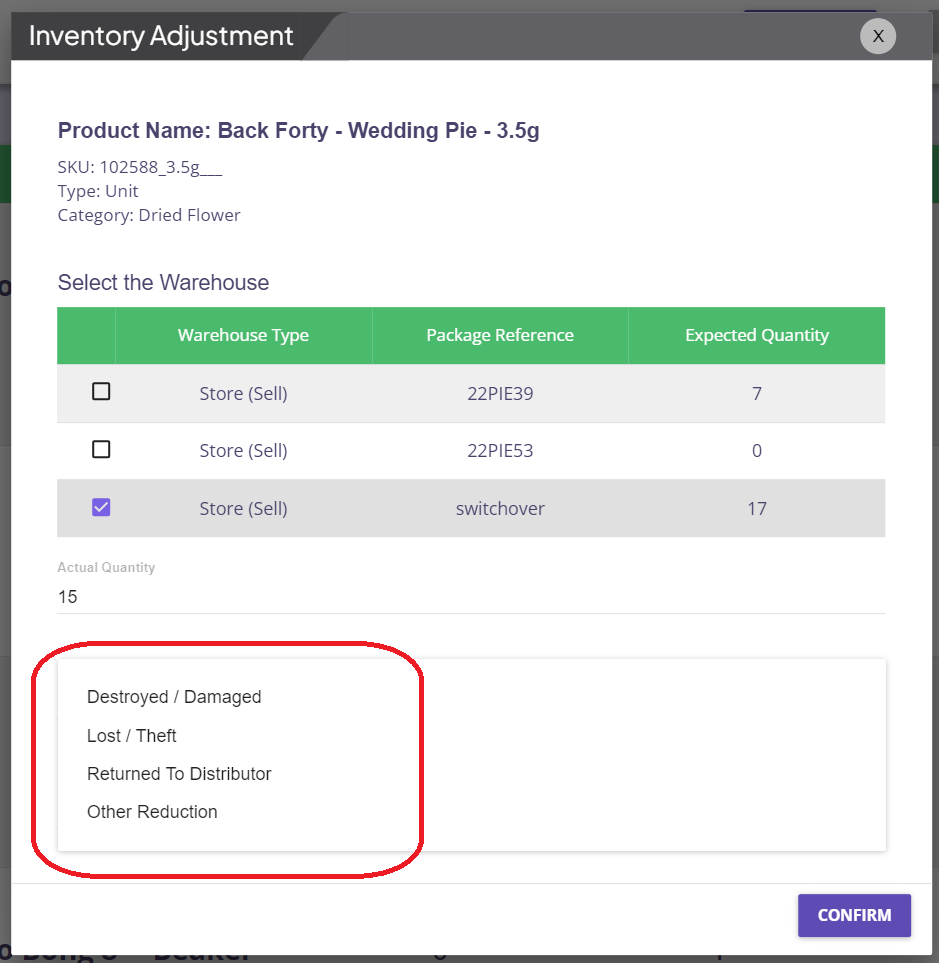
Note: Adjustments and reason codes will be monitored and will seamlessly appear in compliance reports.
Step 5: The verification and recounting process will continue until it is fully completed and finalized. Click on Complete button once finalized.

Managing Inventory Audits
You can view, edit, delete, and download audits. Completed audits are viewable, pending audits are editable, and all audits can be downloaded in csv format.
