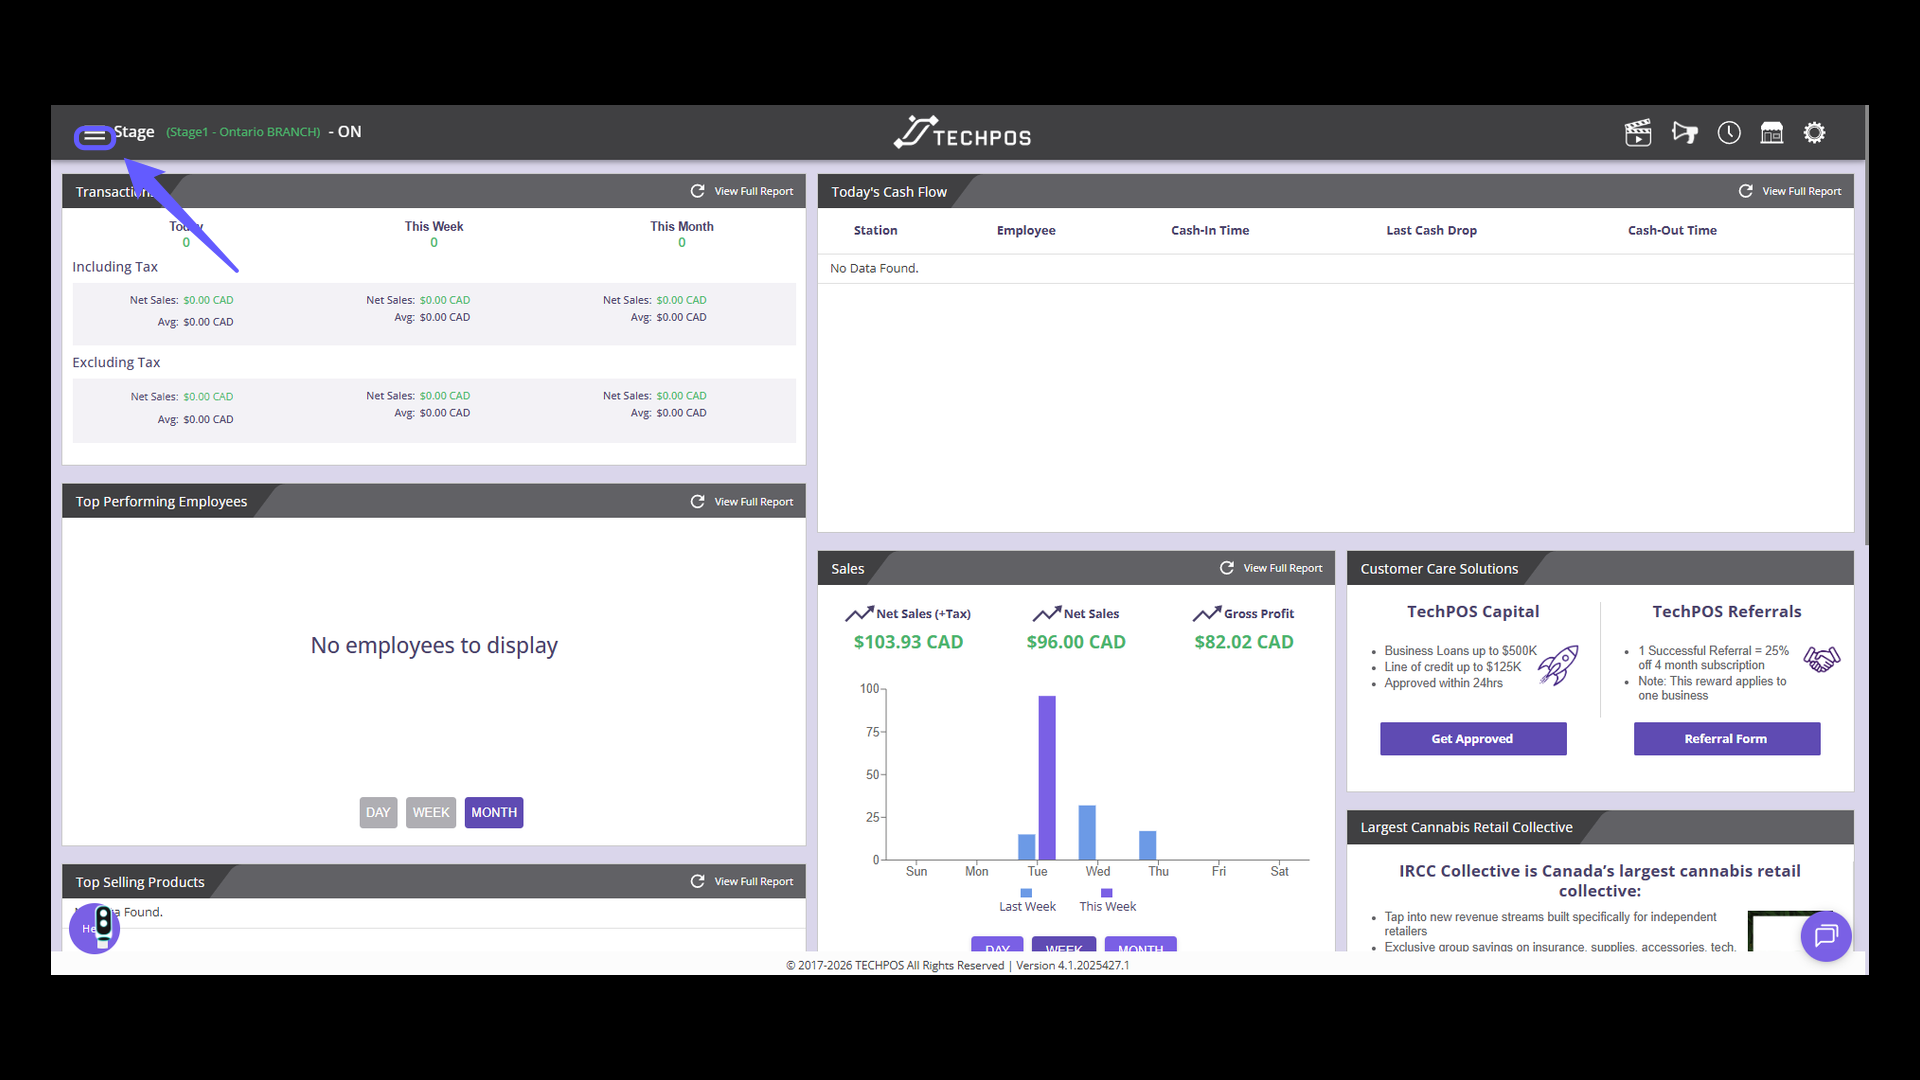
1. Access the Menu
Click the icon to open the main menu and access your TechPOS menu.
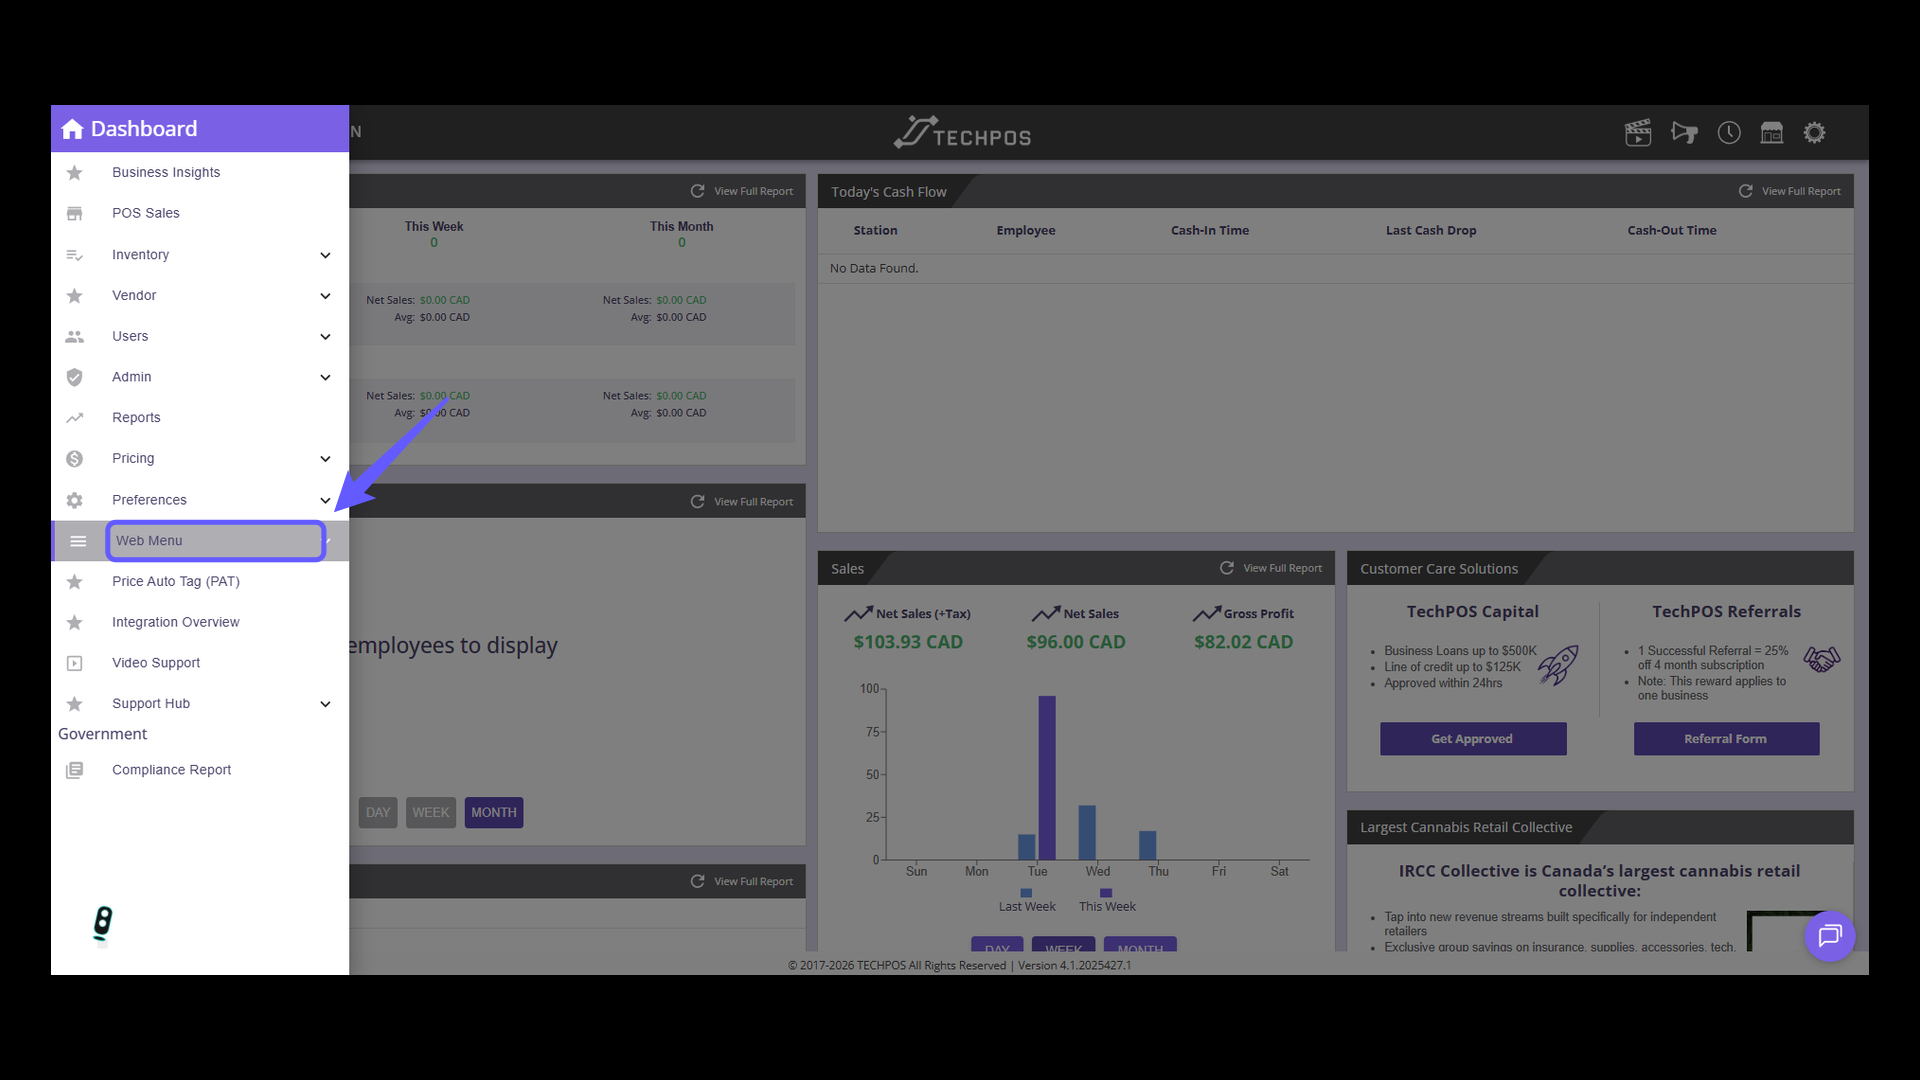
2. From your TechPOS menu...
Select 'Web Menu' under 'Preferences' to access web-related settings.
3. Access UI Settings
Select 'UI Setting' in the menu to modify the user interface configurations.

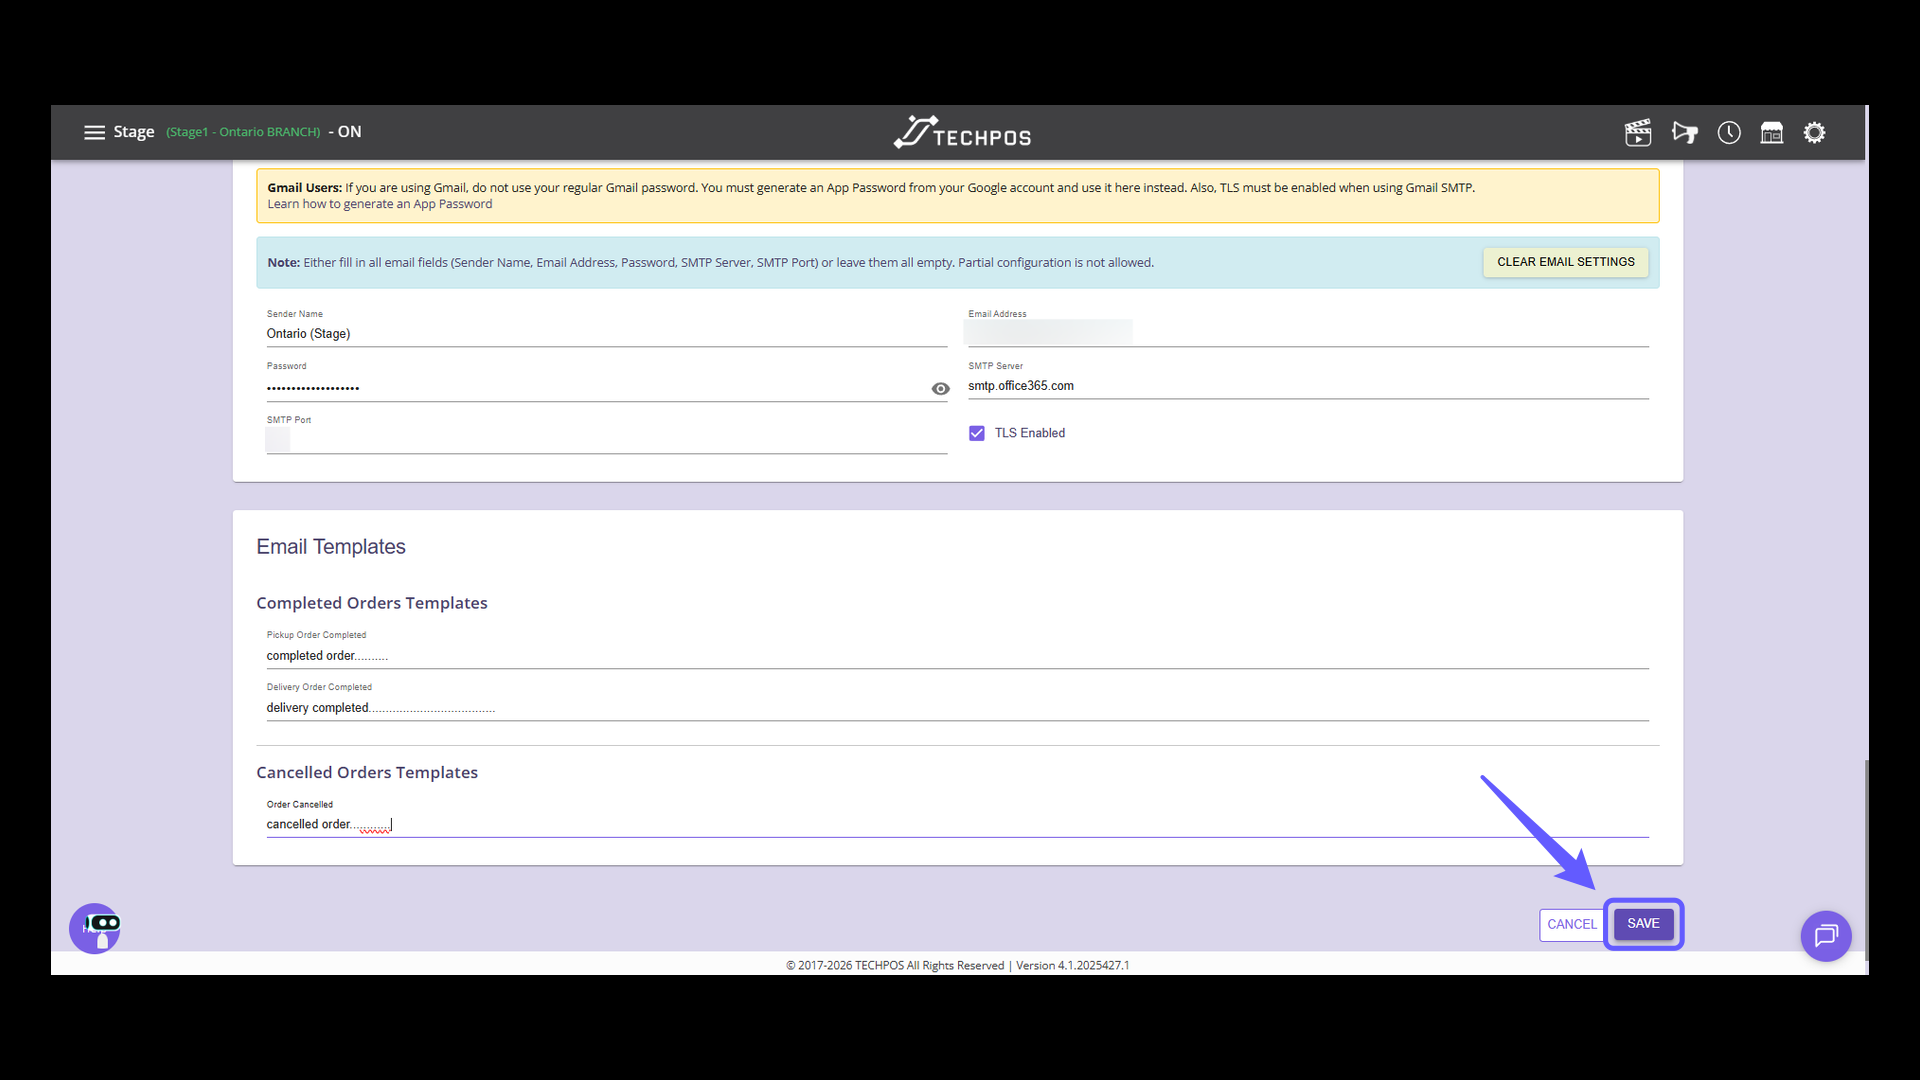
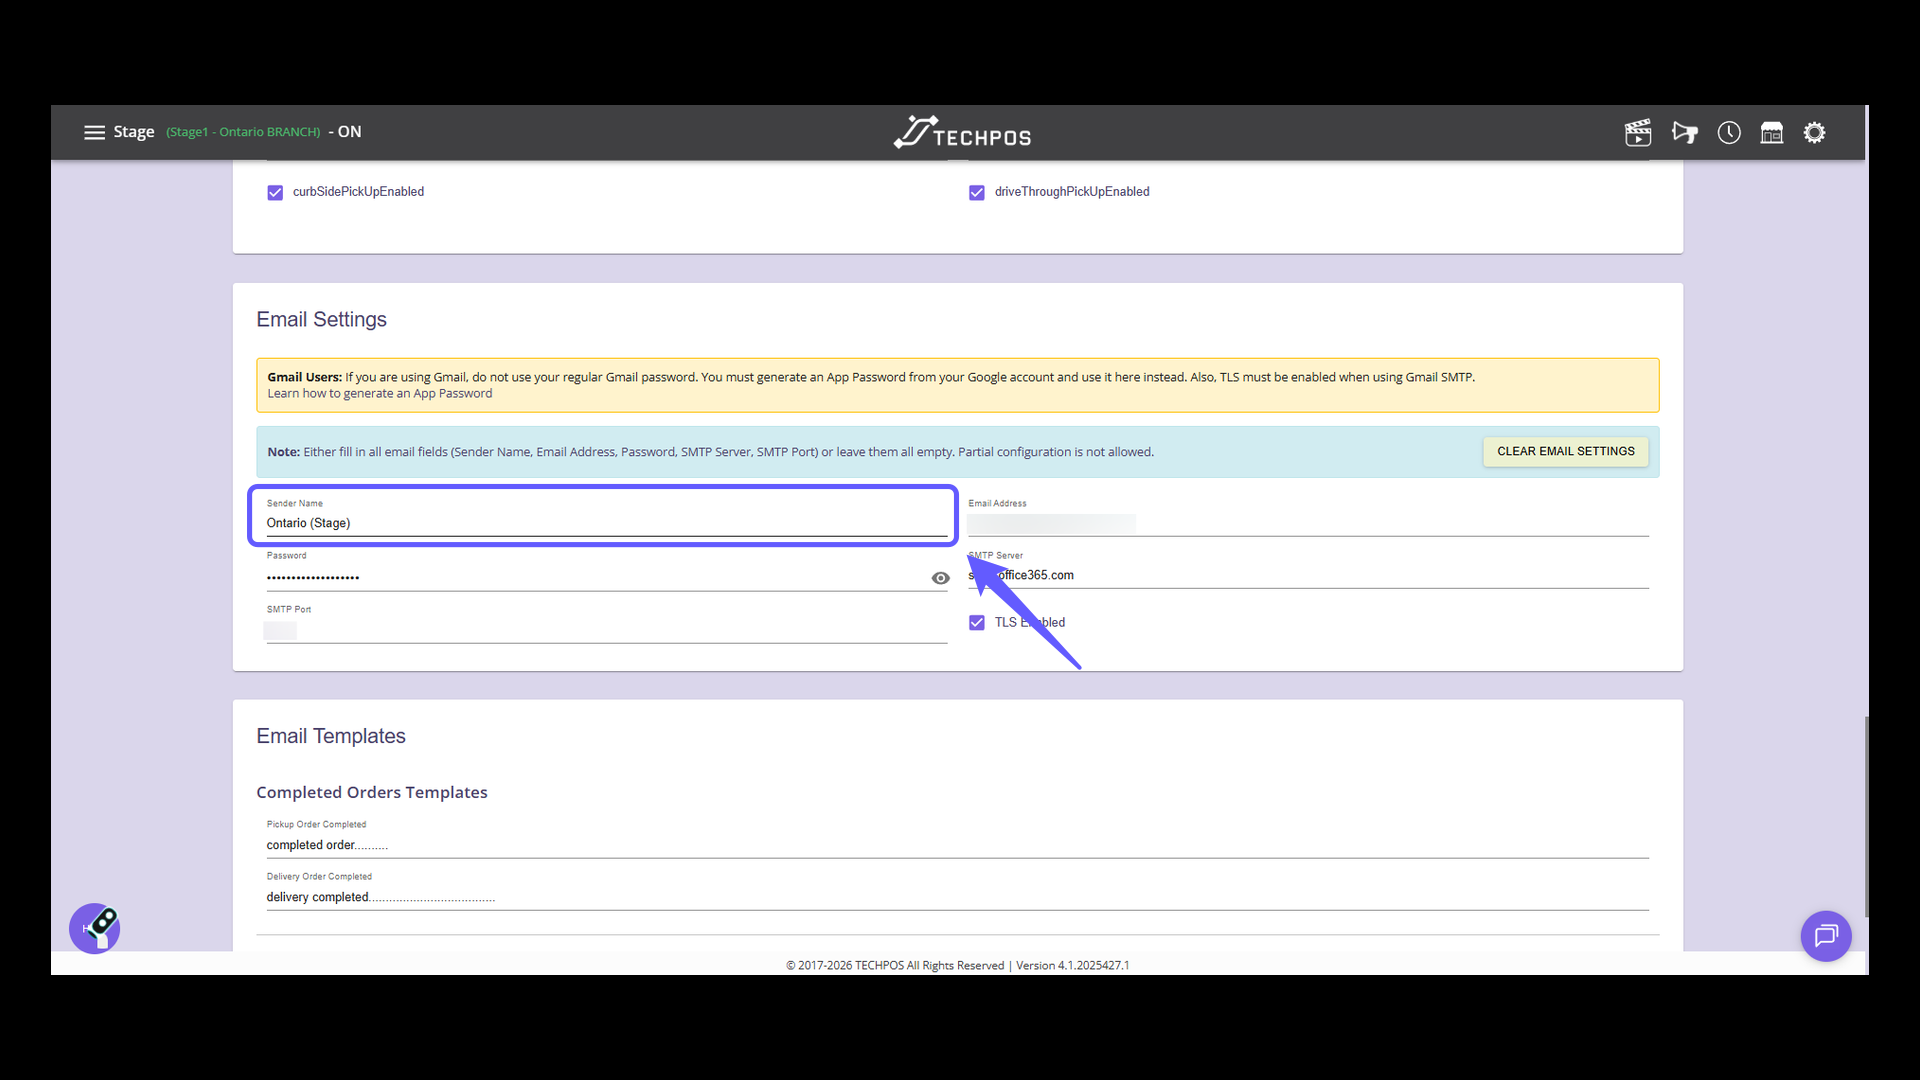
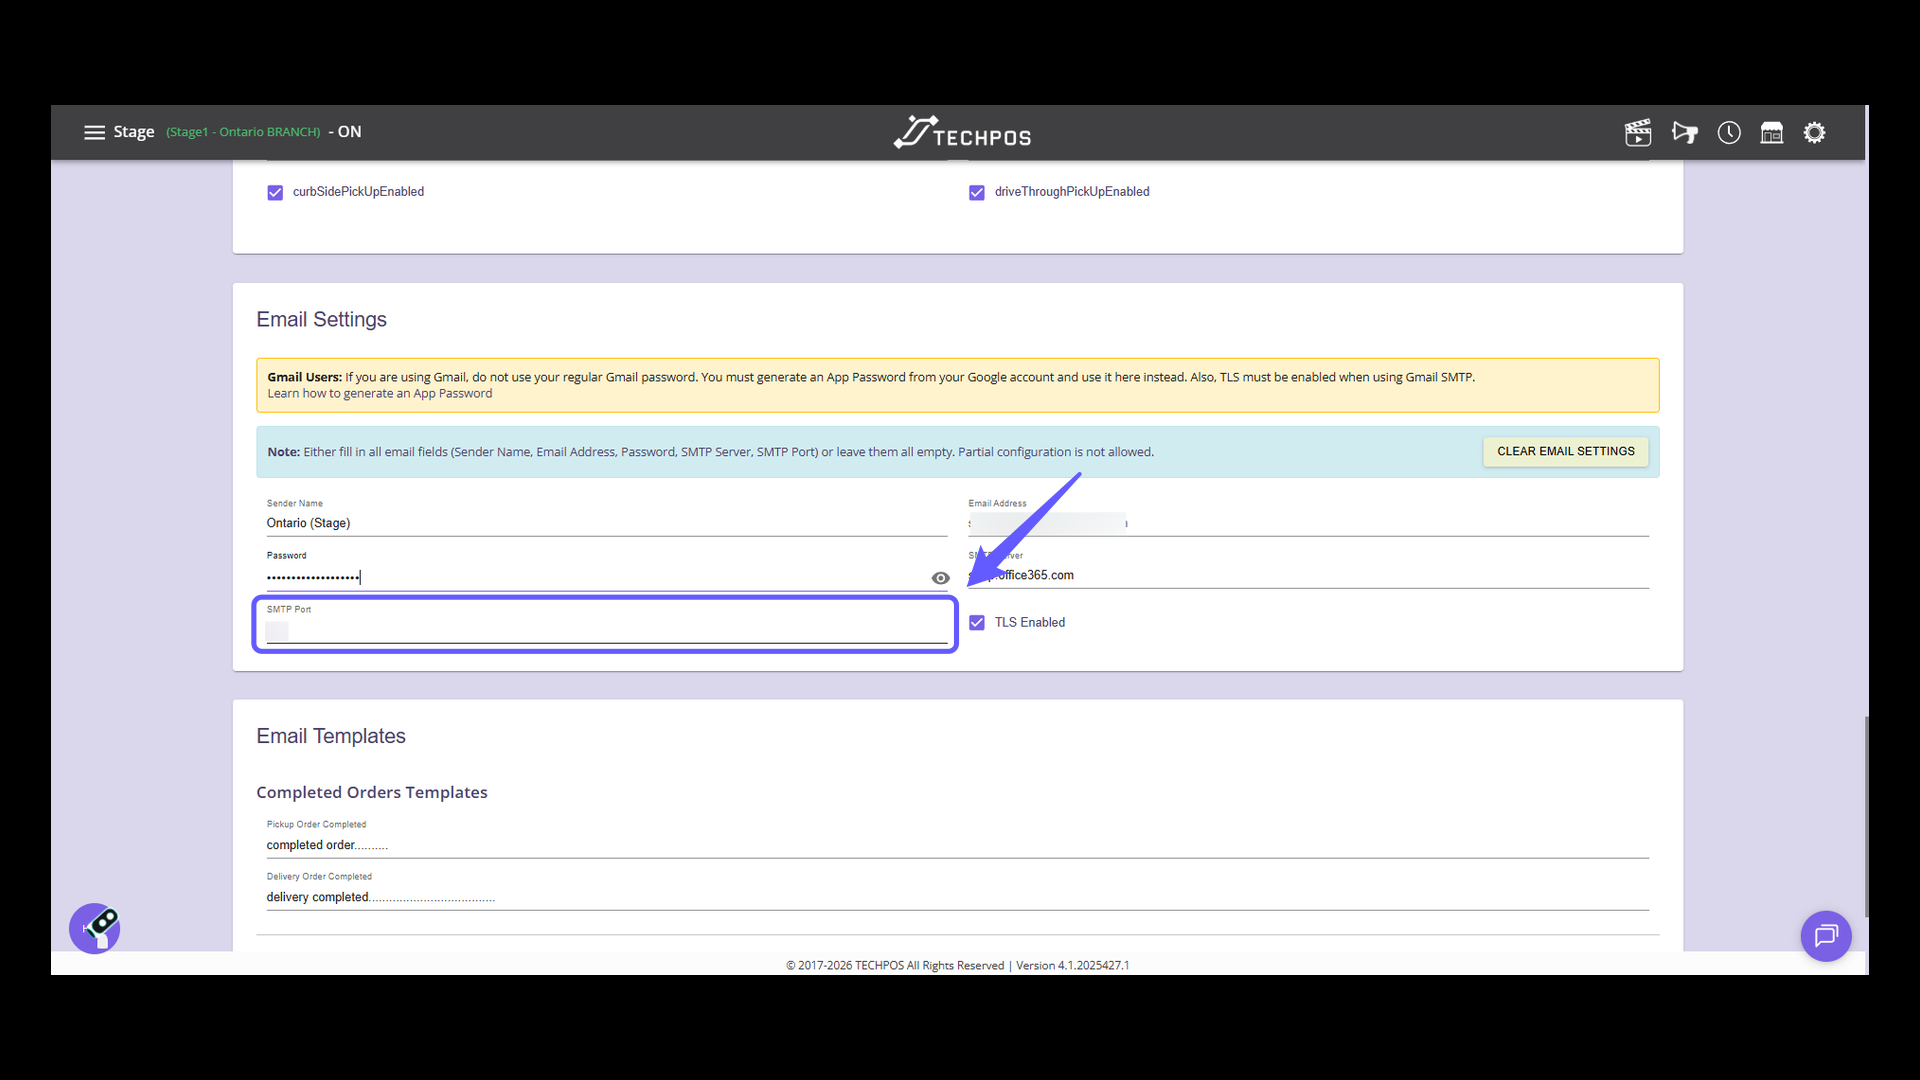
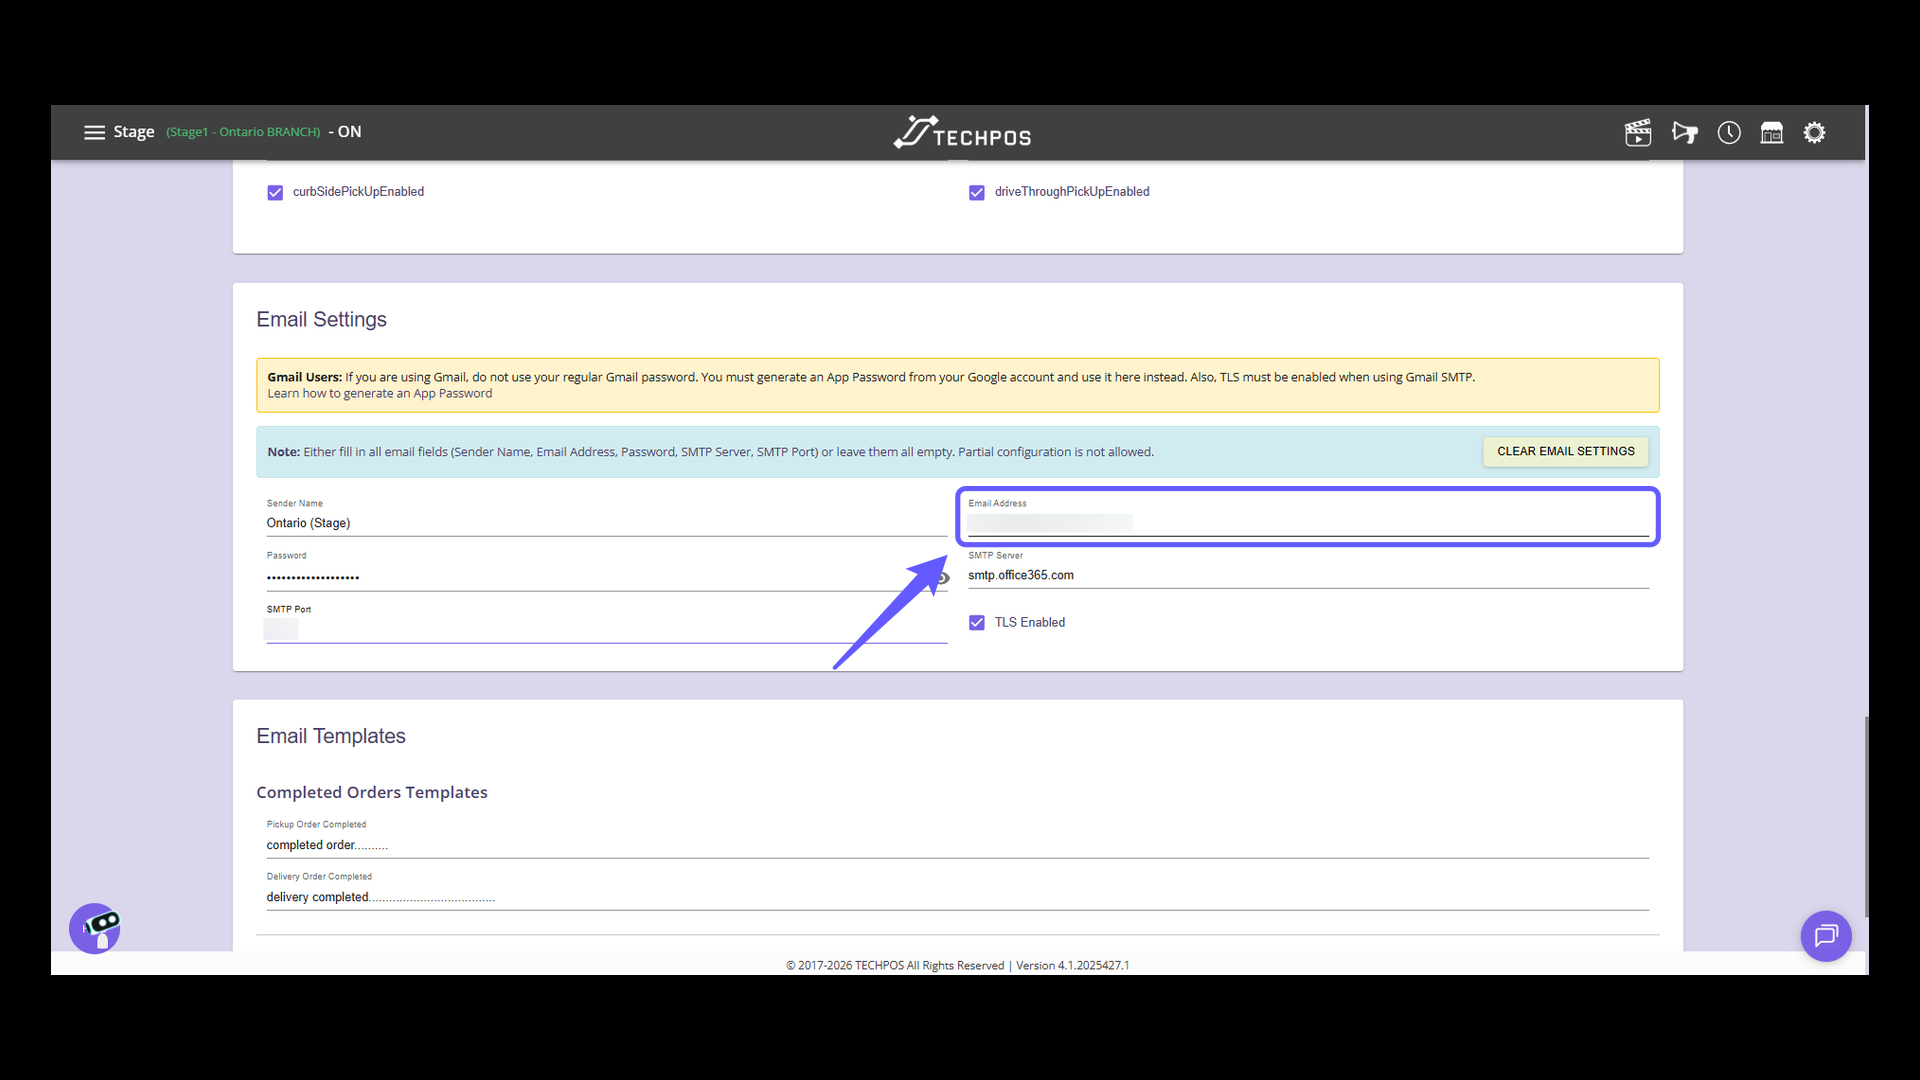
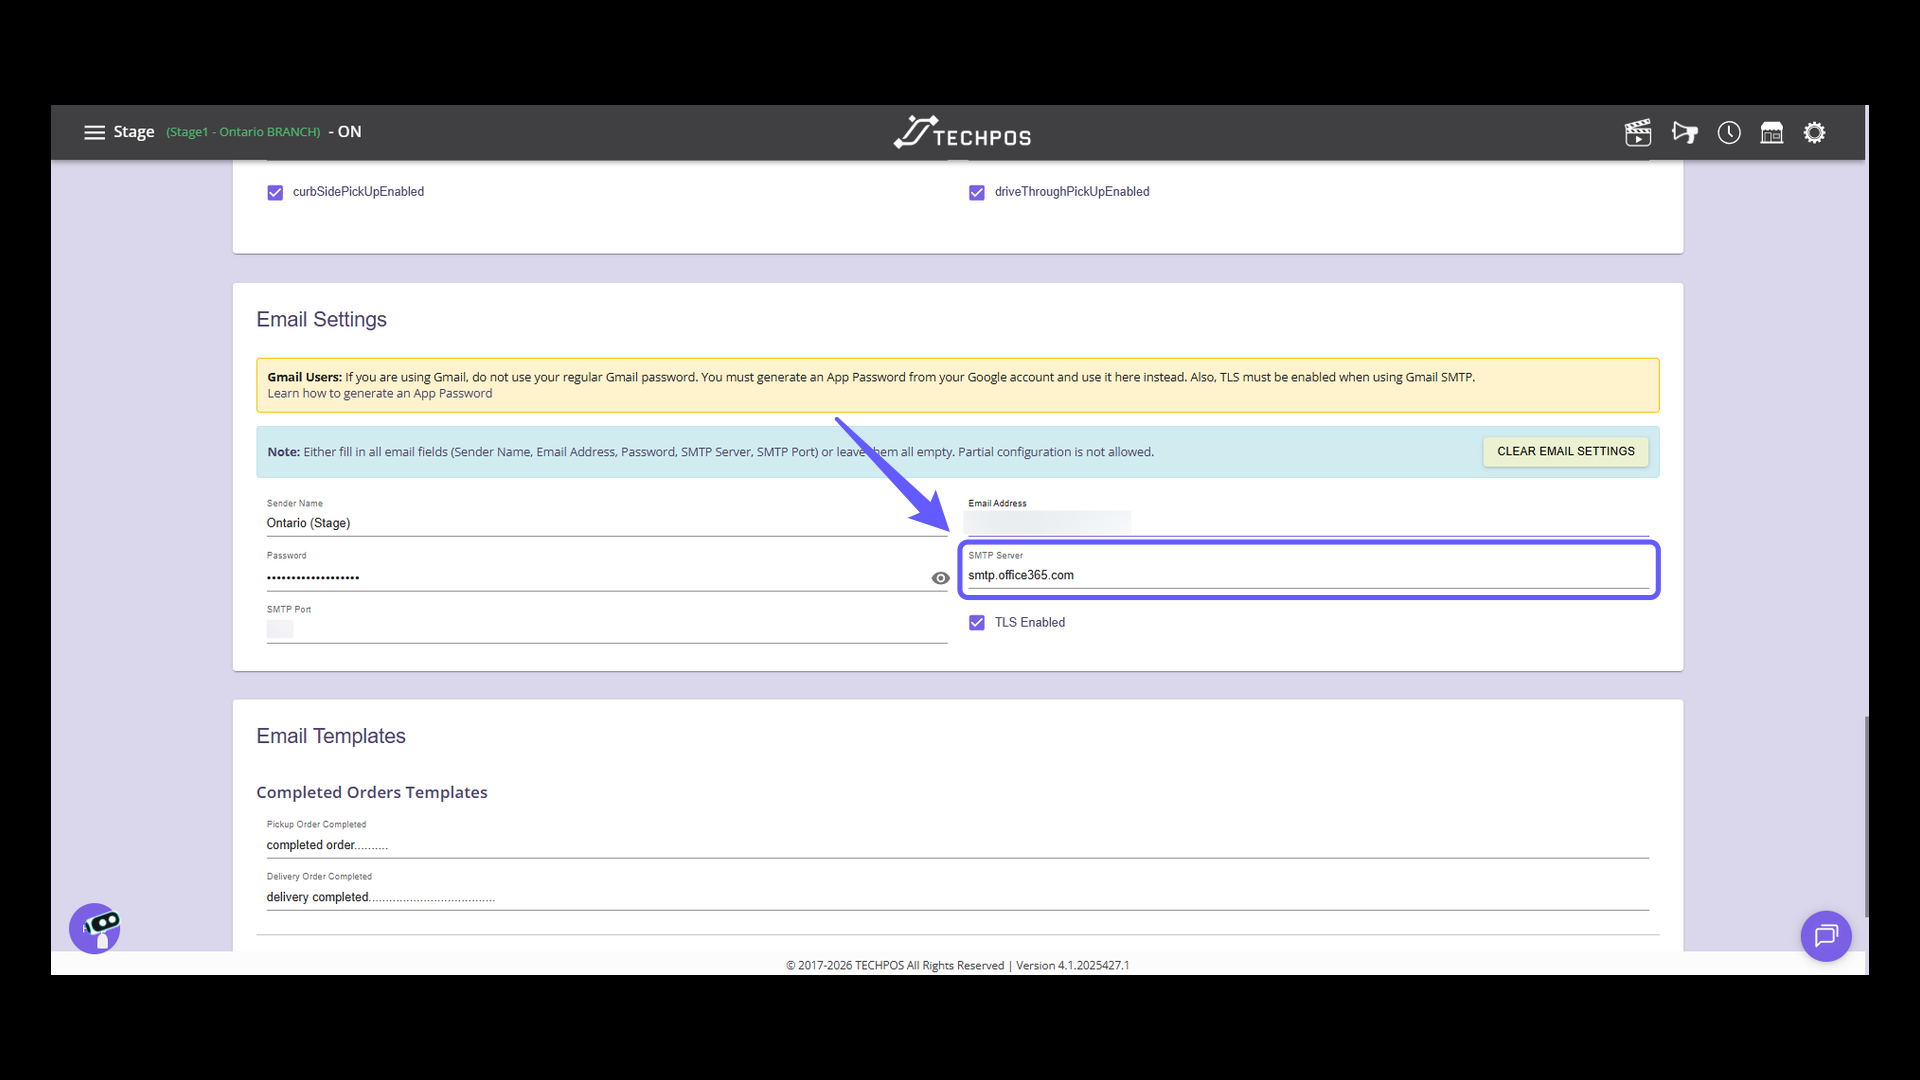
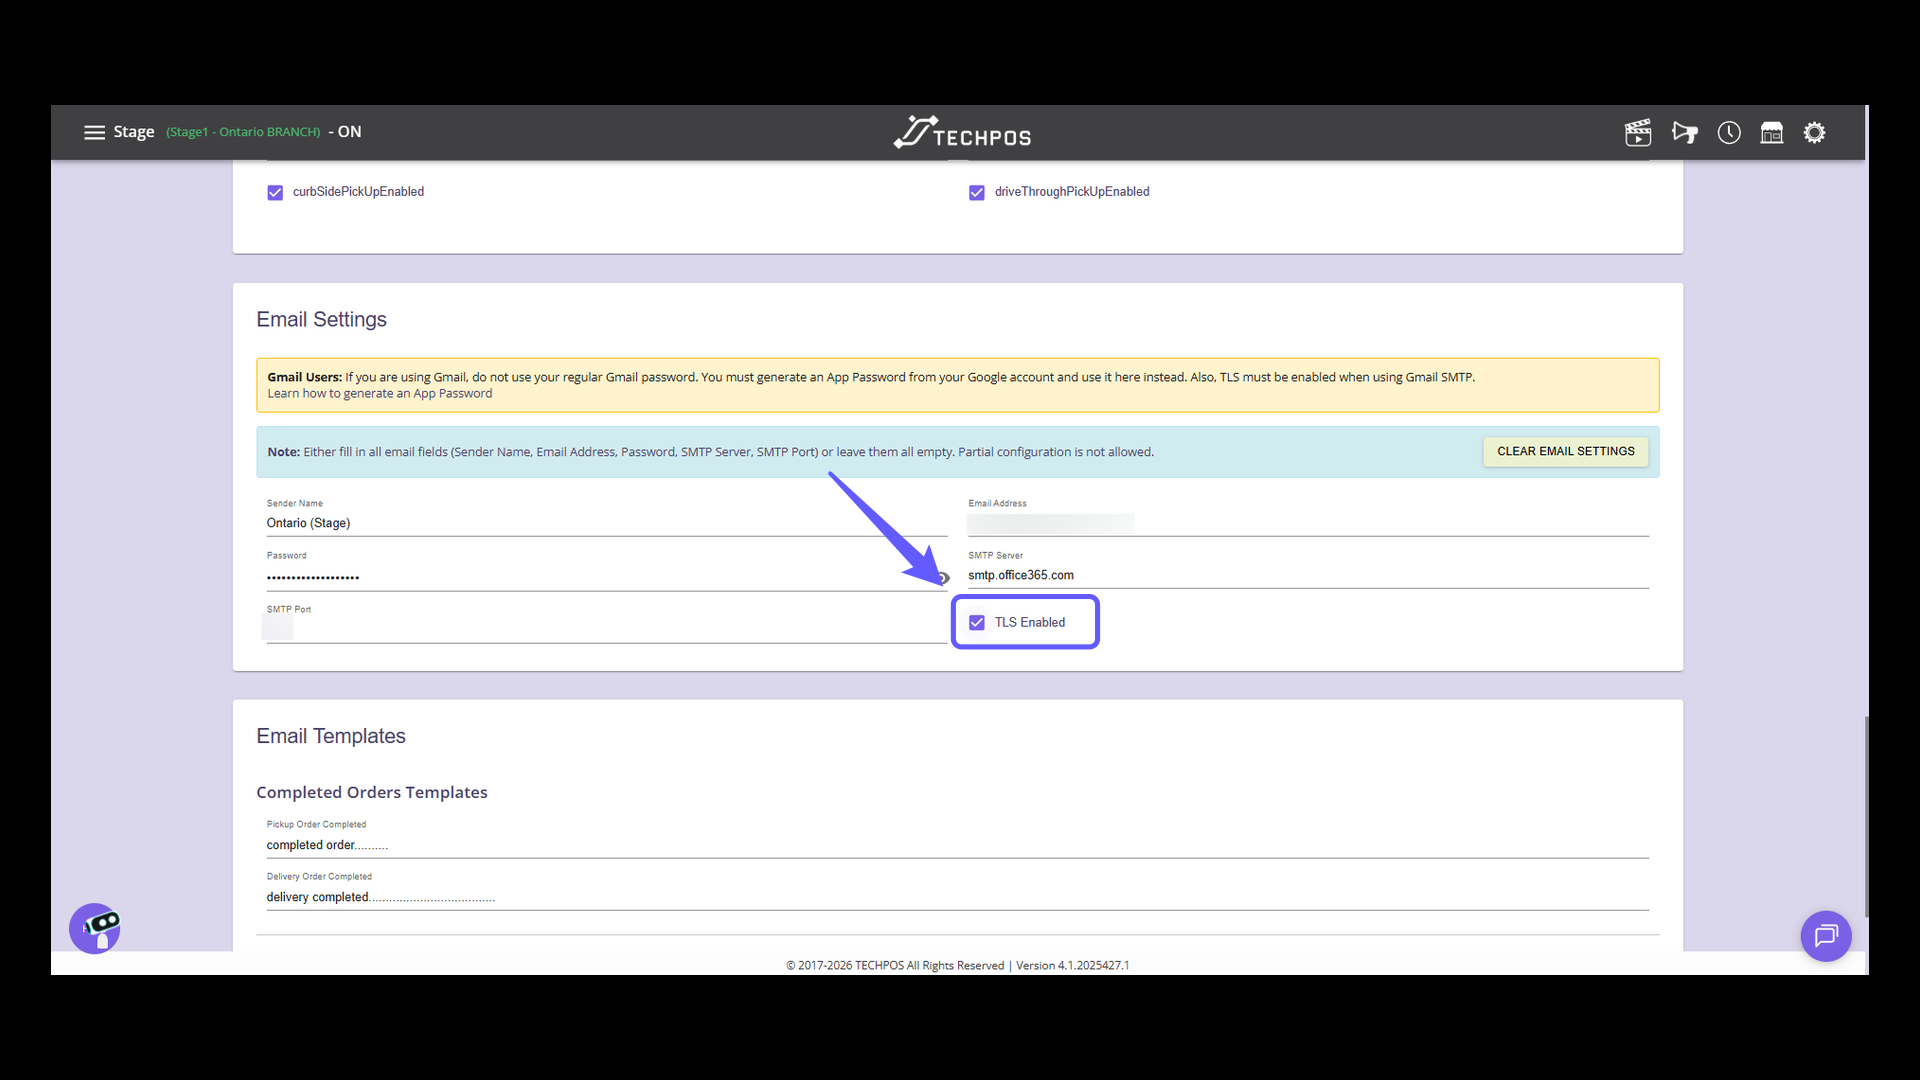
4. Email Settings Section
Sender Name: Specifies the display name that recipients will see as the sender of the email.
5. Password
Specifies the password associated with the configured email account.

6. Port
Specifies the port number used to connect to the SMTP server.
7. E-mail Address
Specifies the email address that will be used to send emails to customers.
8. SMTP Server
Specifies the SMTP server used for sending outgoing emails.
9. TLS Enabled
Determines whether TLS encryption is used when connecting to the SMTP server. The TLS Enabled setting depends on the email service provider being used. Consult your email provider's documentation to determine whether TLS should be enabled.
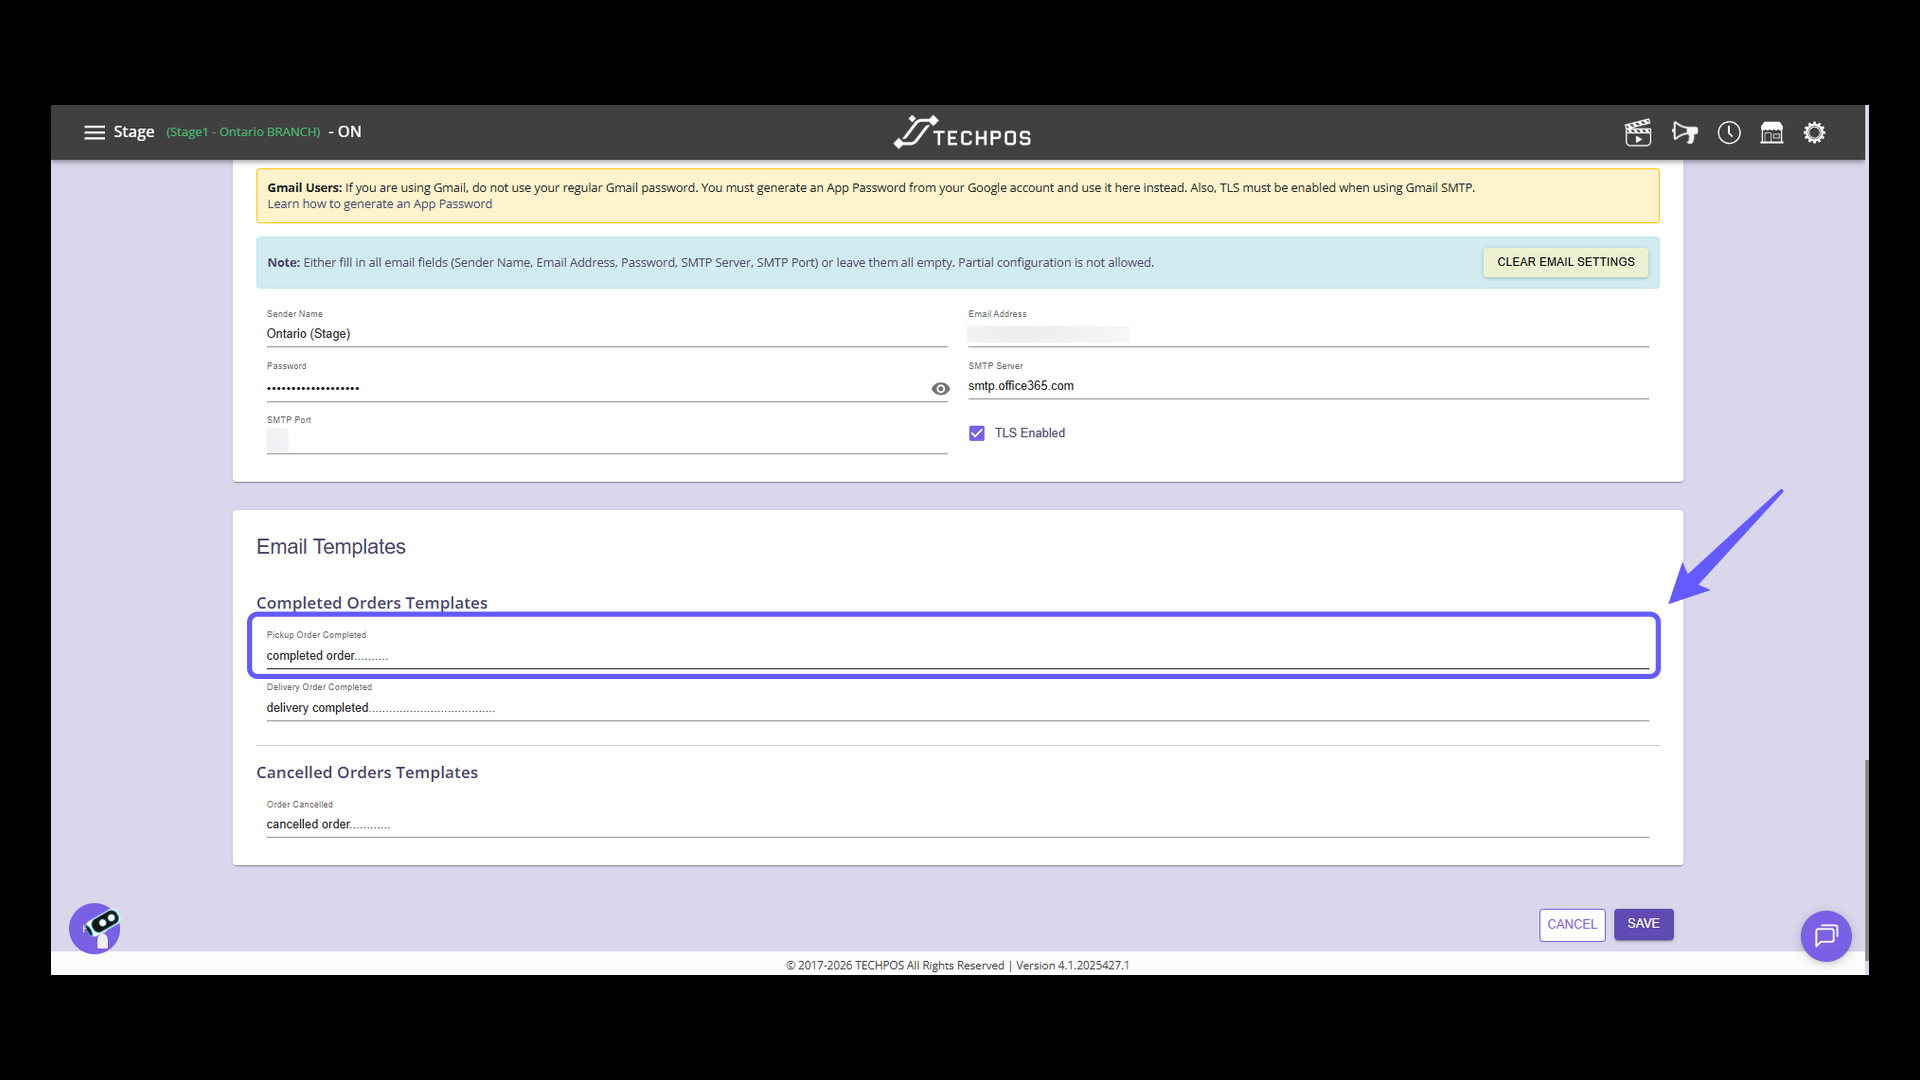
10. Custom Email Templates for Completed Online Orders and Cancelled Online Orders. Pickup Order Completed
The Pickup Order Completed field allows you to configure the email message that will be sent to customers when a pickup order has been completed.
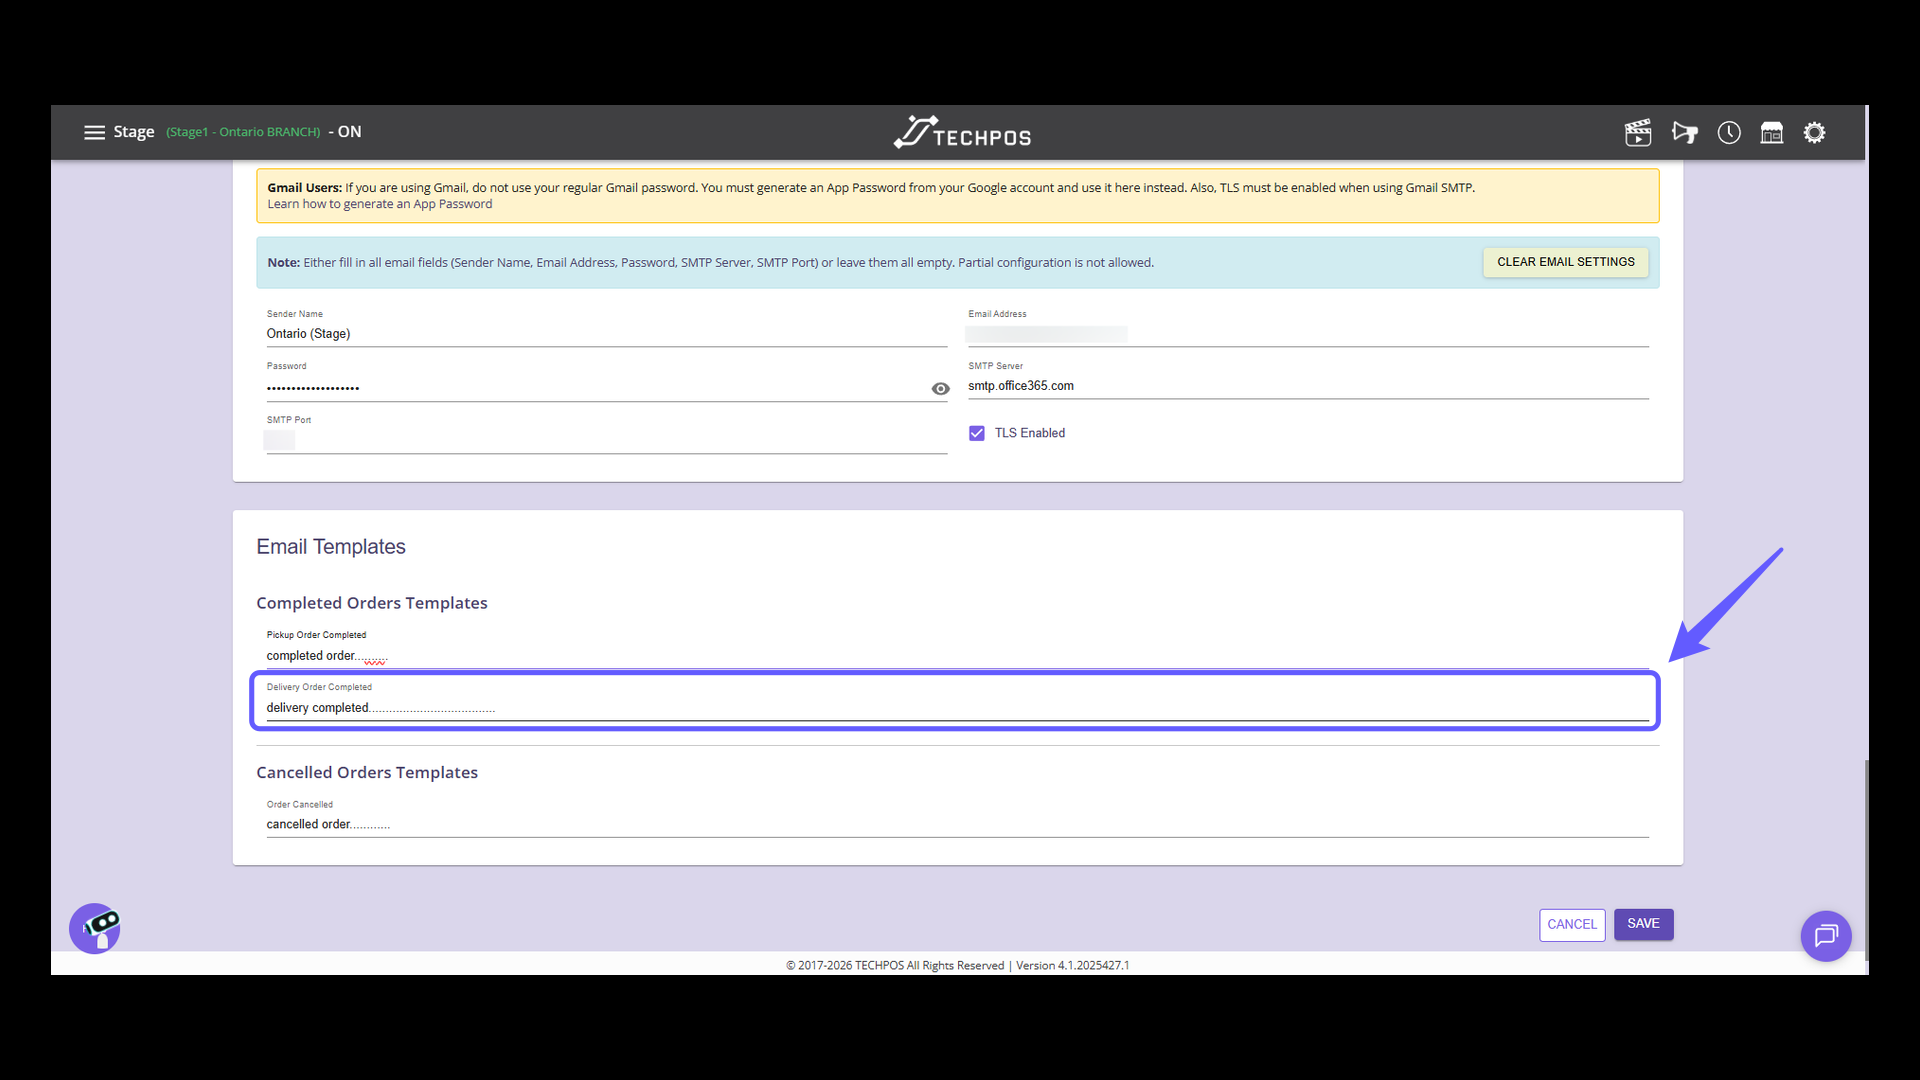
11. Delivery Order Completed
The Delivery Order Completed field allows you to configure the email message that will be sent to customers when a delivery order has been completed.
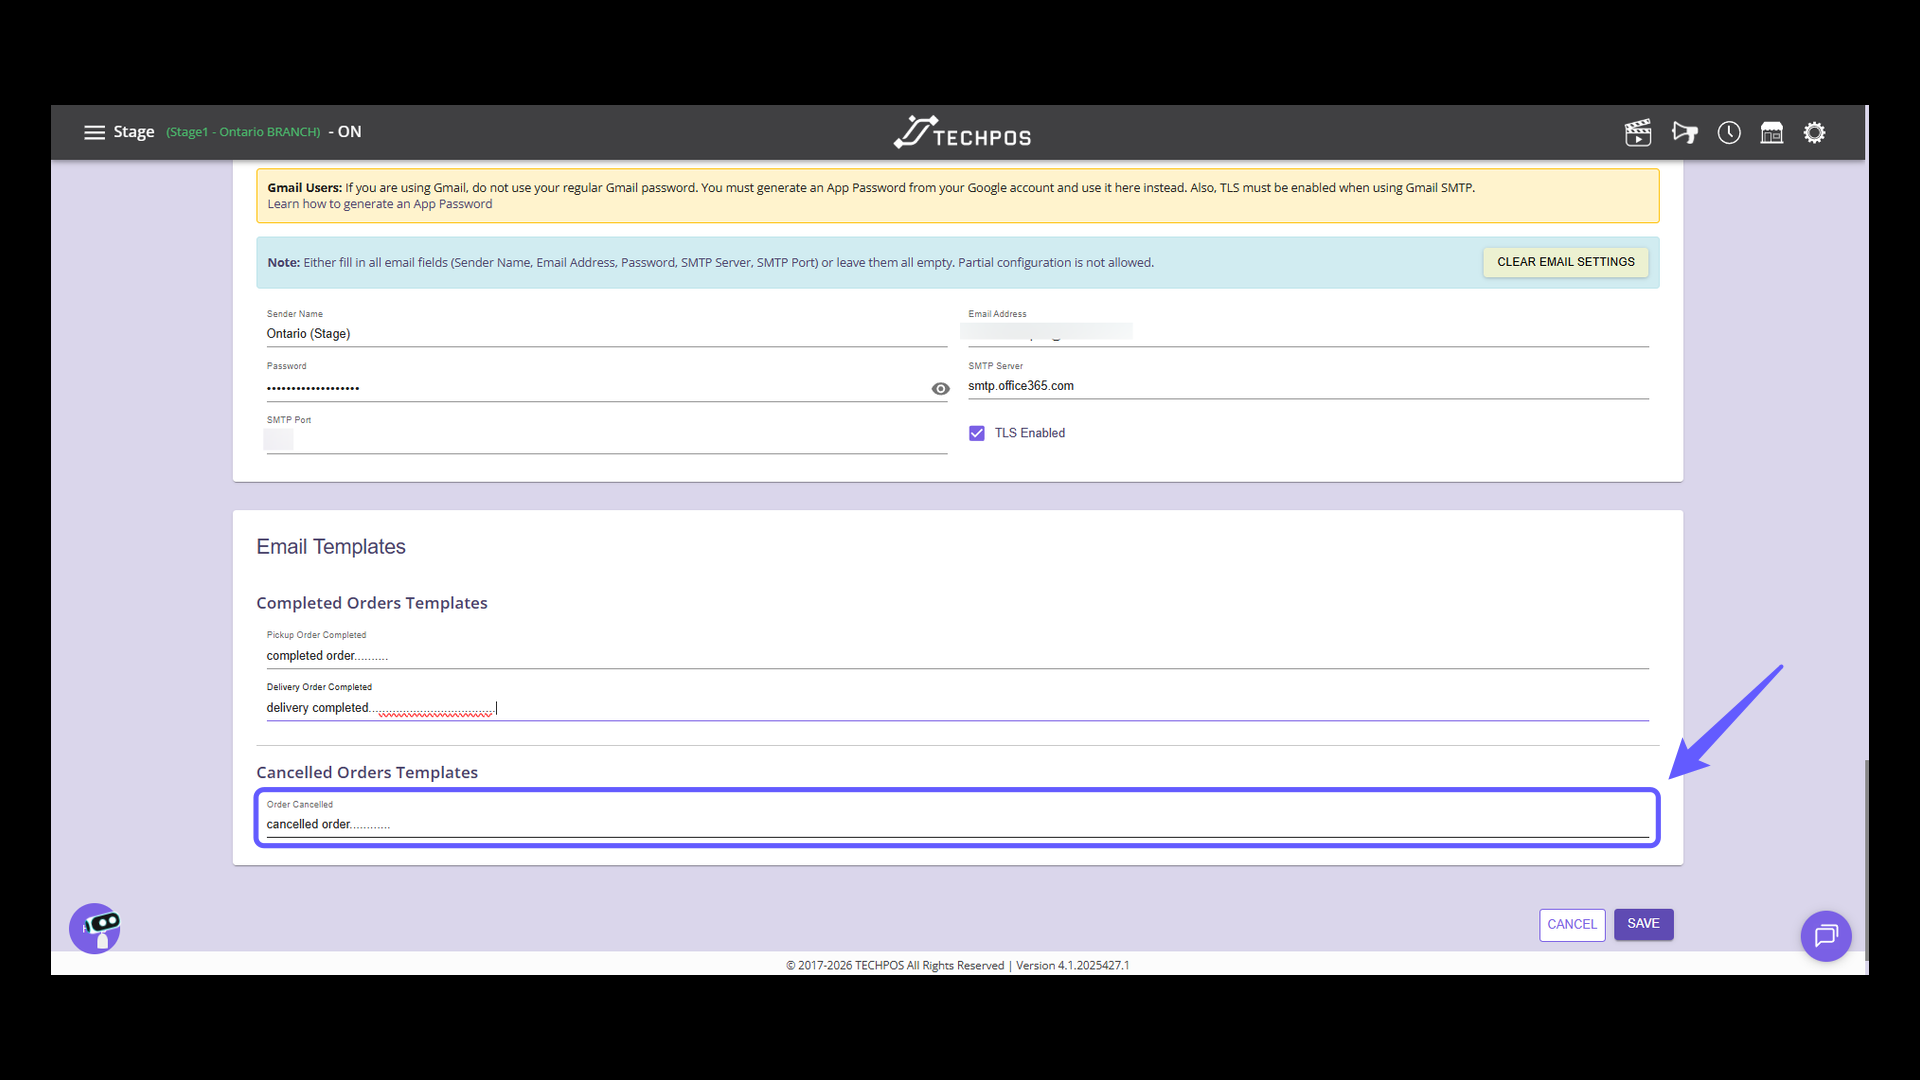
12. Order Cancelled
The Order Cancelled field allows you to configure the email message that will be sent to customers when an order has been cancelled.
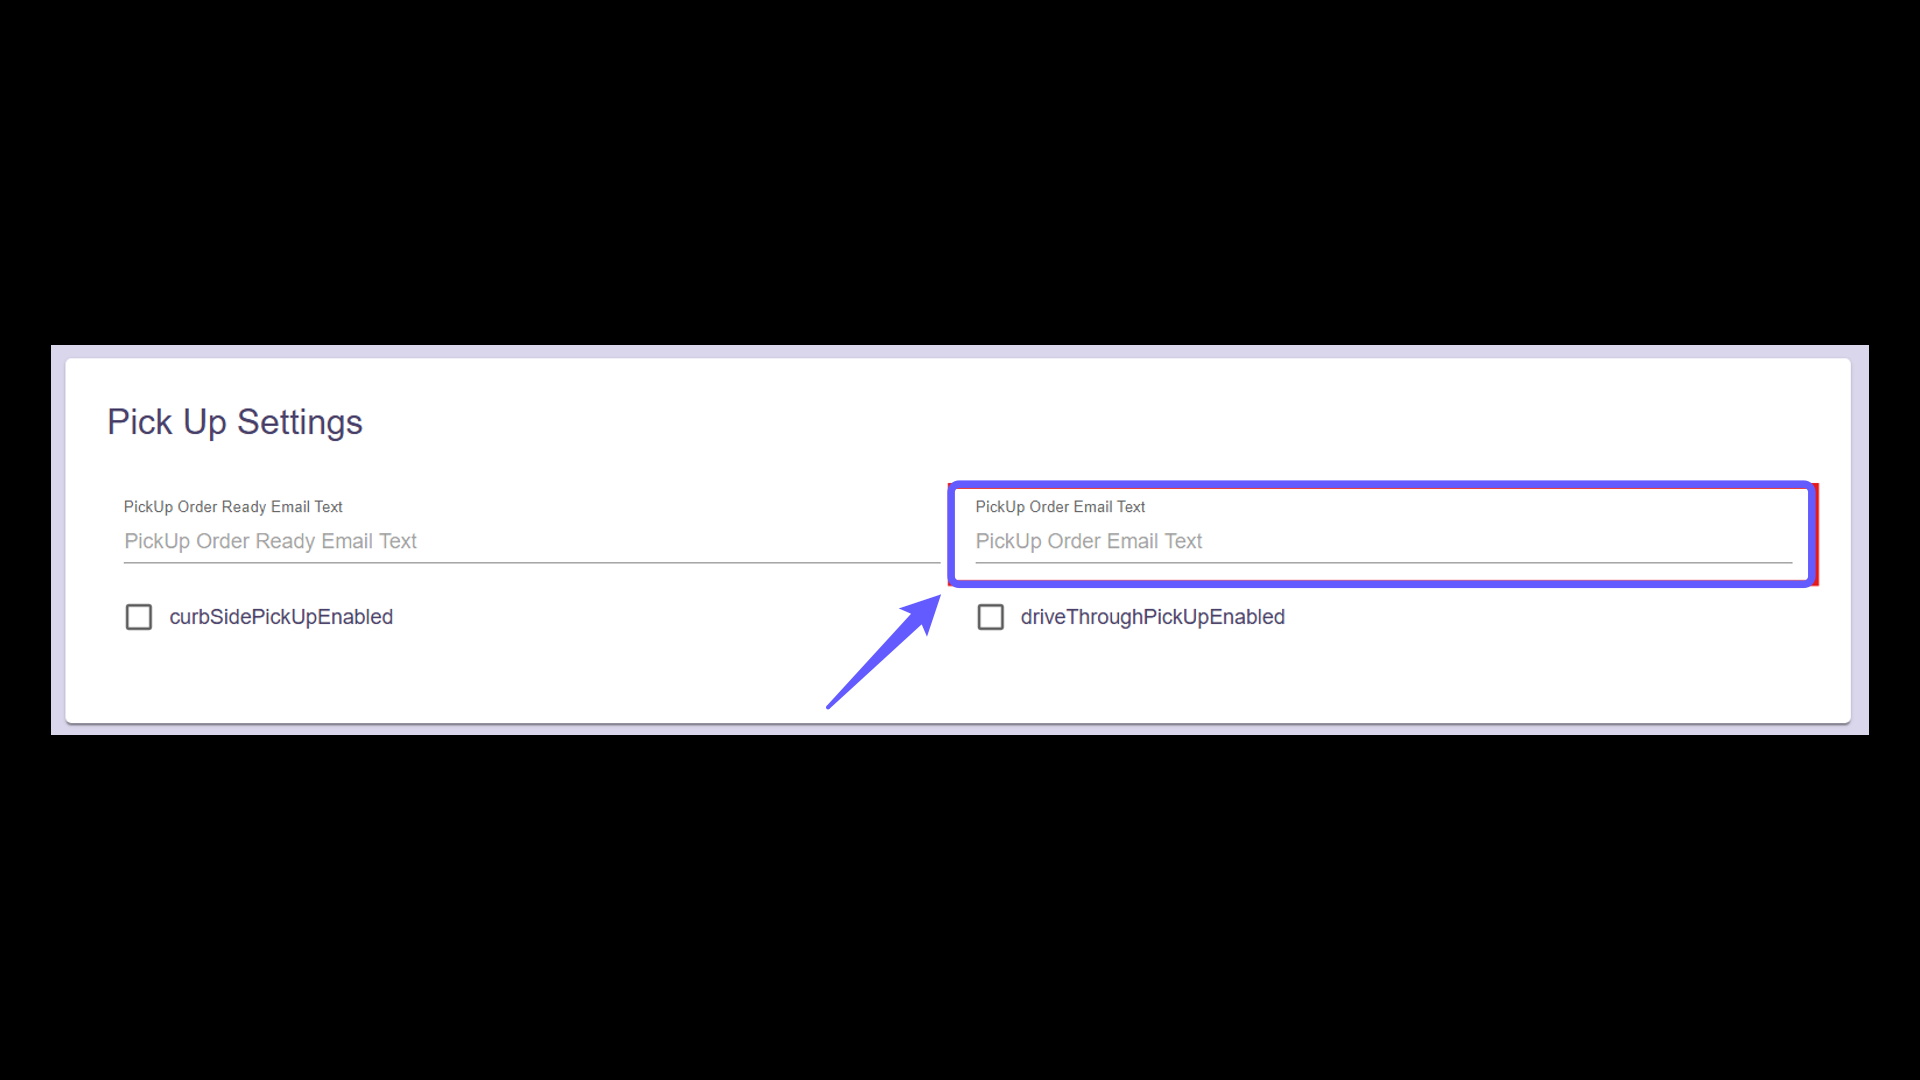
13. Pick Up Settings (New Field Added)
A new field, PickUp Order Email Text, has been added to the Pick Up Settings section. This field allows to configure the email message that will be sent to customers when a new pickup order is created.
14. Save the changes
Press the save button to apply your changes and update all adjustments made on the UI settings page.