With a few simple steps, you can add store rules, create carousels, and organize categories to optimize the functionality and appearance of your online store.
1. Adding/Modifying Store Rules
Store Rules like refund policy, store hours, or any messages customers should know can be added and customized.
Step 1: Go to Menu > Web Menu > Store Rules ListStep 2: Click on Add New Rule and enter any the rule name or title
Step 3: Click on Add New Content button to enter the rule content

2. Adding/Modifying a Carousel
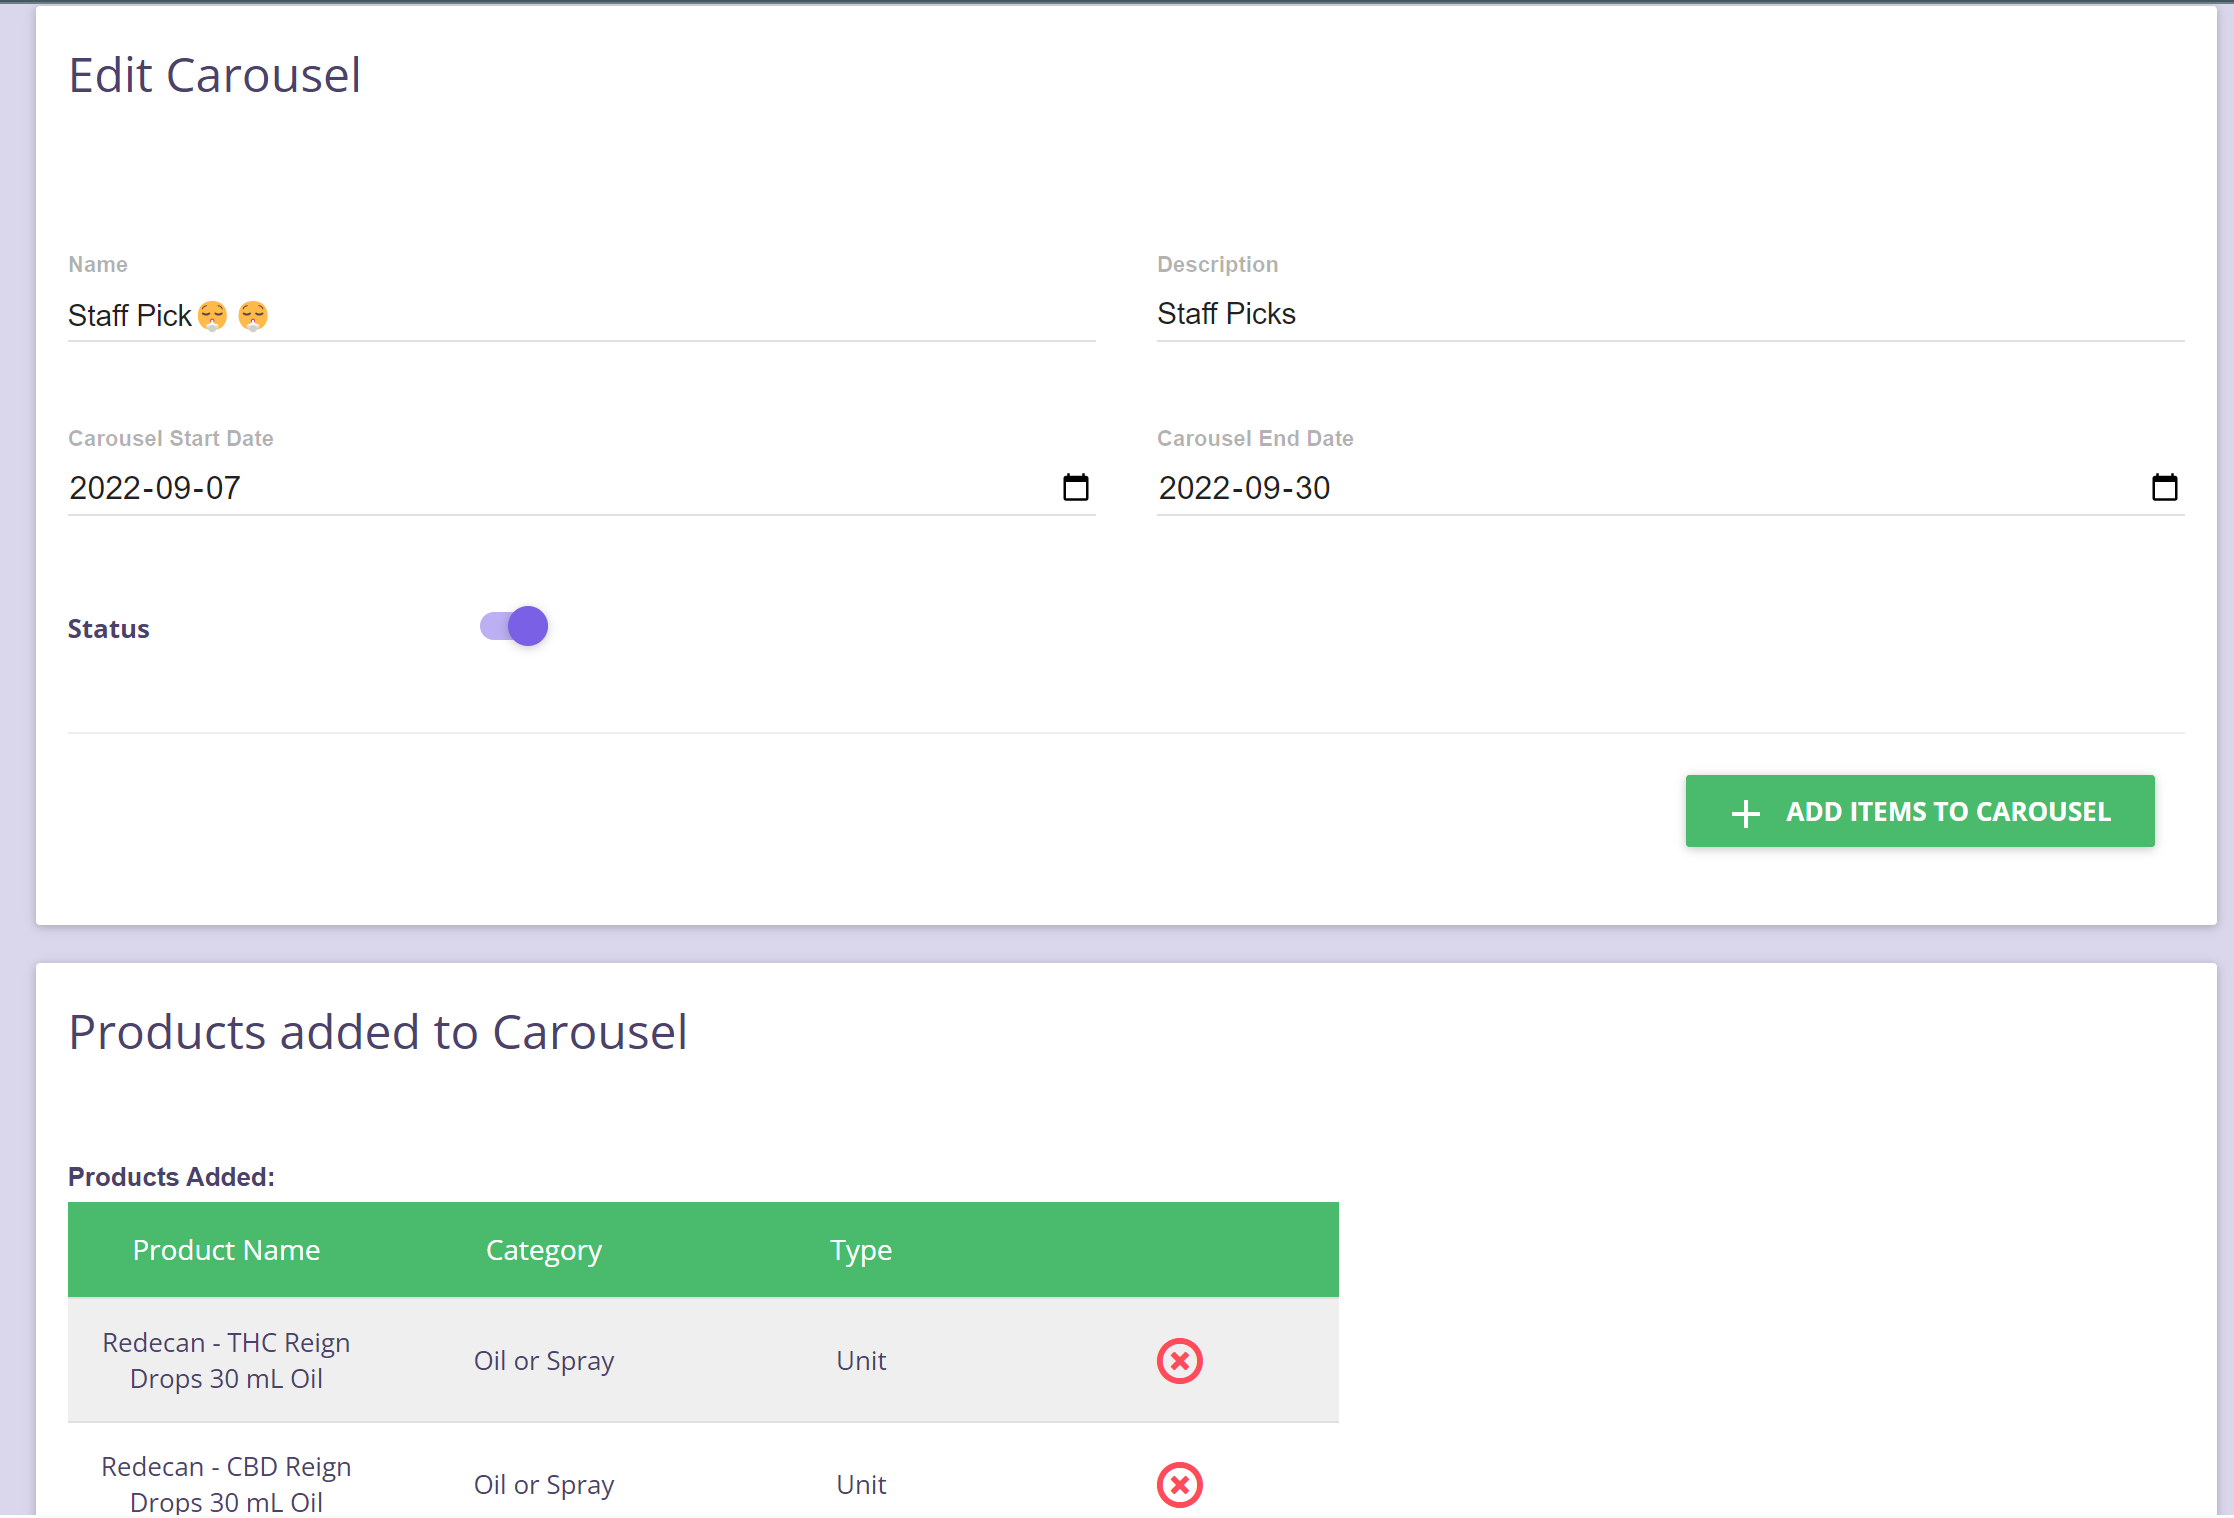
Step 1: Go to Menu > Web Menu > Carousel ListStep 2: Click on Add New Carousel (Or Edit Existing Carousel)
Step 3: Fill out the Carousel Name and Description
Step 4: Click on Add Items to Carousel. Either categories or specific products can be added inside the carousel
Step 5: The carousel Start and End Date can be set up from here to. It will automatically hide and show based on the dates entered.
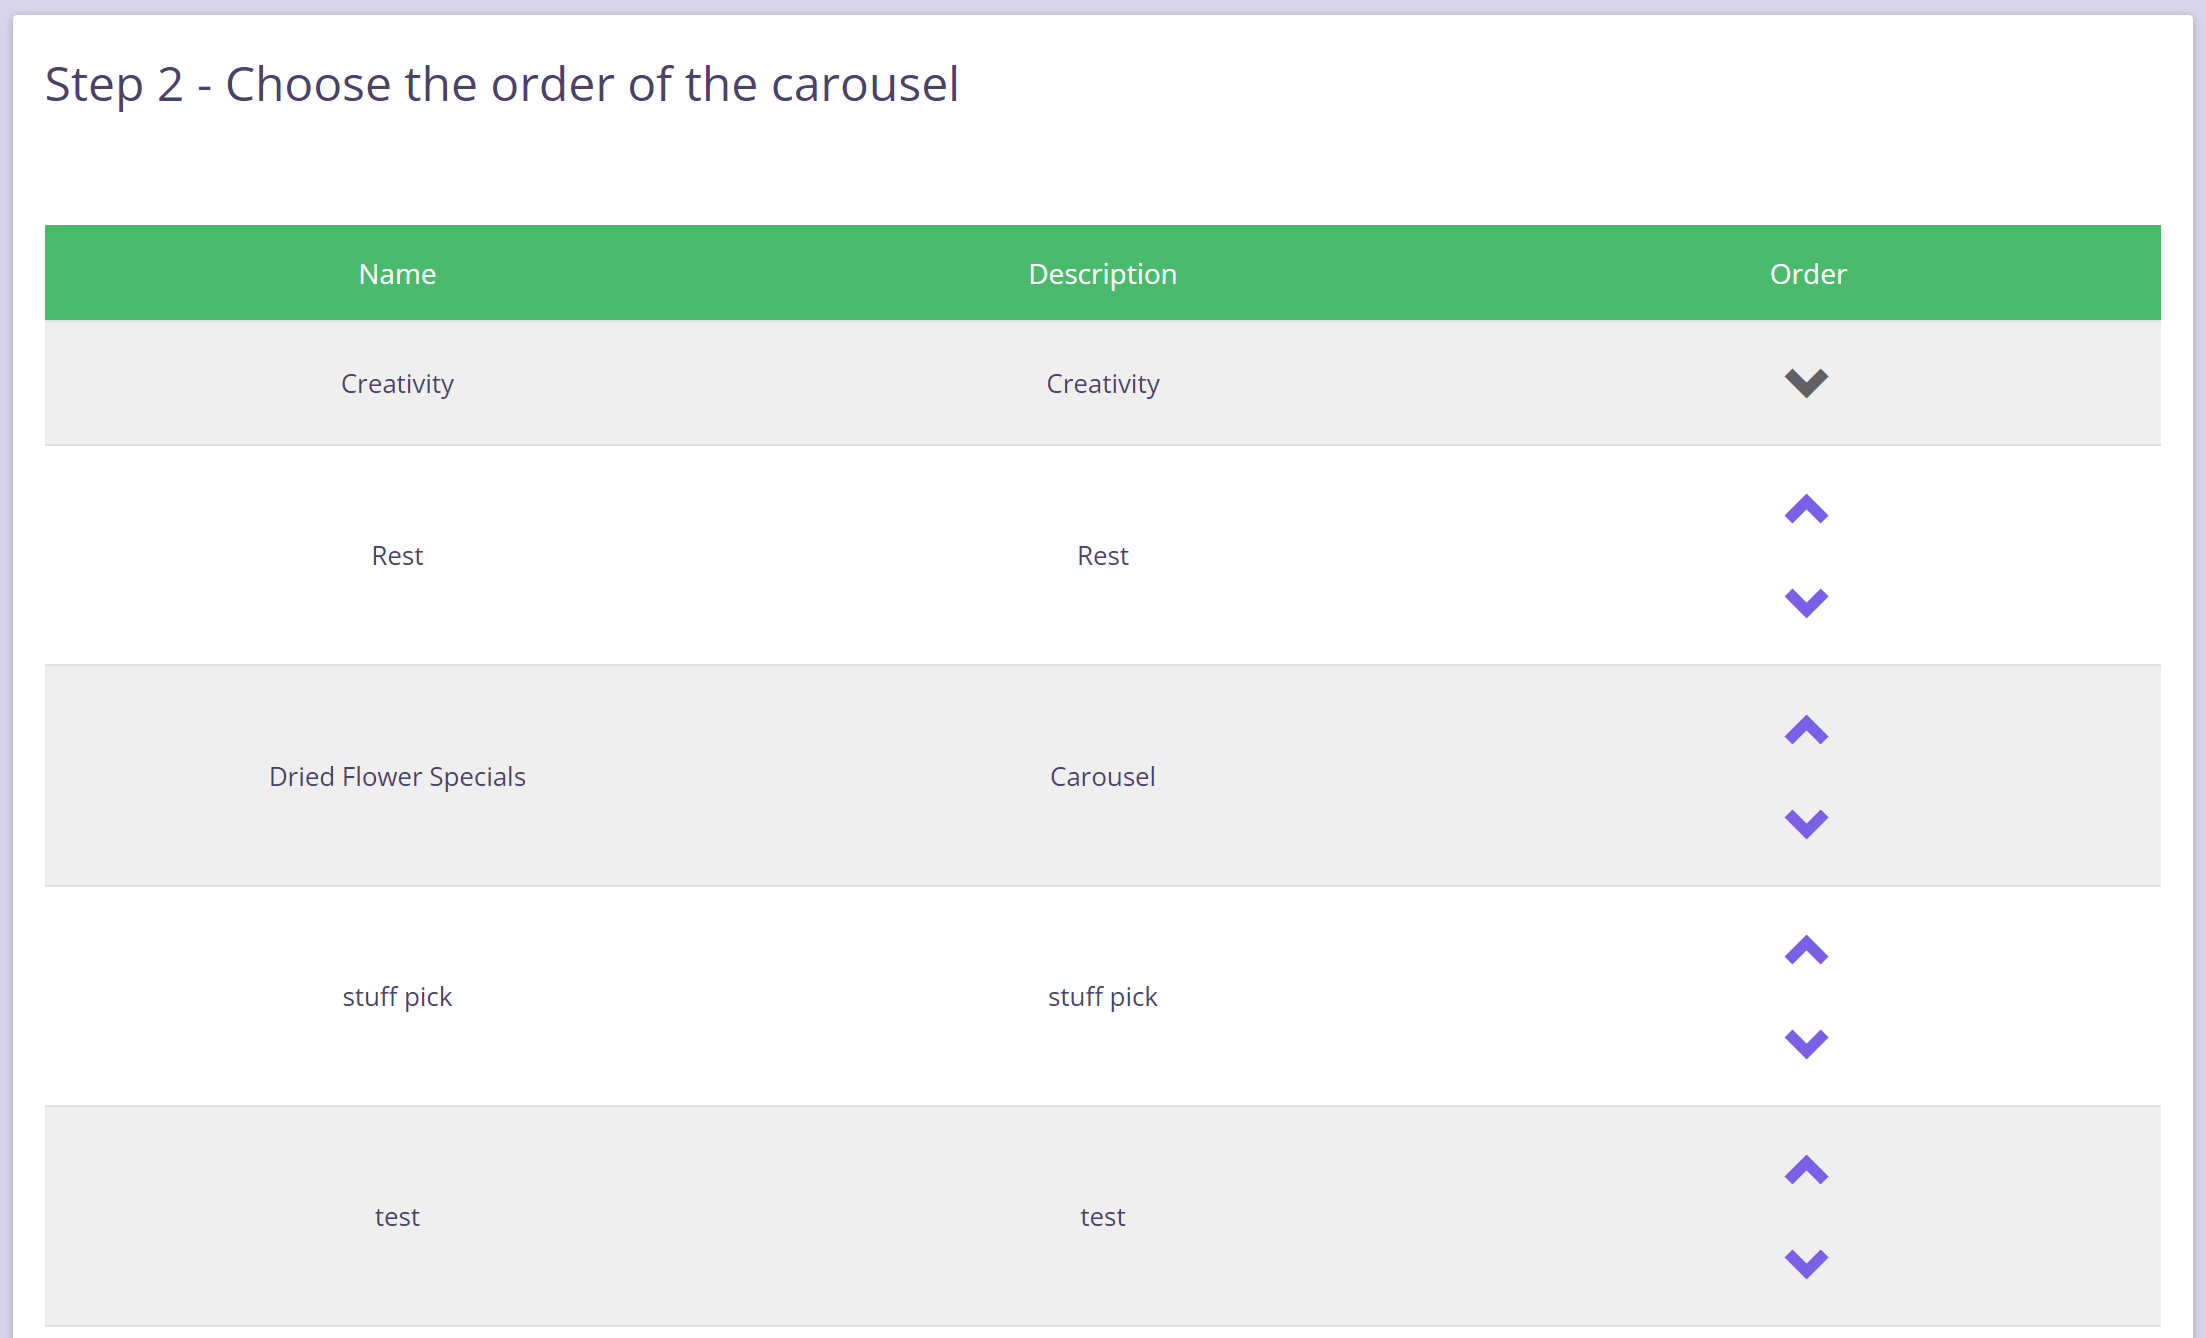
Carousel Order Setting
Step 1: Go Web menu > Carousel Order SettingStep 2: Select which carousel must show on the home page
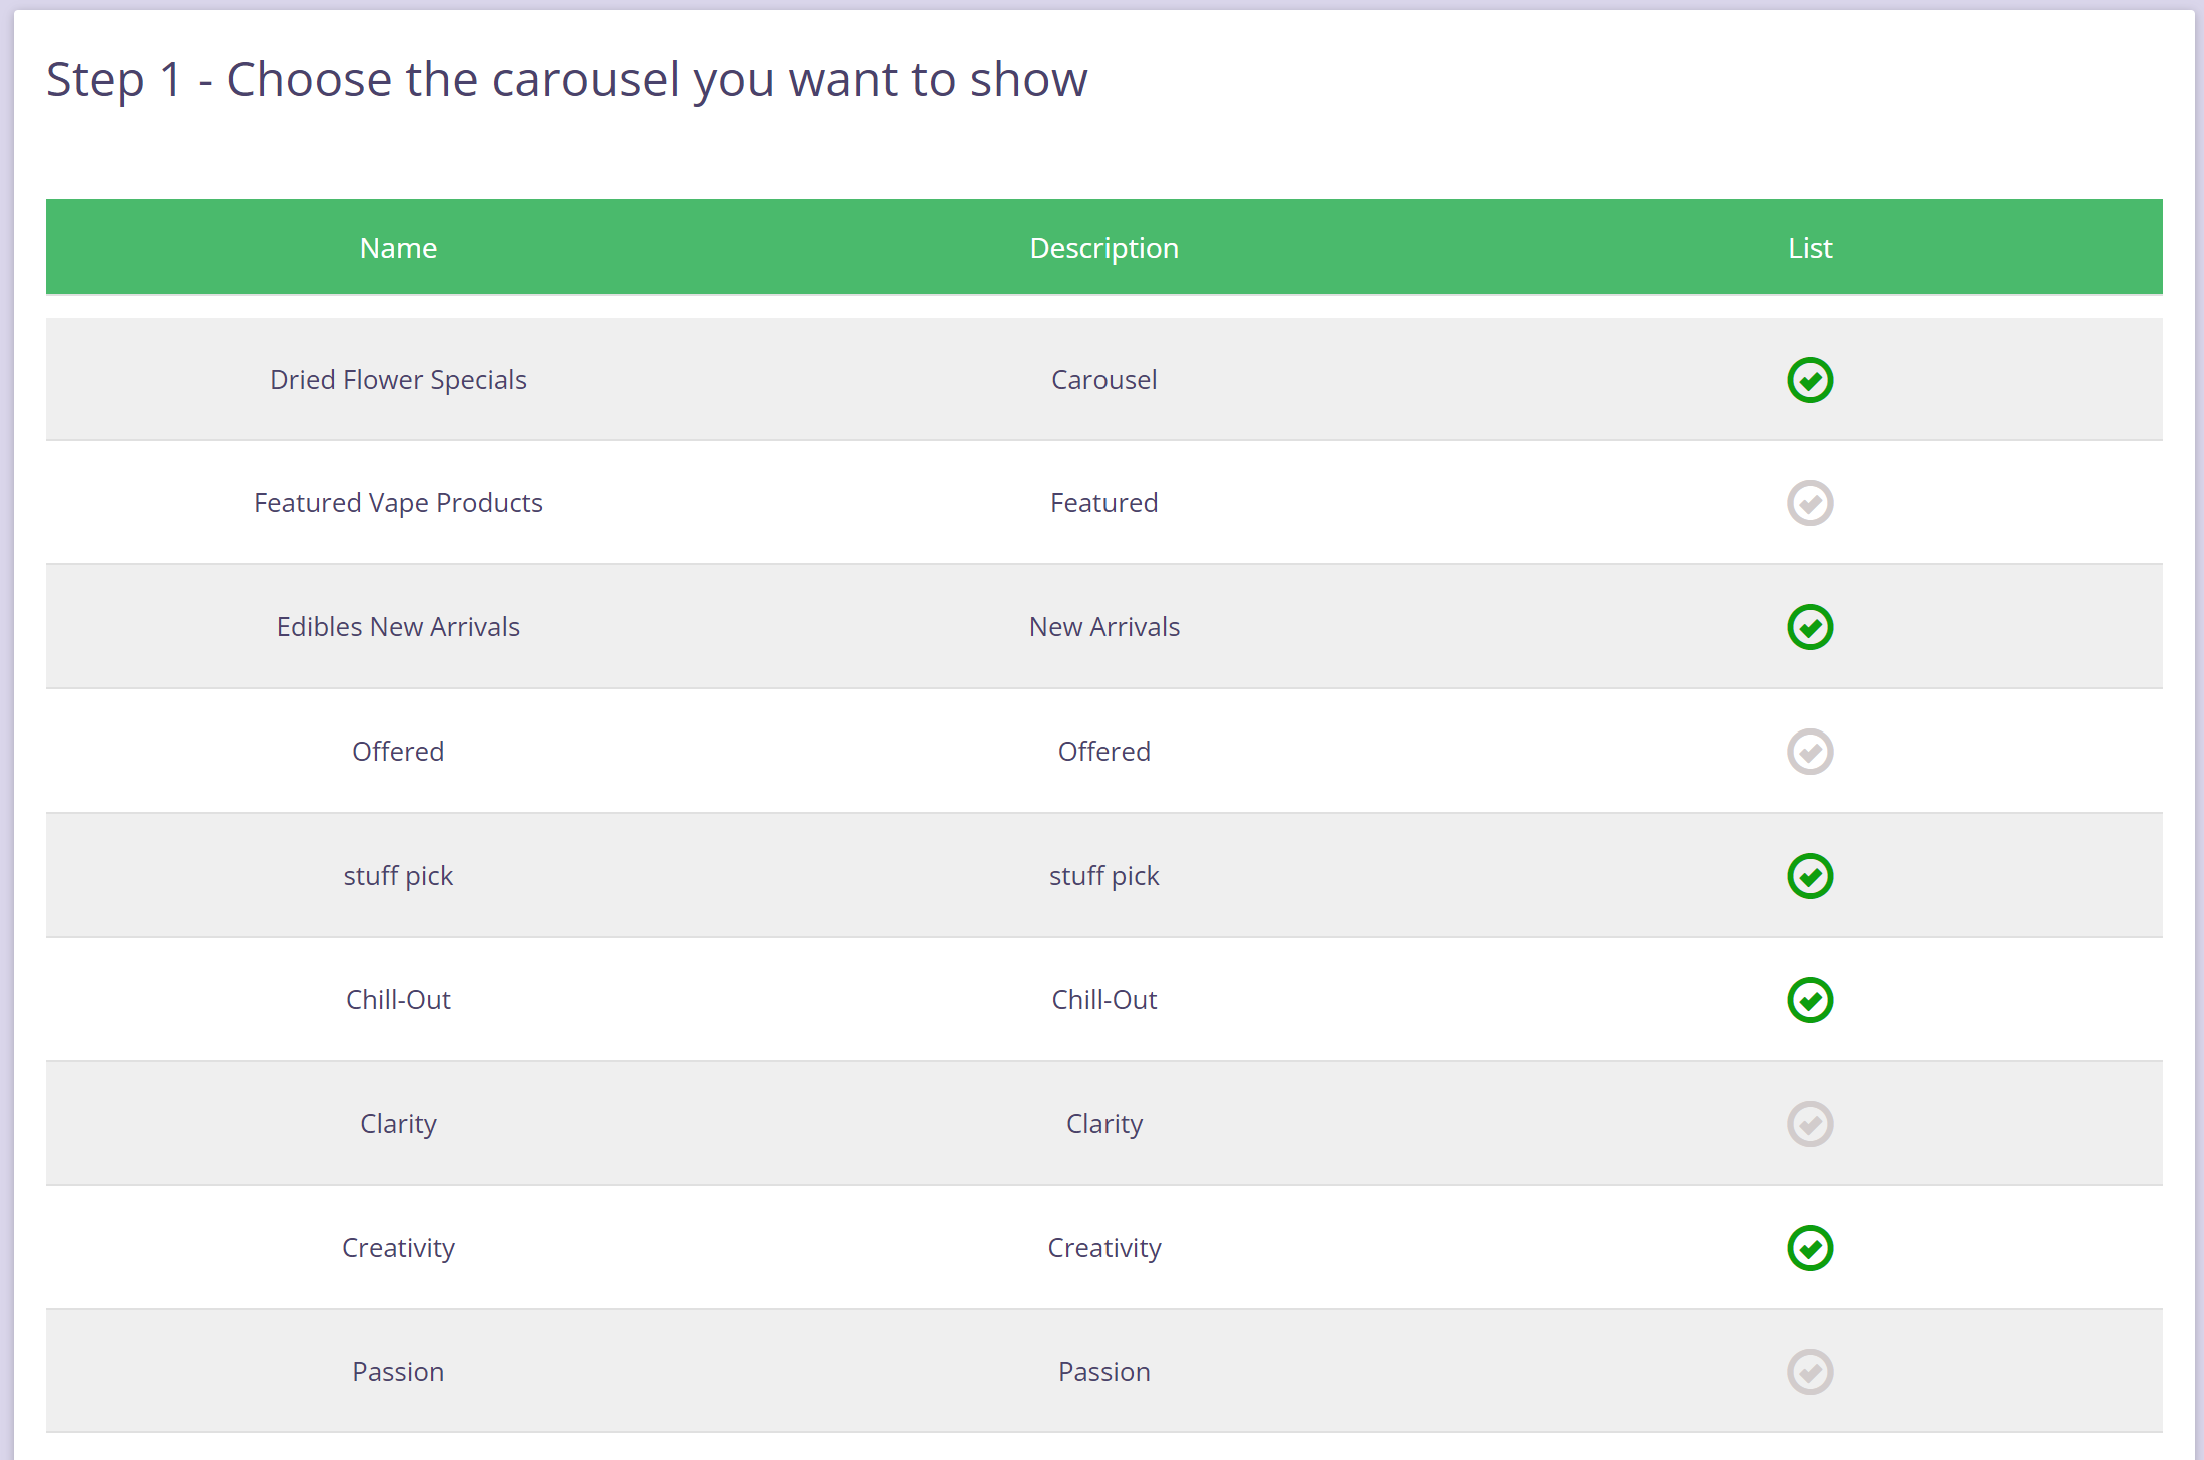
Step 3: Specify the order of the carousel and Save.
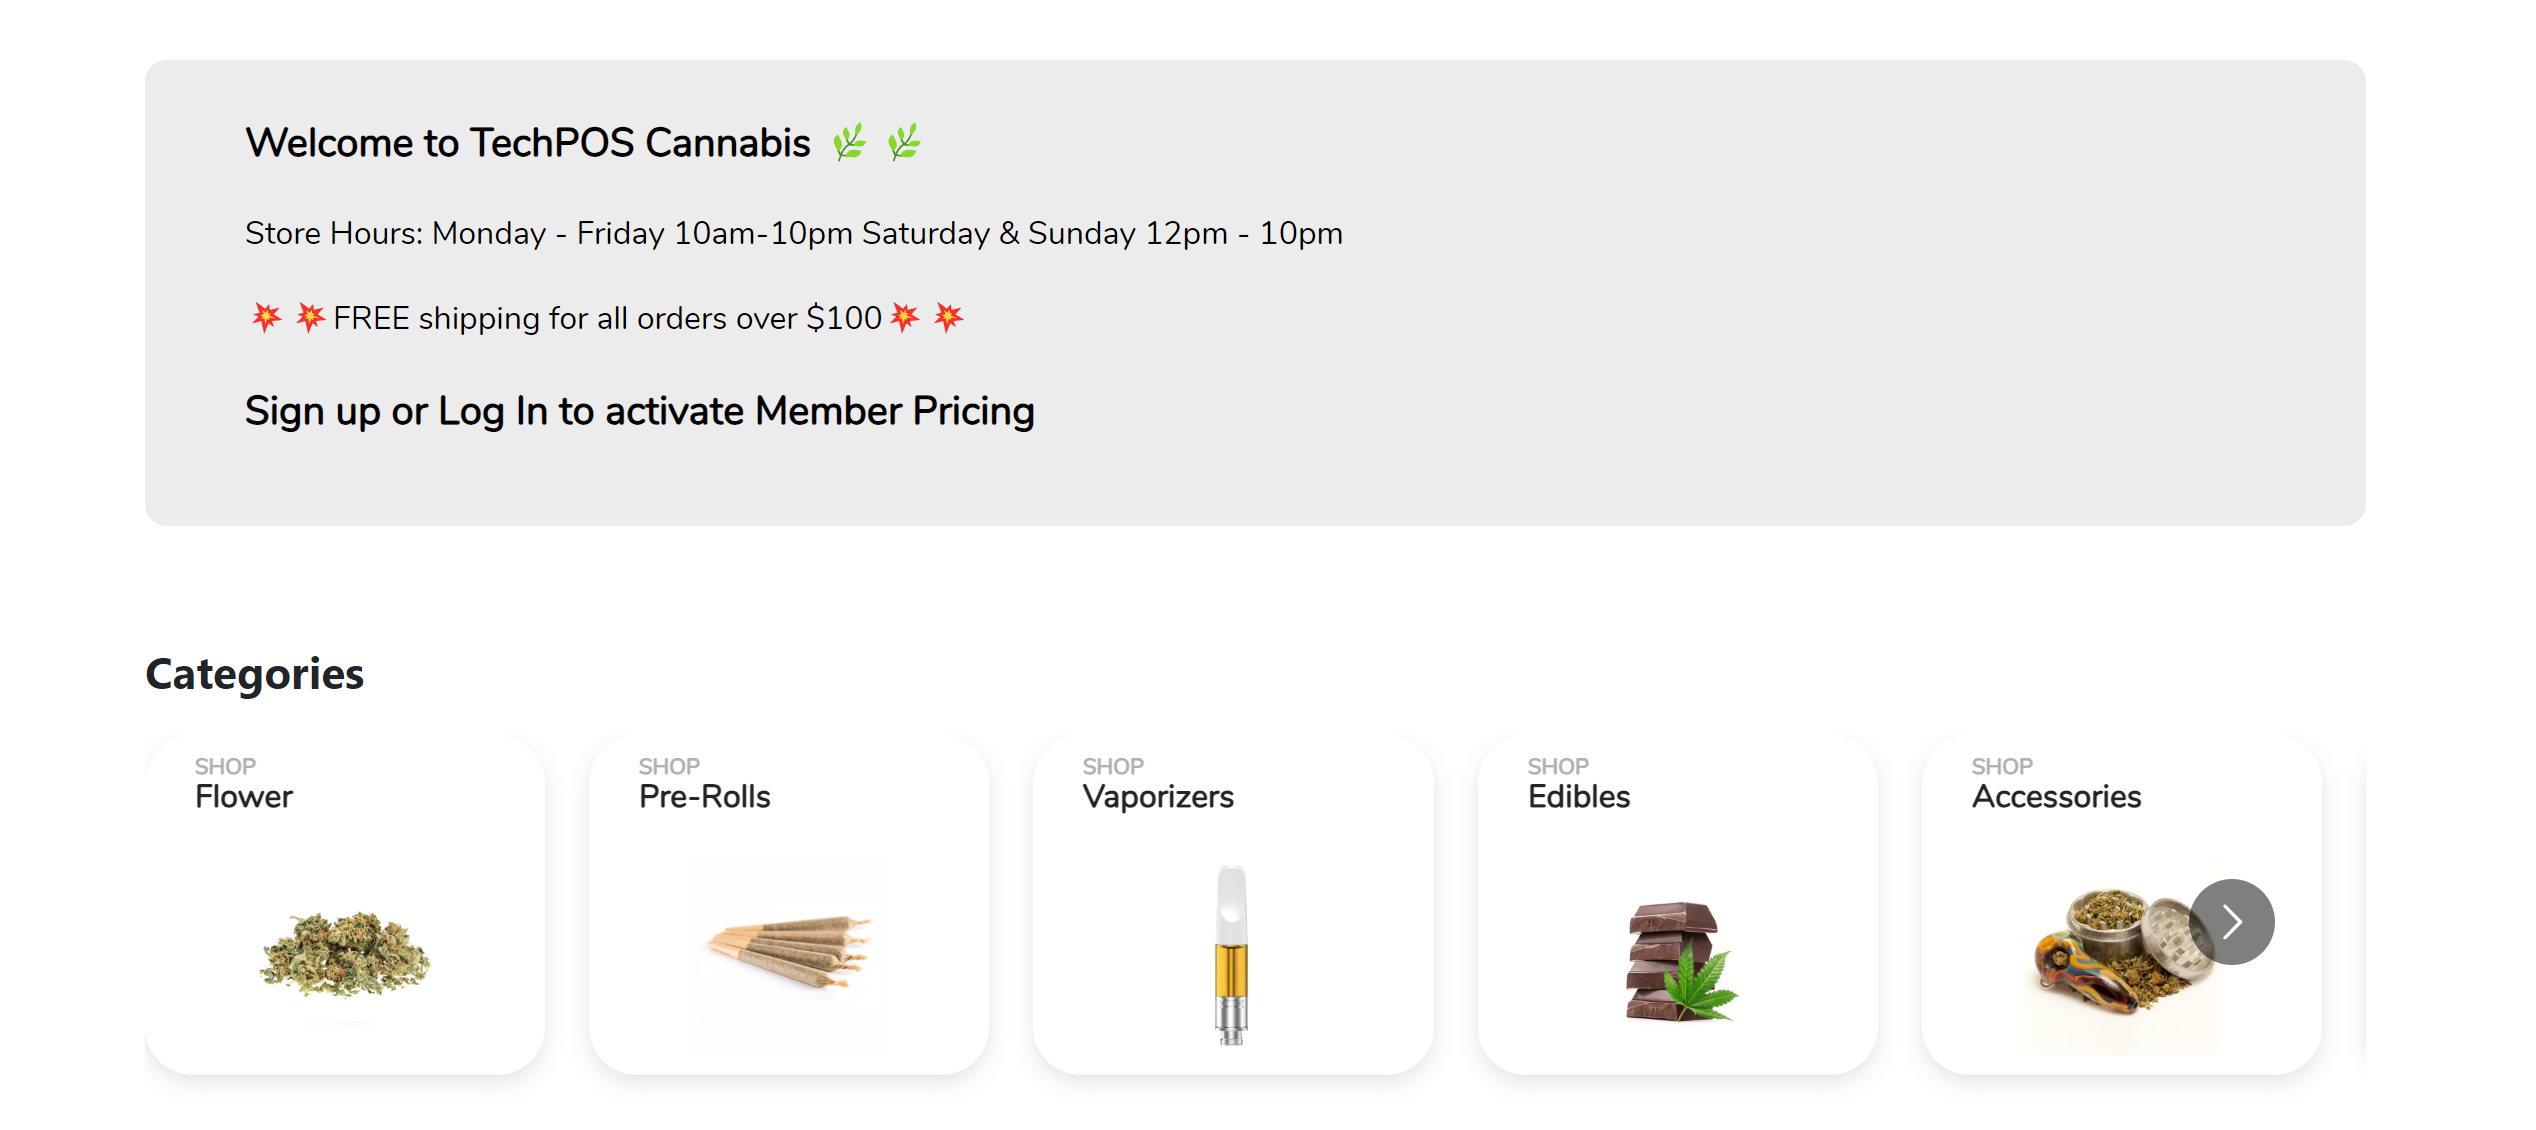
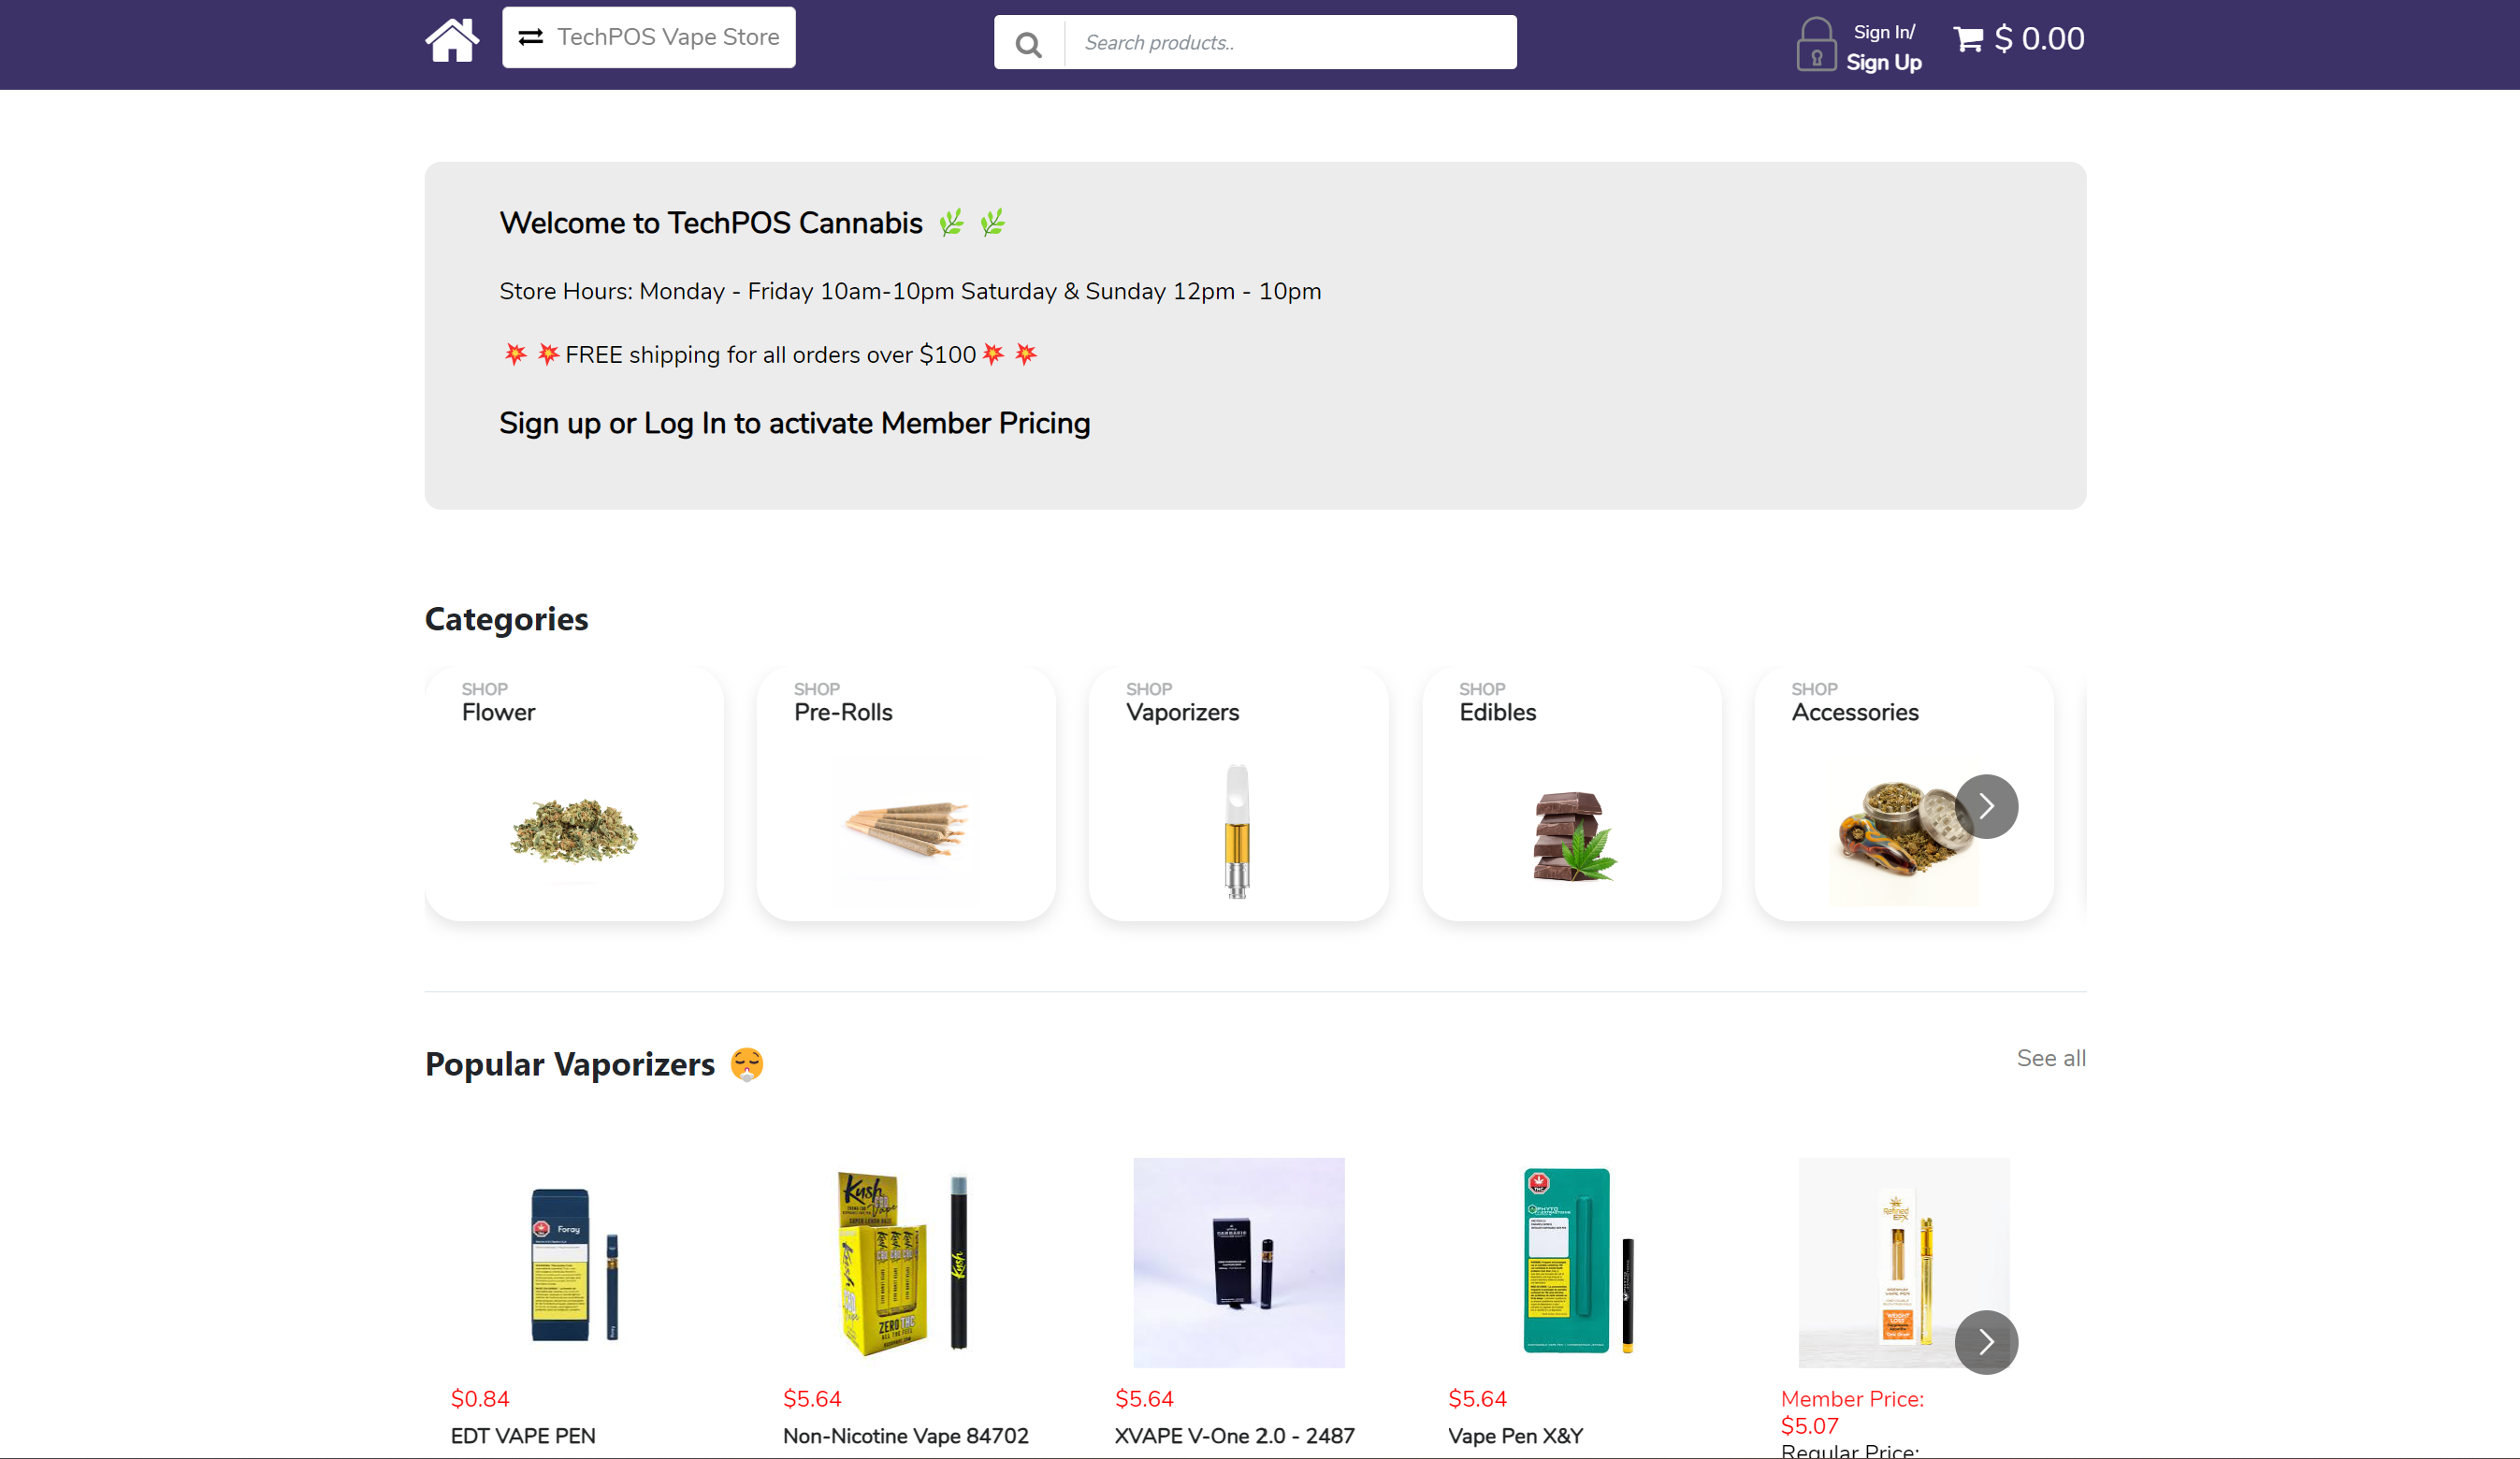
Once Store List and Carousel are added, the home page layout will be the same as below:
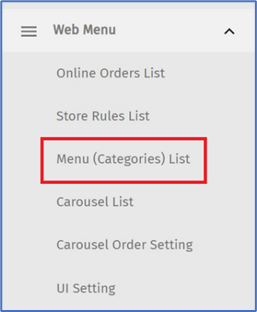
3. Adding/Modifying Categories on the TechPOS Shopping Cart
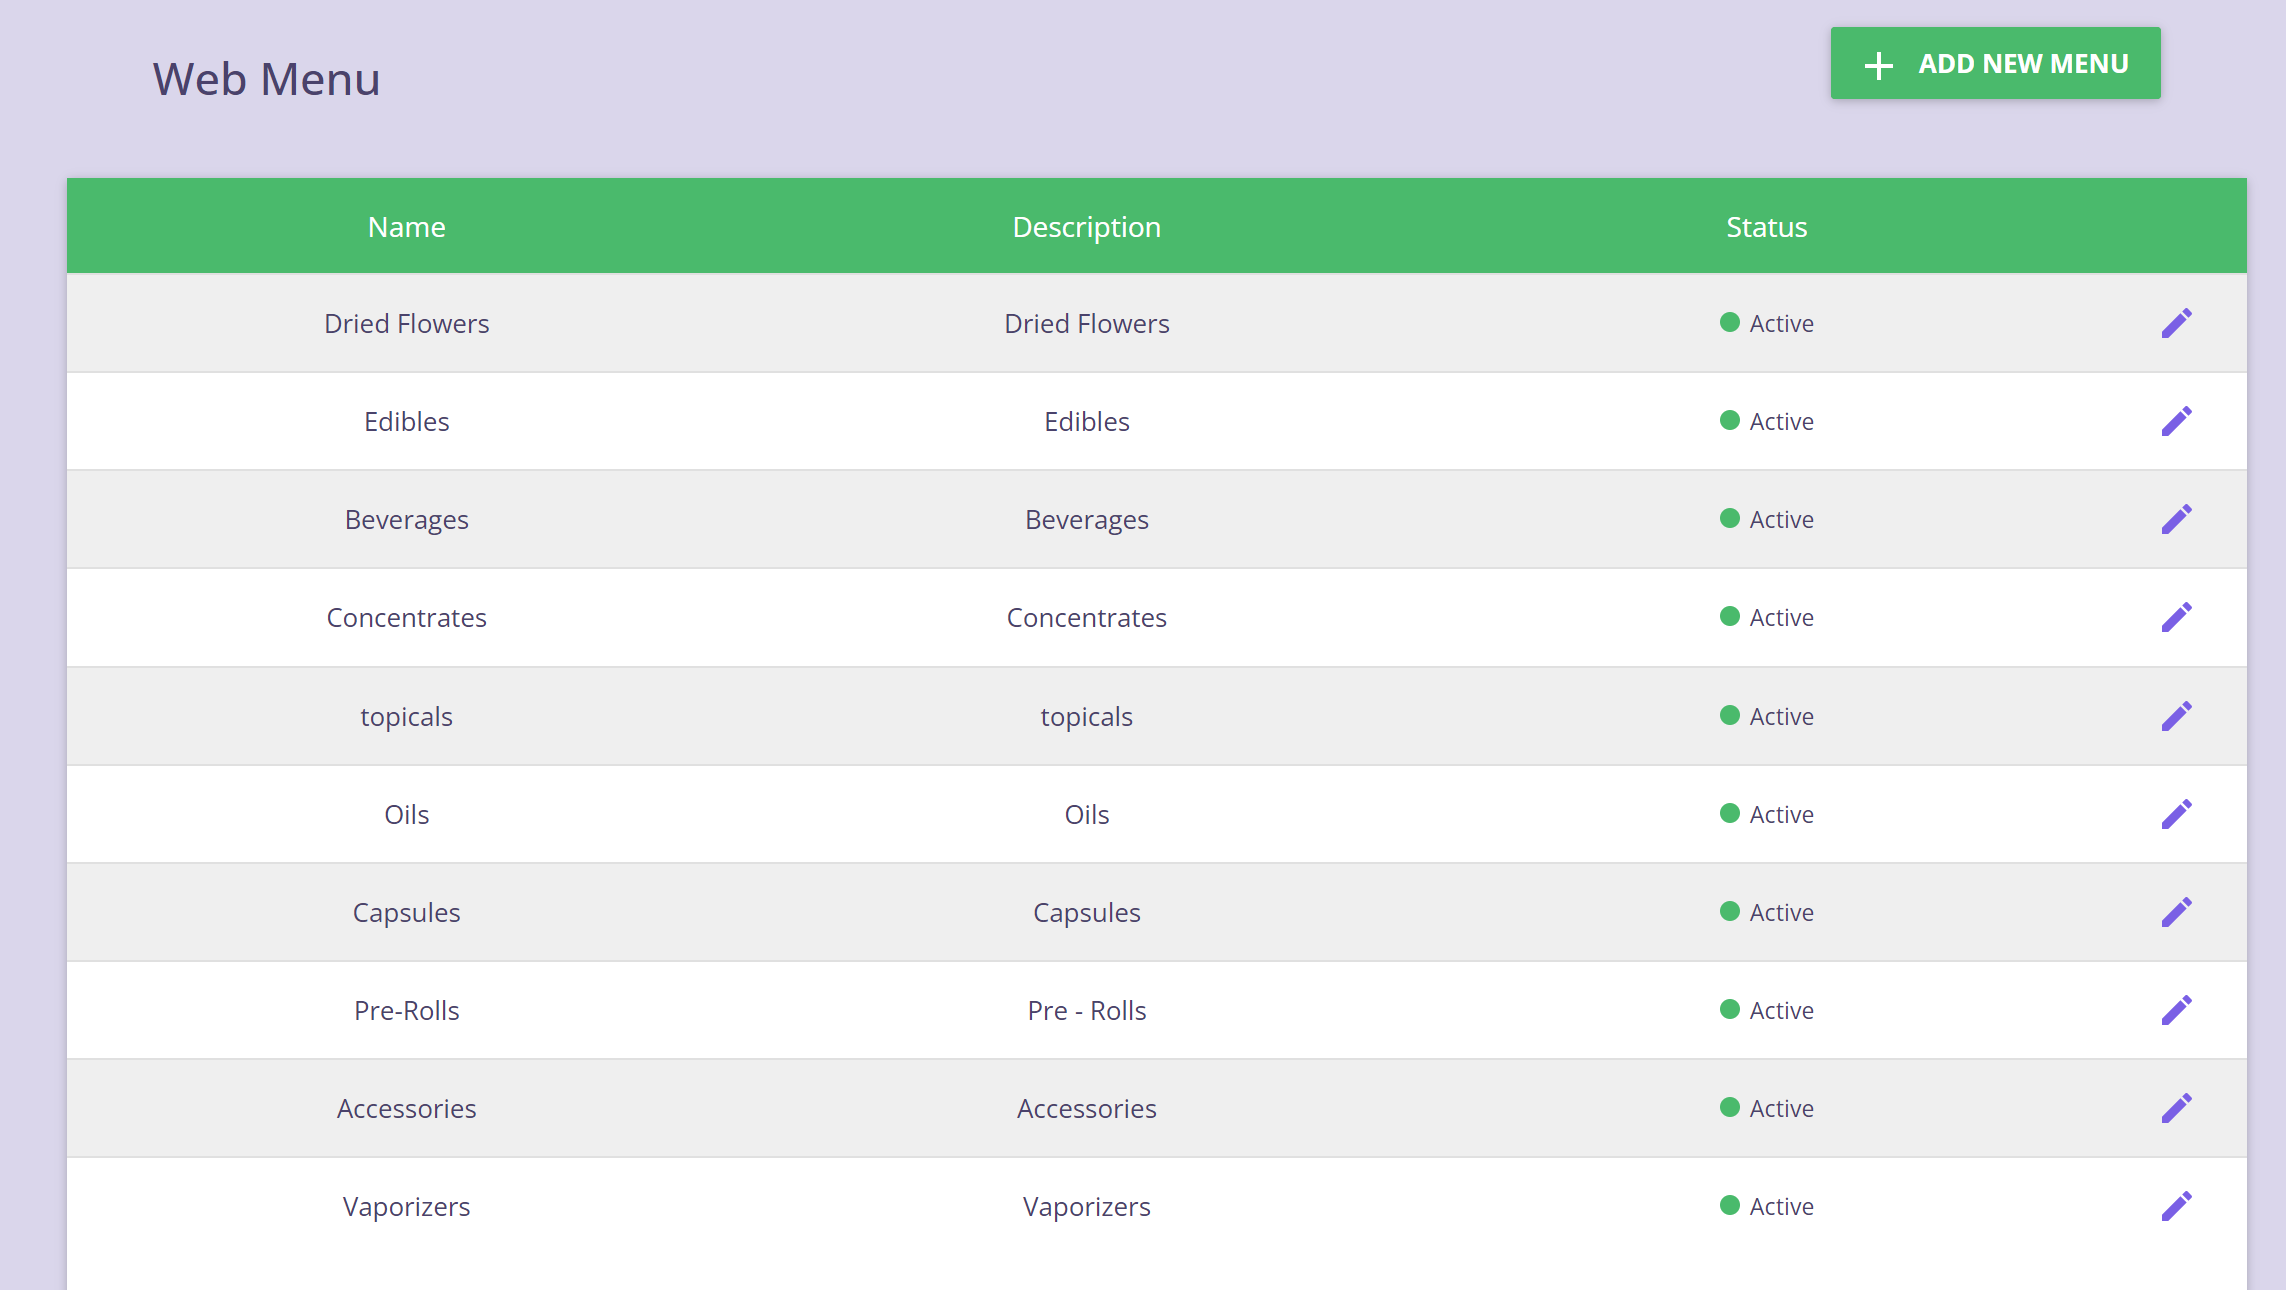
These categories are displayed in this section of the Shopping Cart:
Step 3: Fill out the Menu information
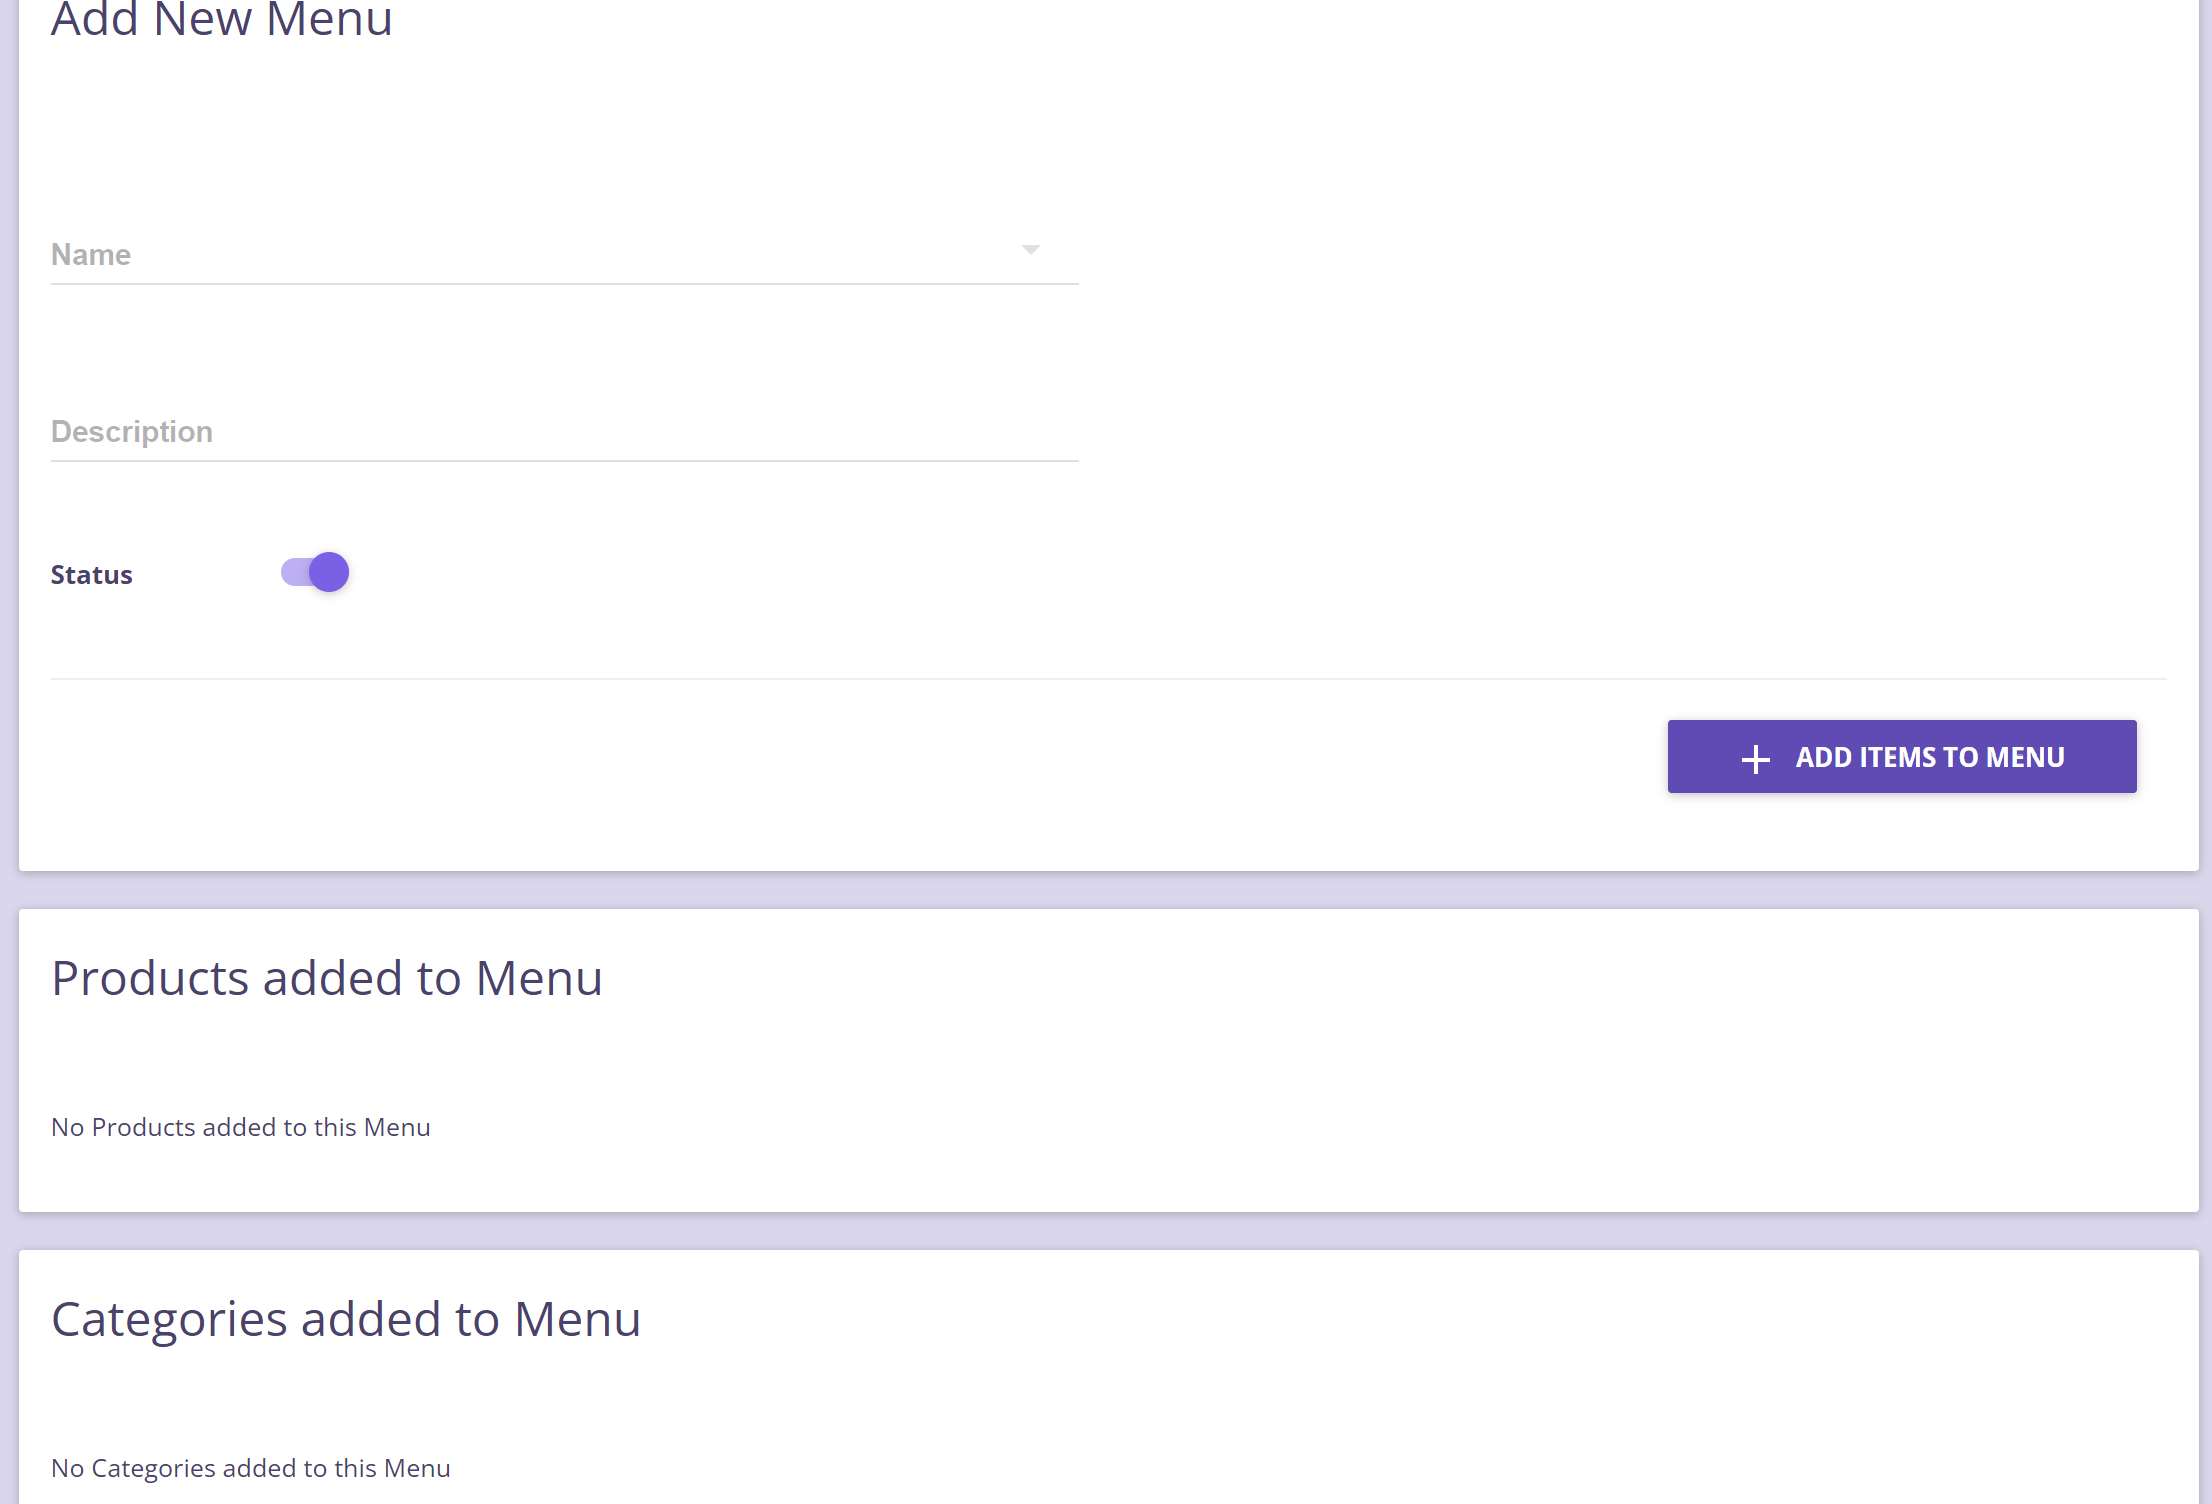
-
- Name – this is the category name that will be displayed on the web menu.
- Description – add any description for the category.
- Status – this should be active.
- Display on Menu Page? – should be active if you would like to show it on the website, inactivate it if you would like to hide it.
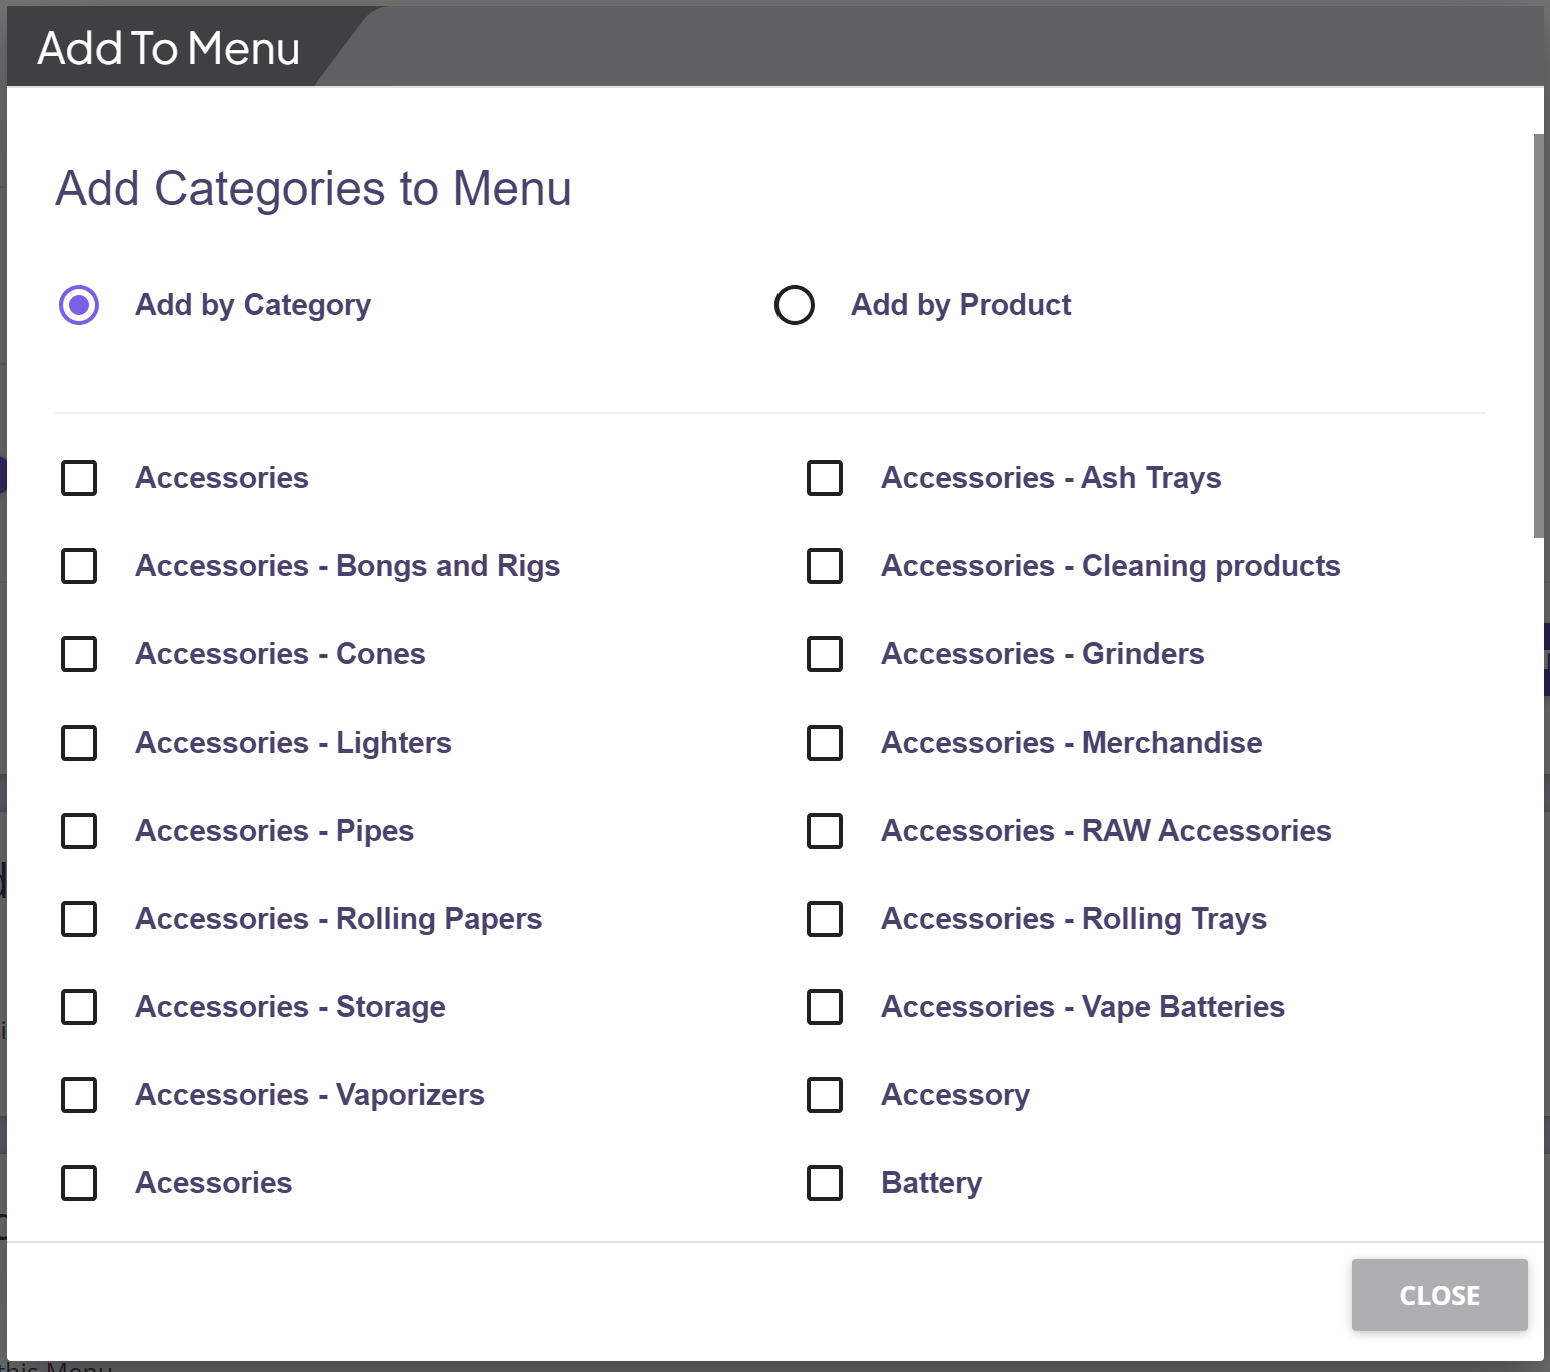
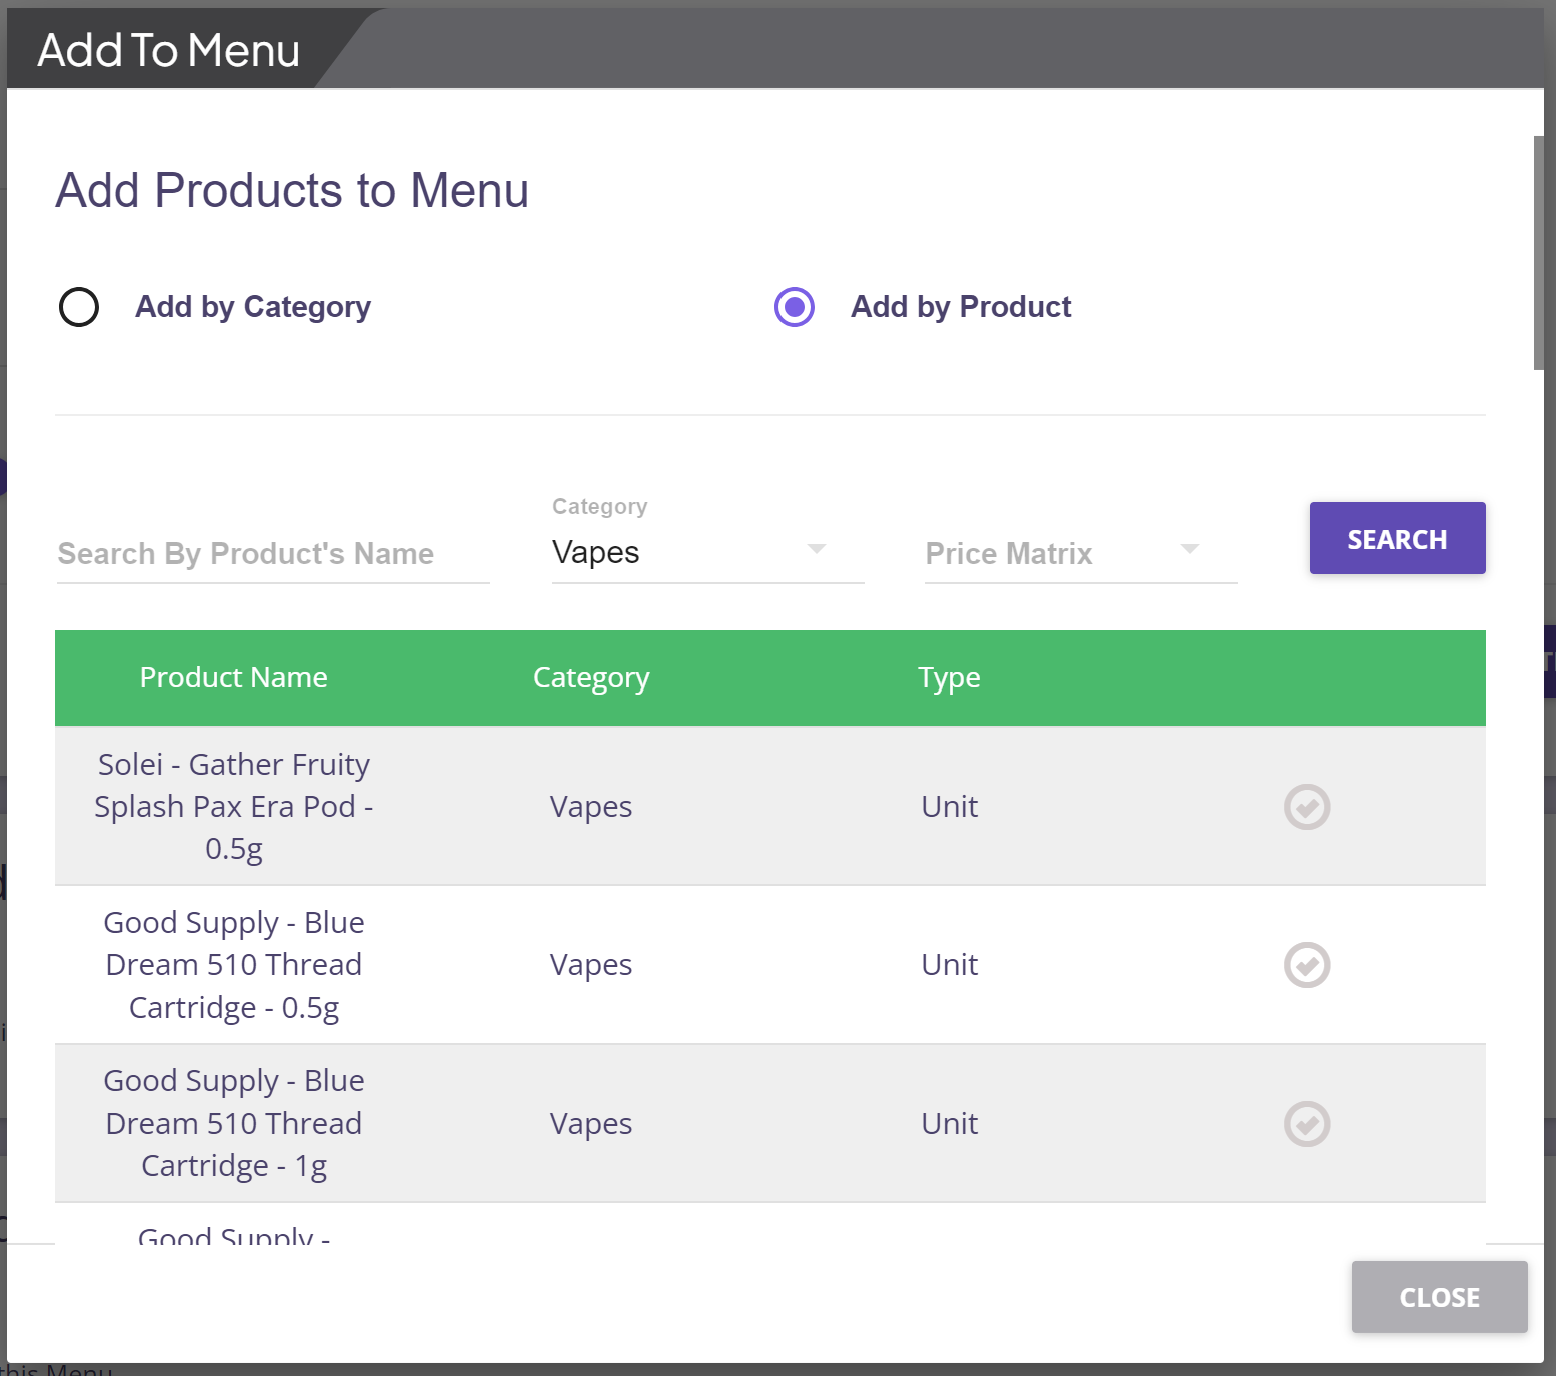
Step 4: Add items by Categories
Click on Save, the category should now be added on the Web Menu.
UI Settings
You can also customize the user interface design of the Shopping Cart within the TechPOS Core. Simply go to Menu > Web menu > UI Setting. From there, you can easily modify the header settings such as the background color and foreground color. You can also customize the body settings, including the background and button colors. This allows you to create a personalized and visually appealing shopping experience for your customers.
Header Settings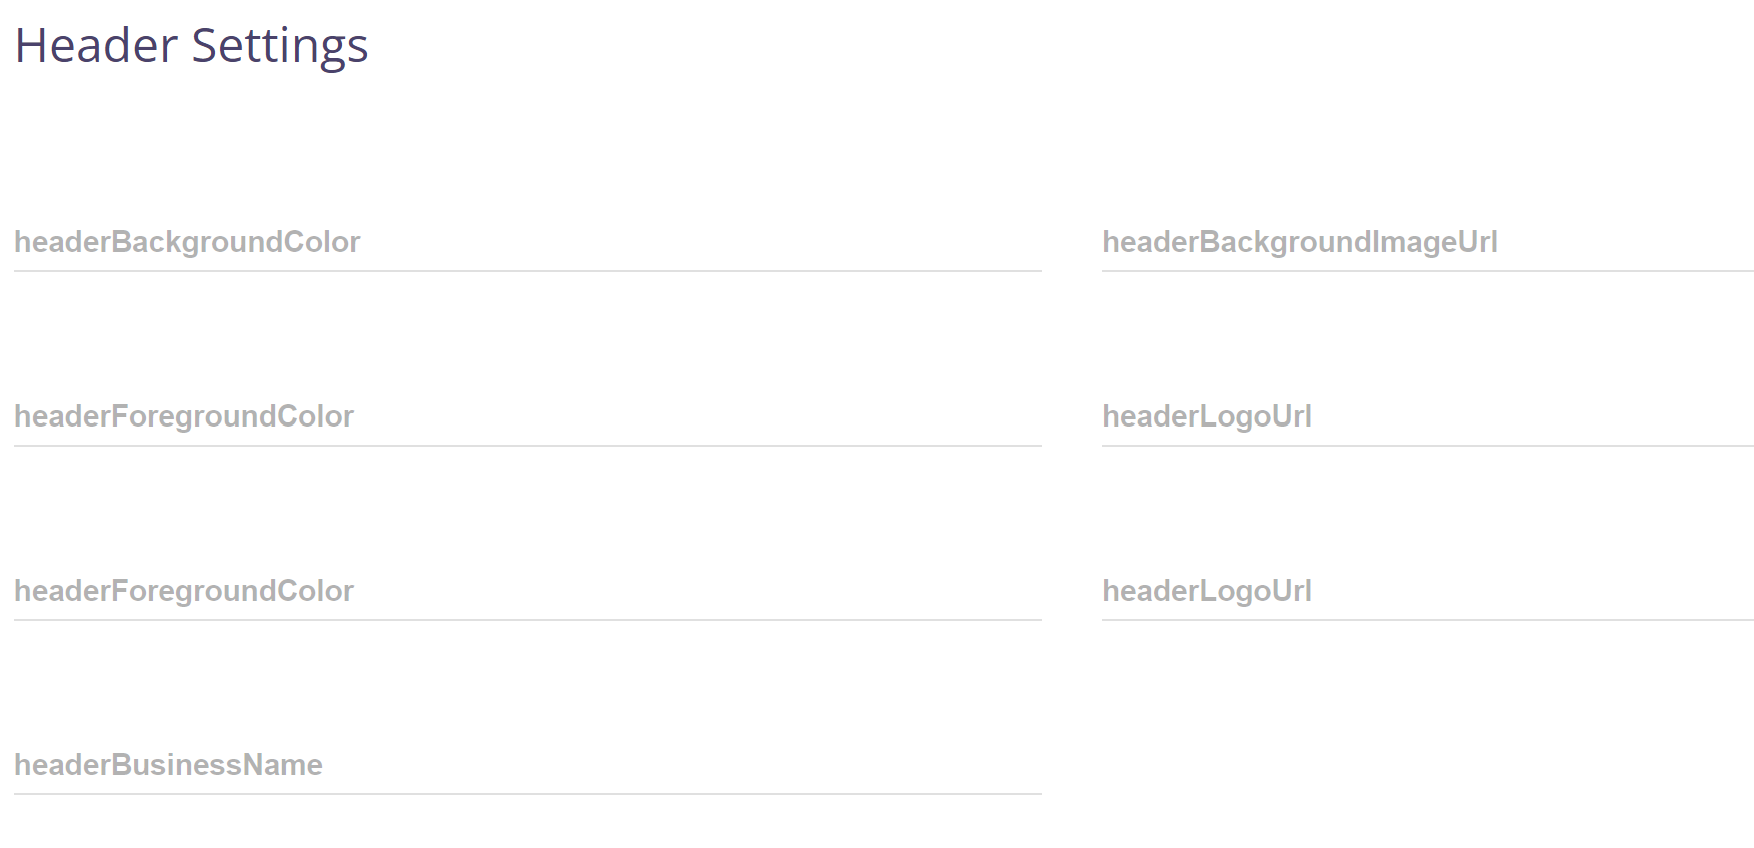
Body Settings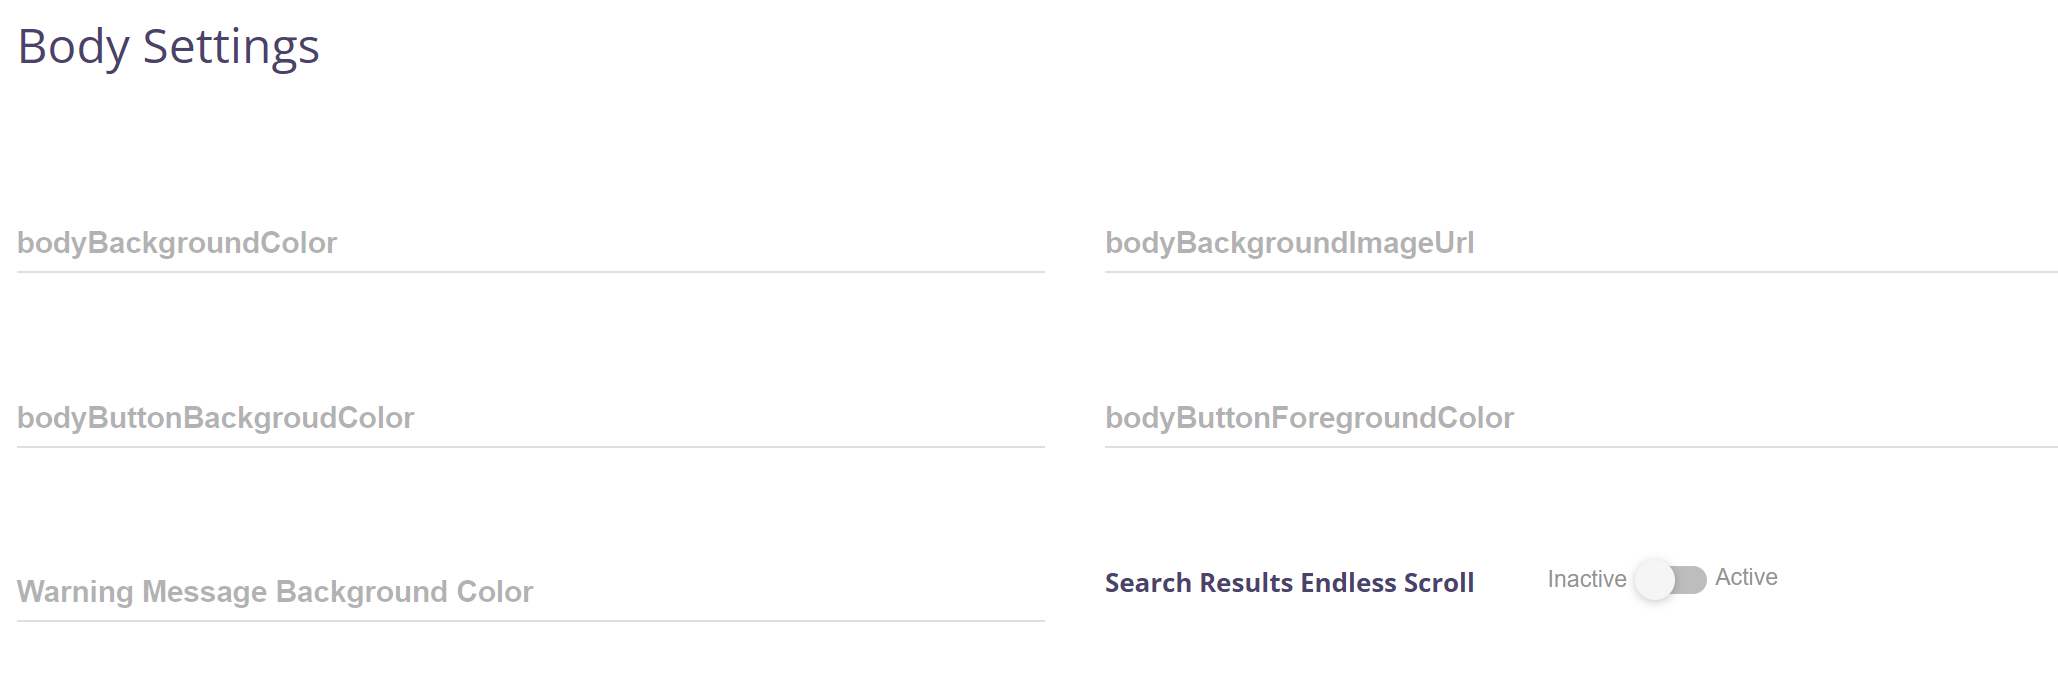
Footer Settings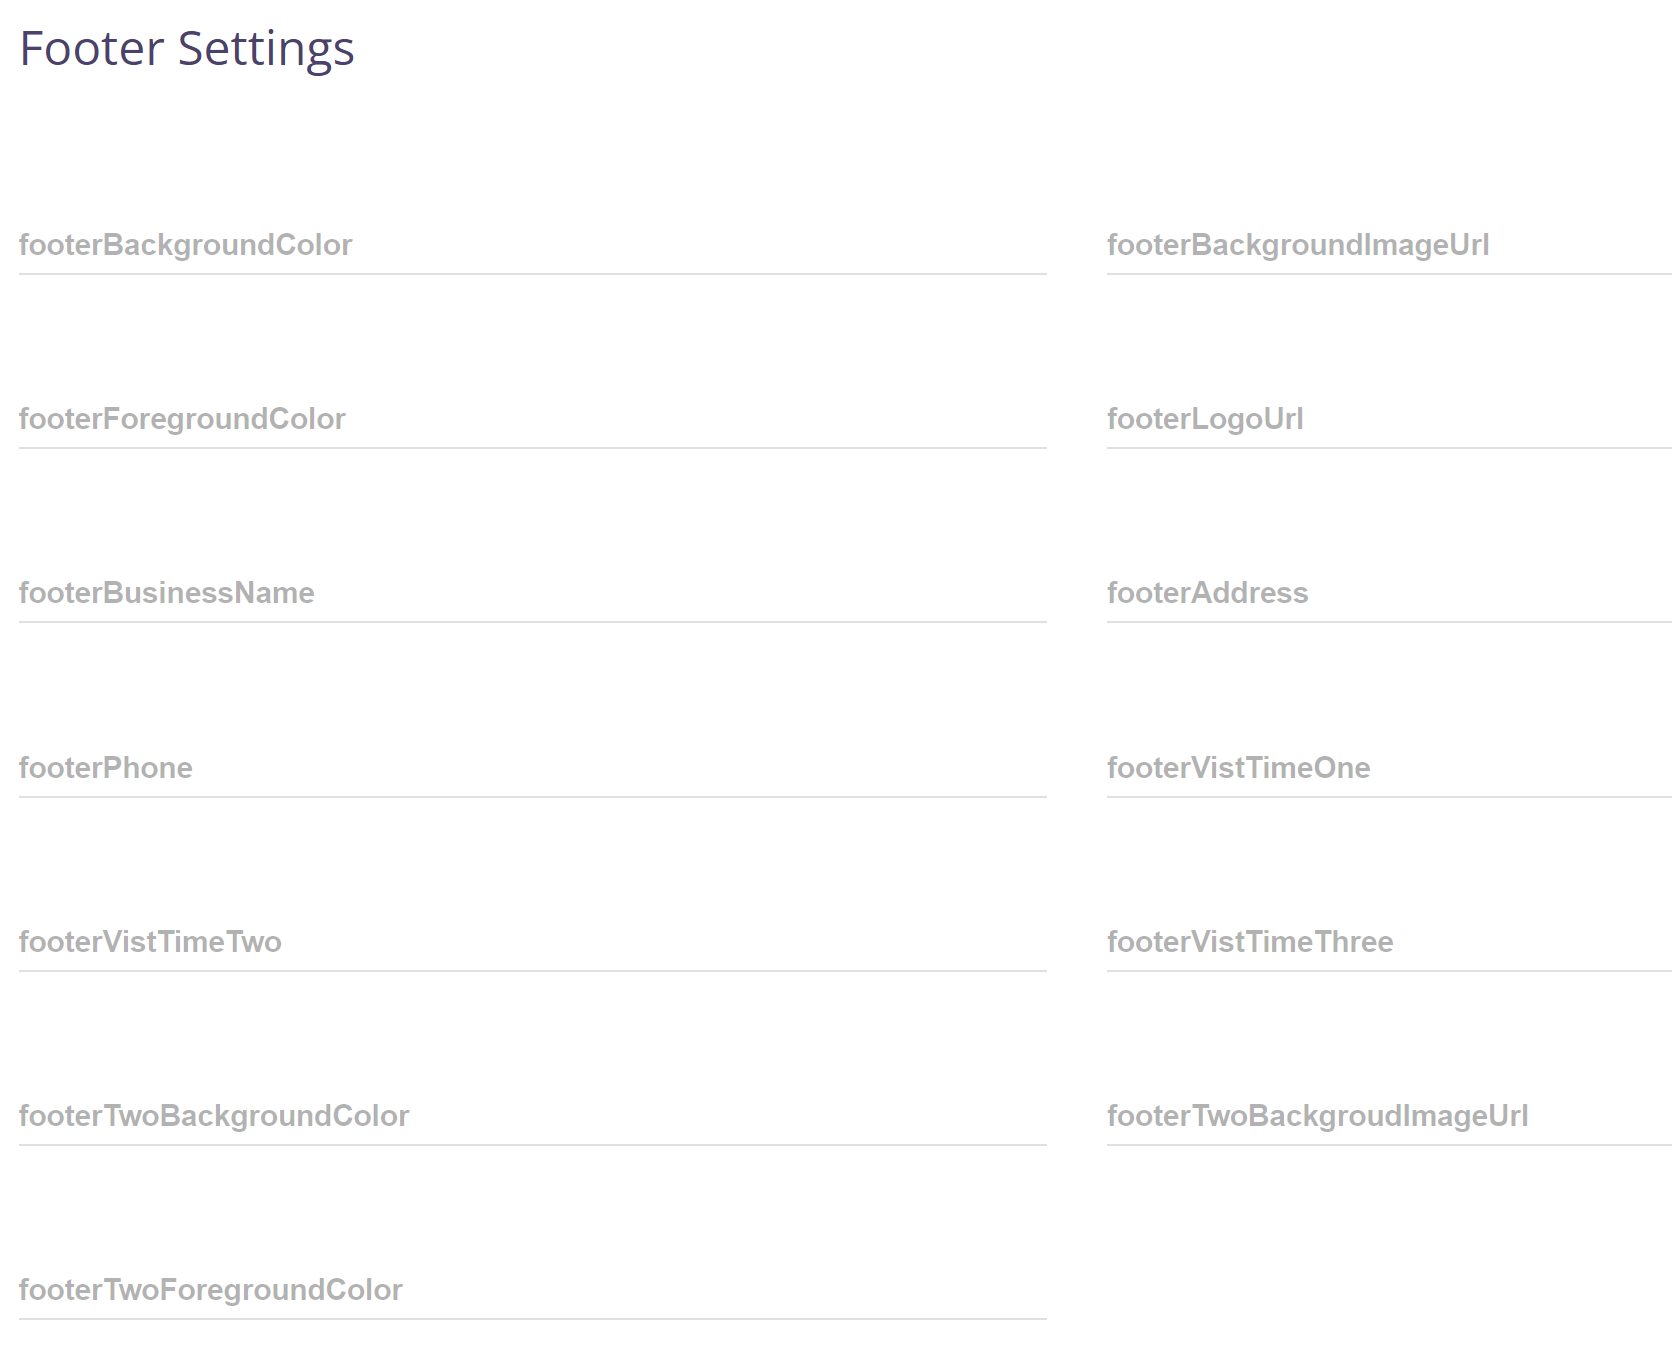
Delivery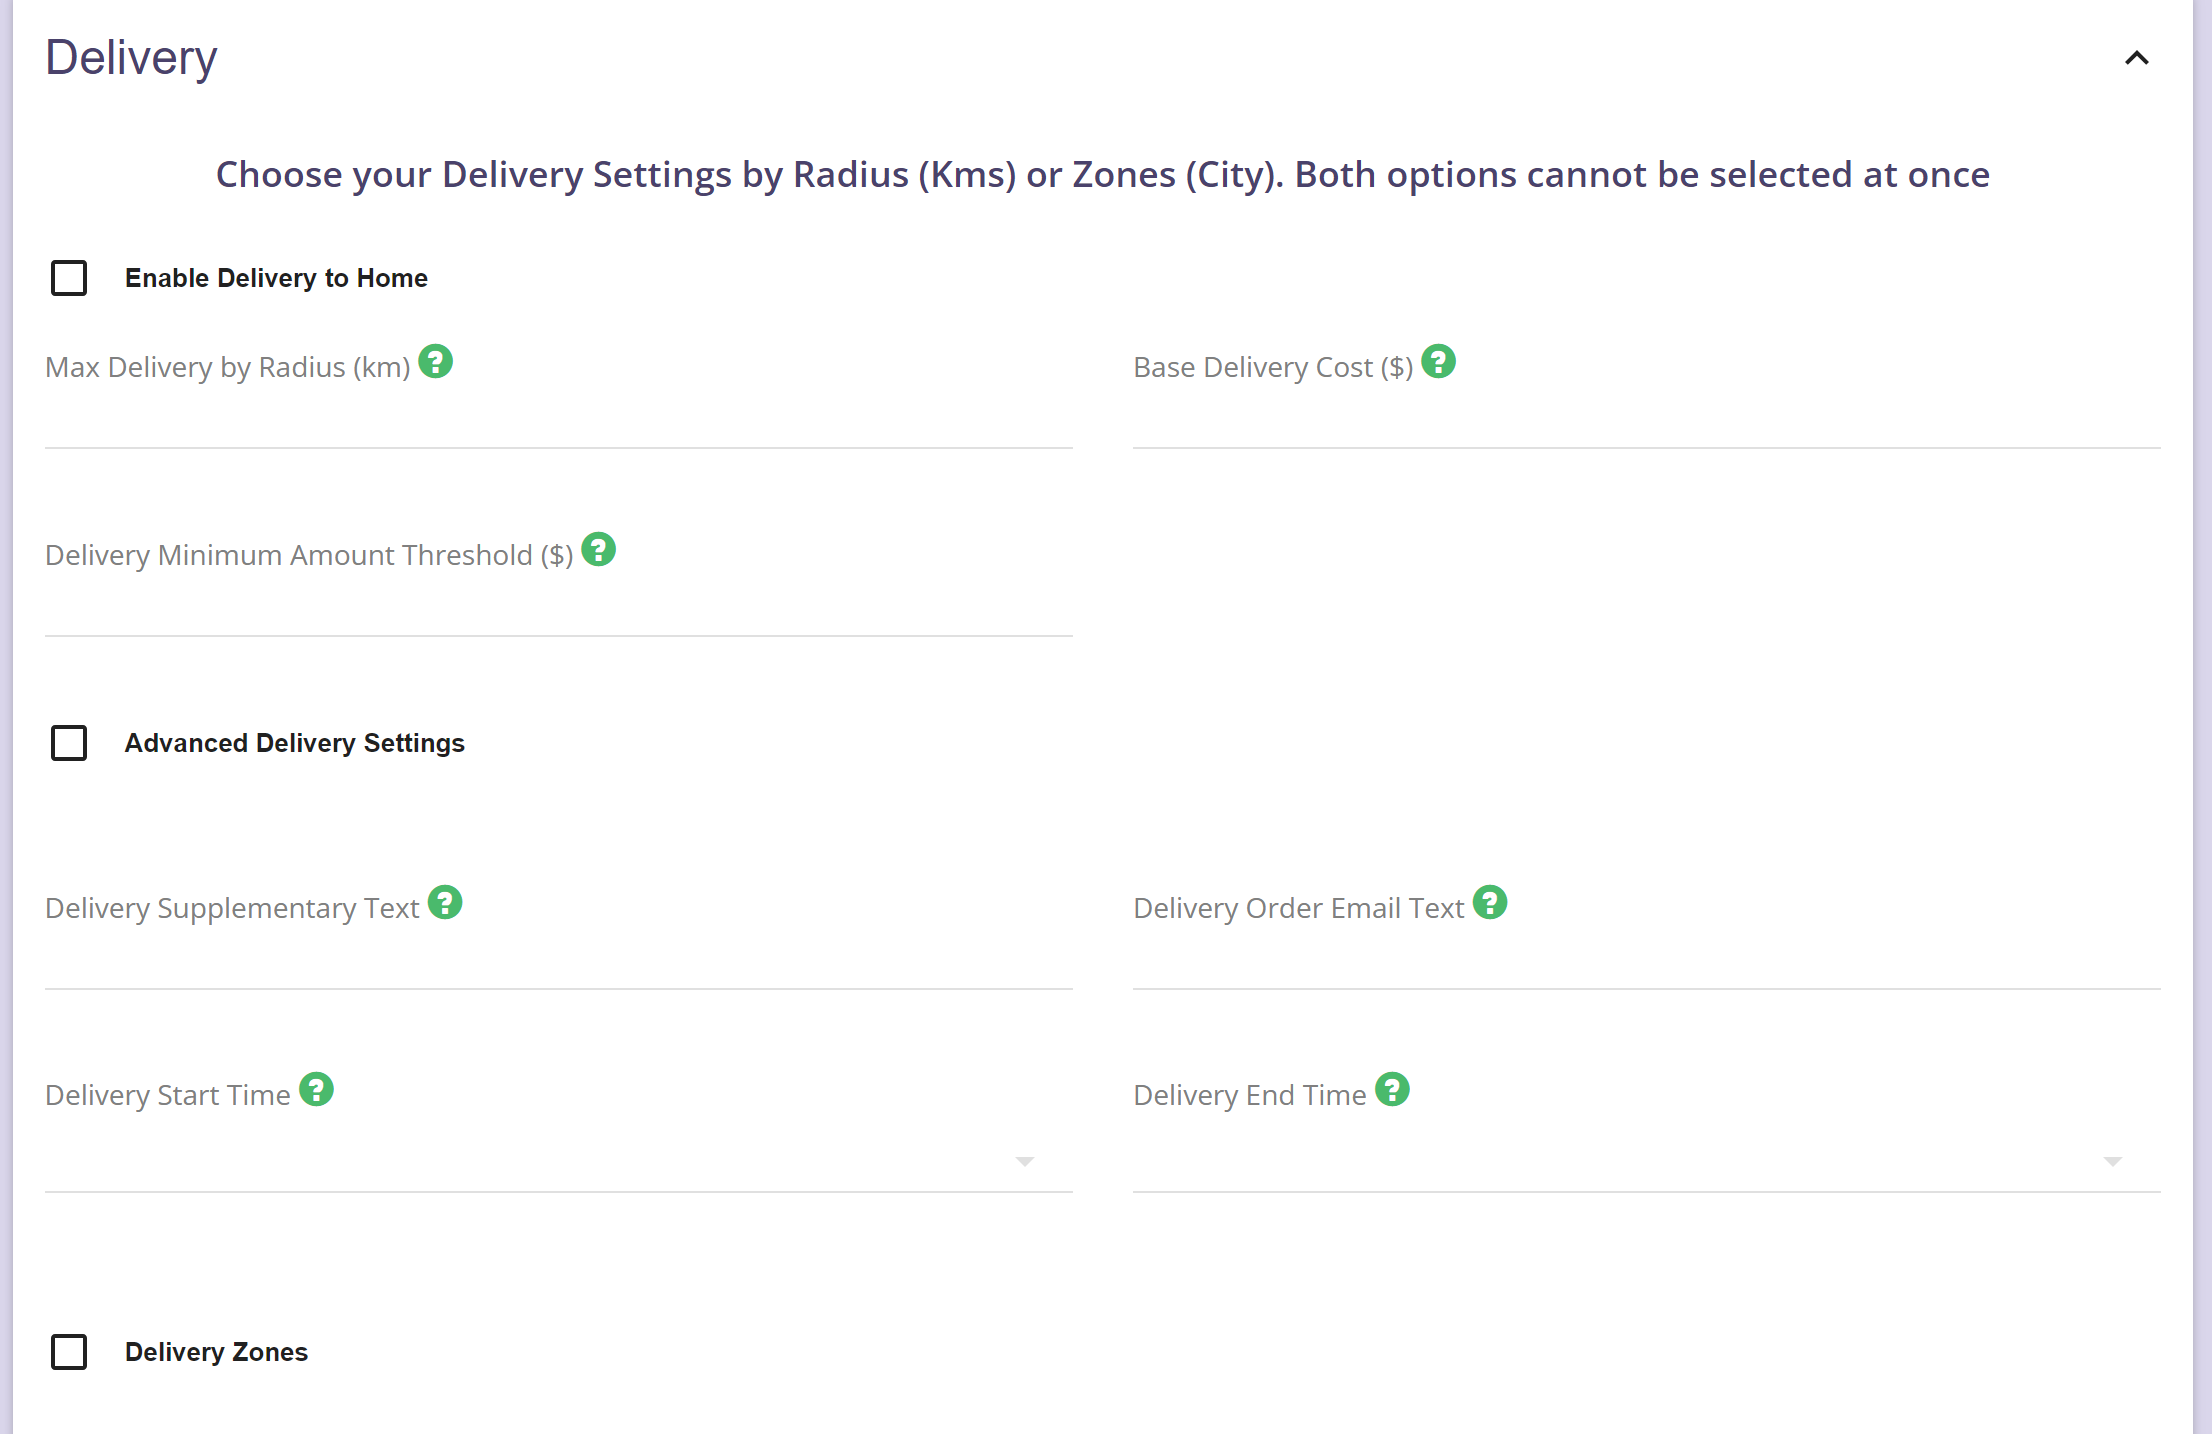
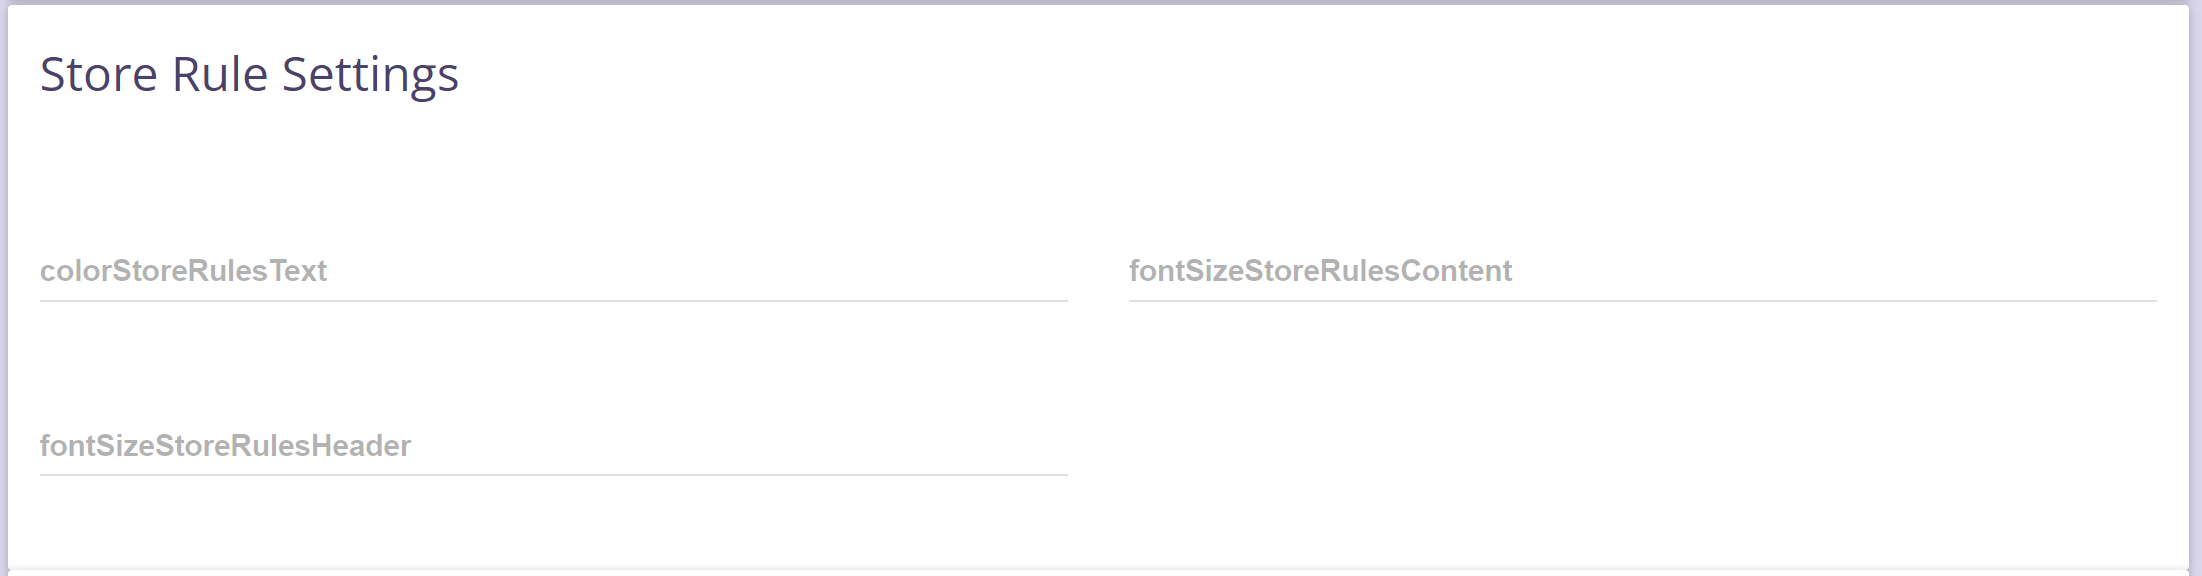
Store Rules Settings
Payment & Pickup Settings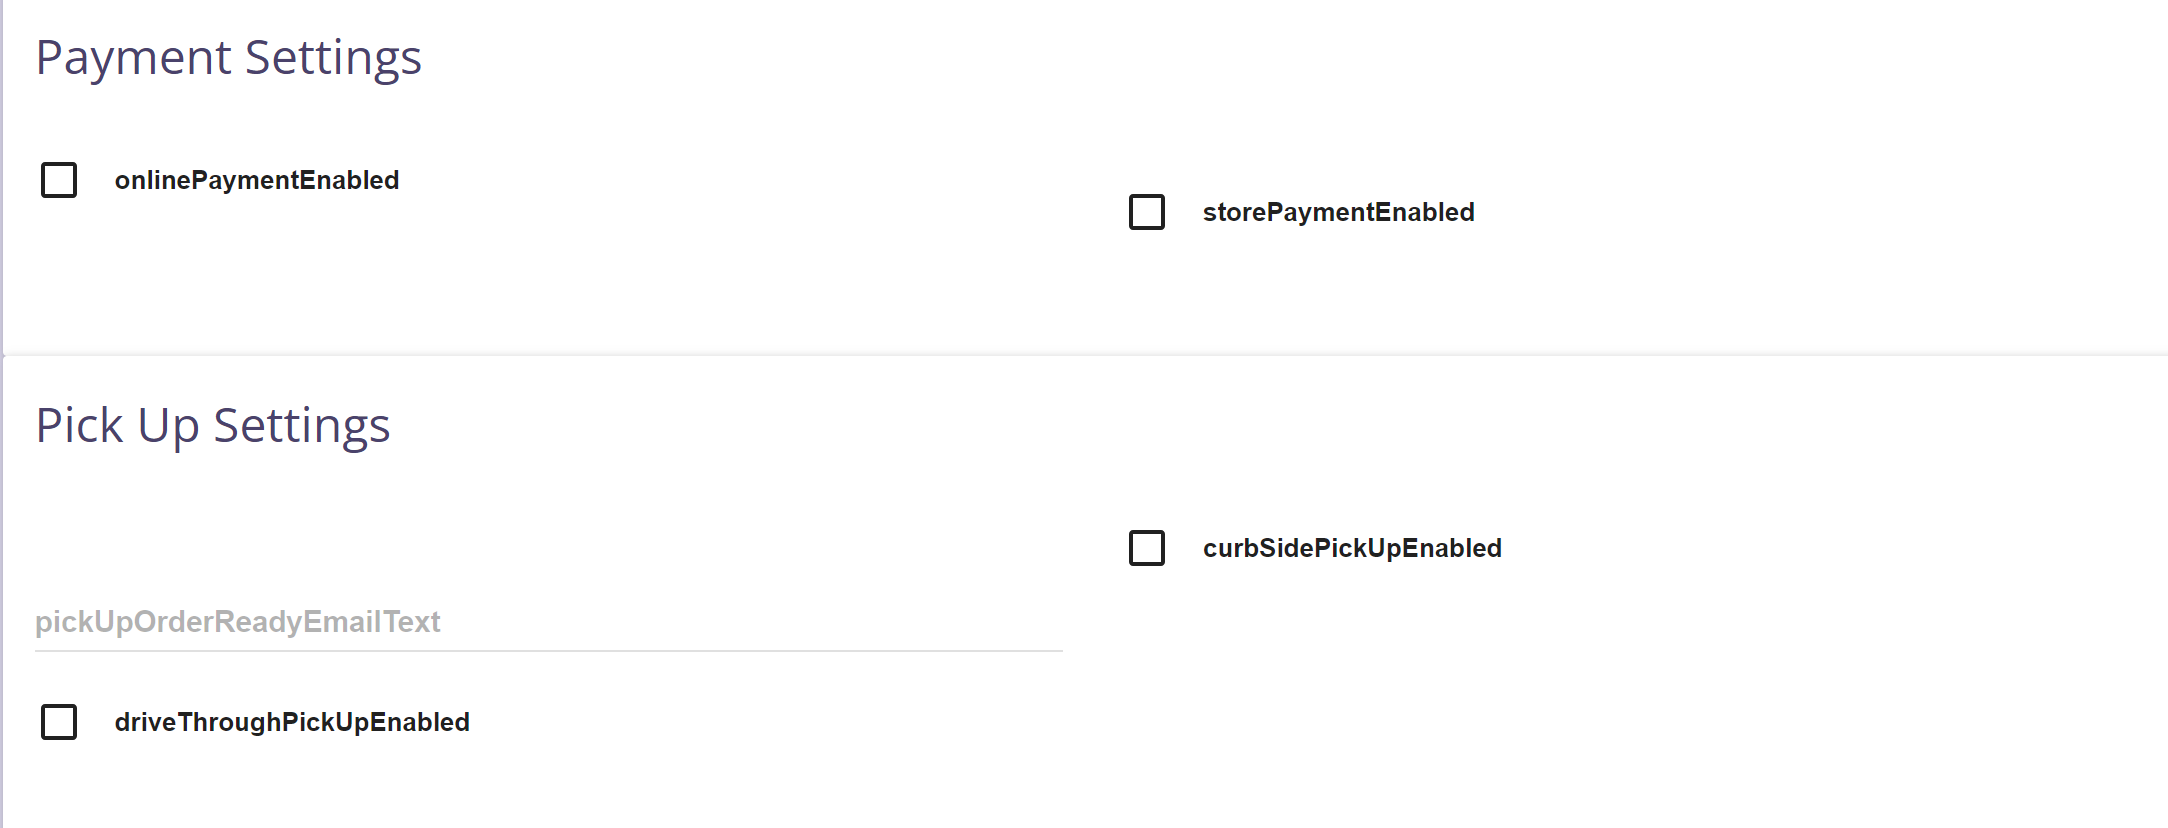
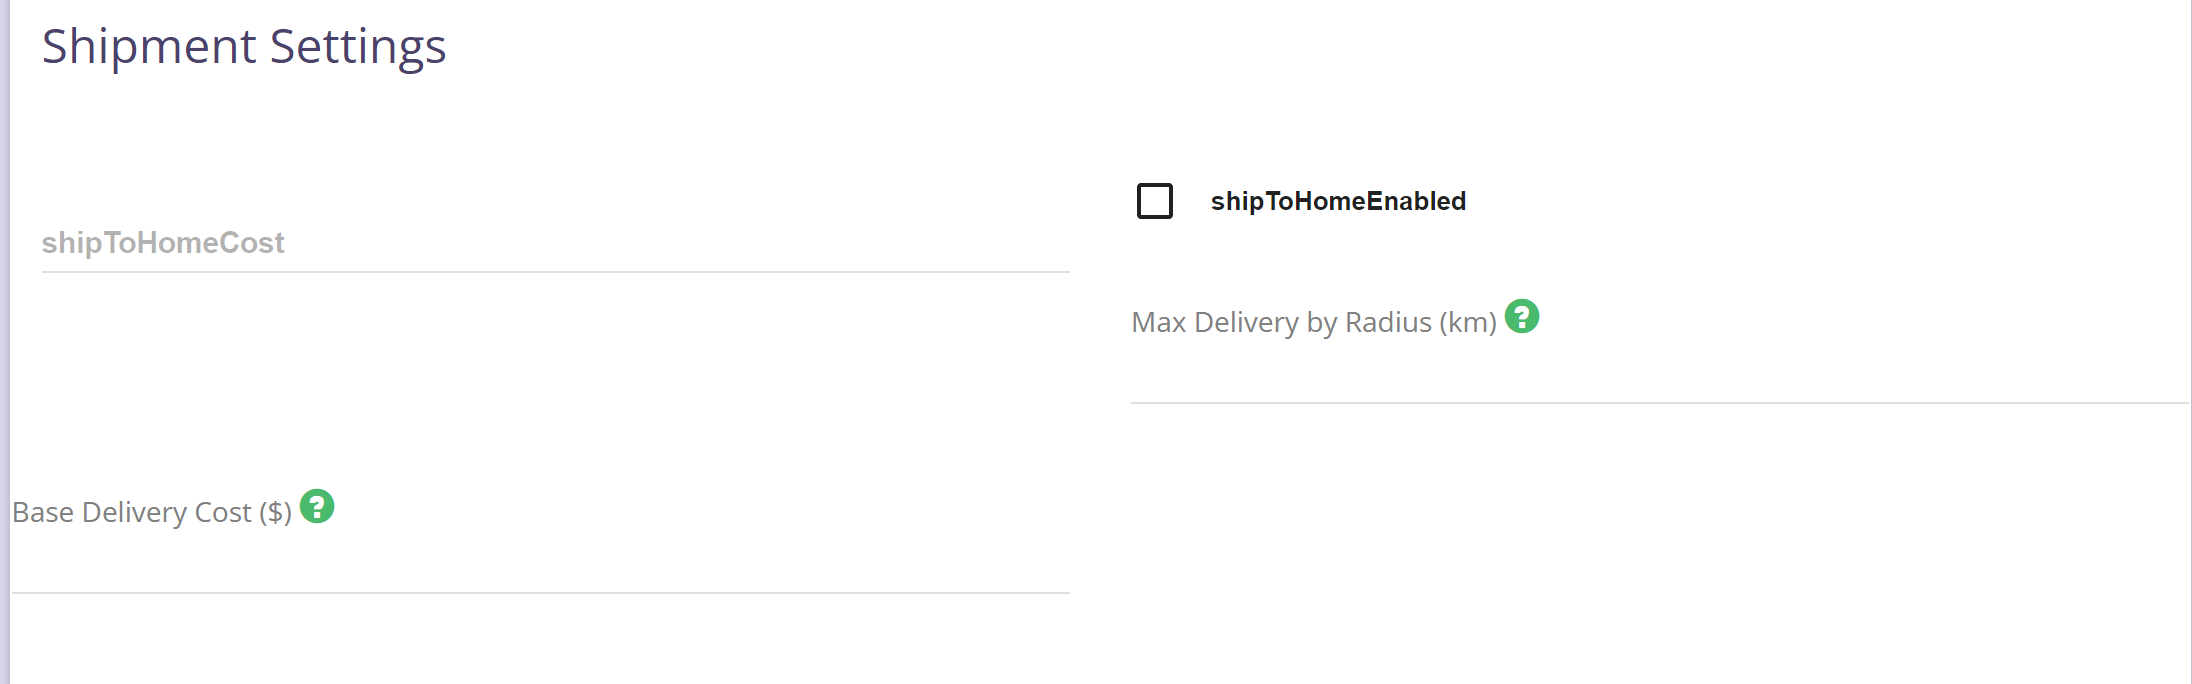
Shipment Settings