There are three ways to add a purchase order.
Option 1: You have the option to automatically add your purchase order to the system by utilizing the import function (uploading the ASN provided by the supplier)
Option 2: Manually generate purchase orders.
Option 3: Complete the Cannabis Template in Excel format and upload it.
Note: When using options 1 and 3, there are two distinct configurations for how the items will be received in the system.
1. Manual Receiving - this requires you to scan each product barcode to receive it into the system.
2. Automatic Receiving - once uploaded, the purchase order will automatically be closed. This means you won't have to scan each items, and products will be added to inventory instantly. (Go to Menu > Admin > Settings > Enable PO Auto Receive)
Option 1: Adding Purchase Order via Import Function
Step 1: Go to Inventory > Purchase Orders
Step 2: Click on Import PO from Excel/XML file
Step 3: A window will open, locate and select the invoice file to upload onto the system.
Step 4: Once you retrieve your invoice, it will be added to your Purchase Orders. Depending on the configuration, the order will either be closed or open.
If an error shows up, you can either:
1. Import the latest catalog by going to Inventory > Products > Import from Catalog
2. Add the Product manually by going to Menu > Products > Add New Product. Make sure you fill out the SKU number with the product's correct SKU number.
Option 2: Adding a Purchase Order Manually
Step 1: Go to Menu > Inventory > Purchase OrdersStep 2: Click Add New PO on the top right

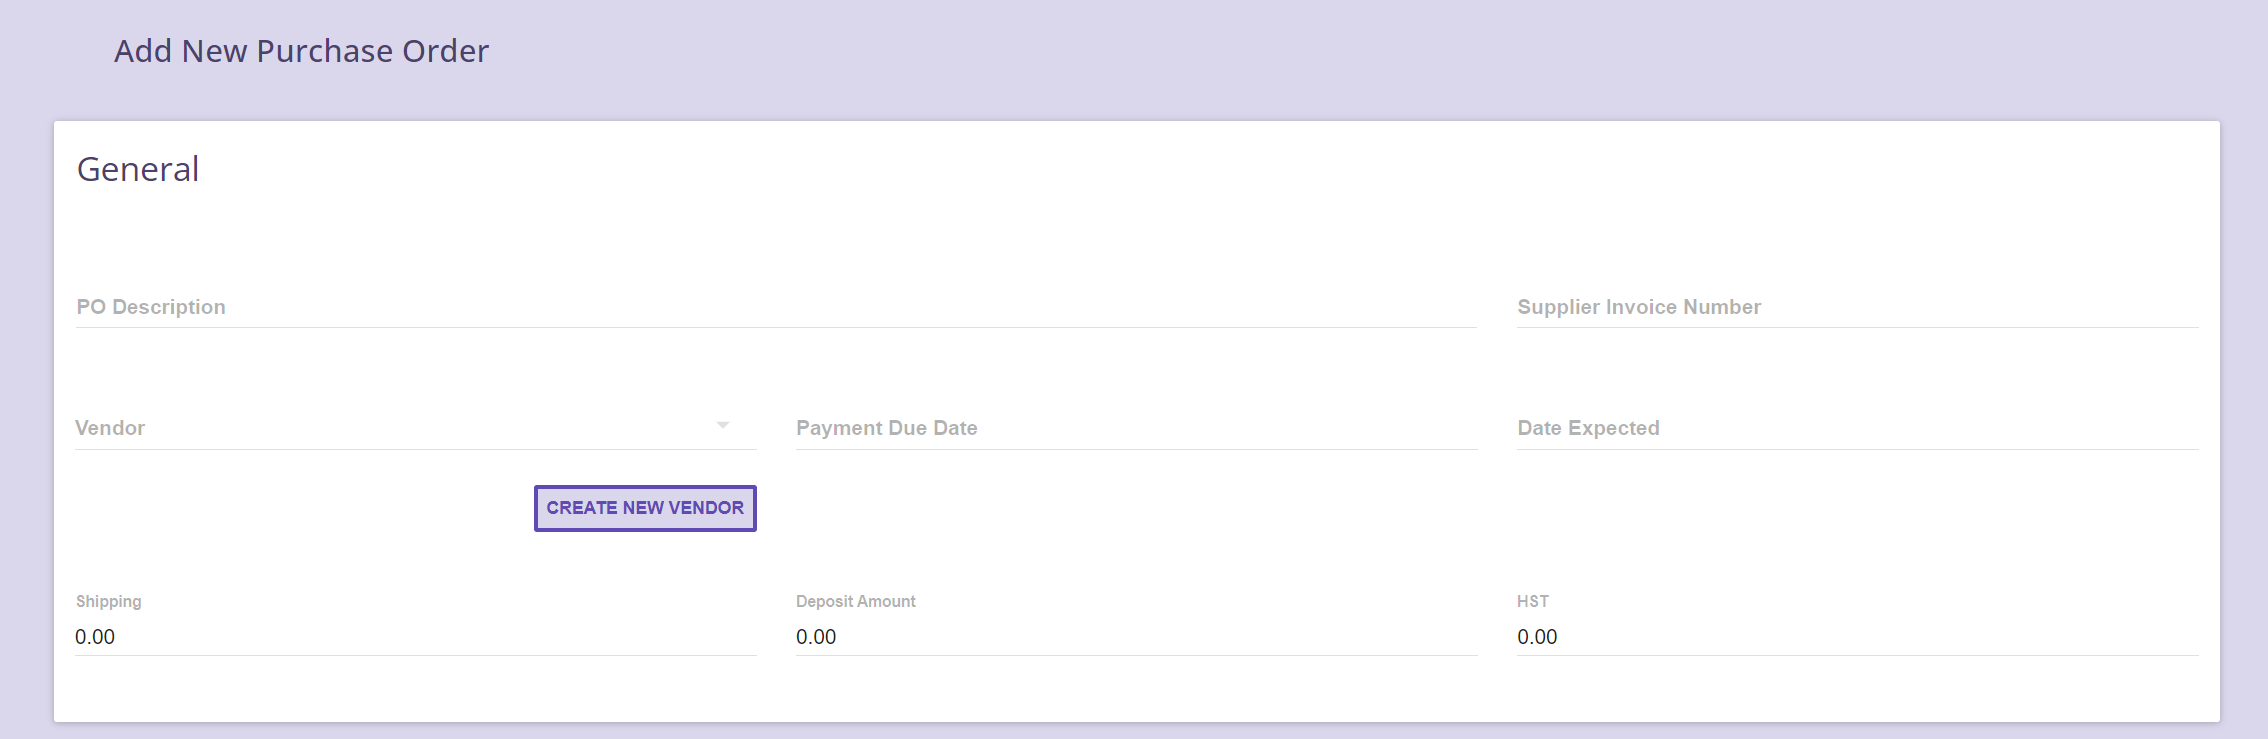
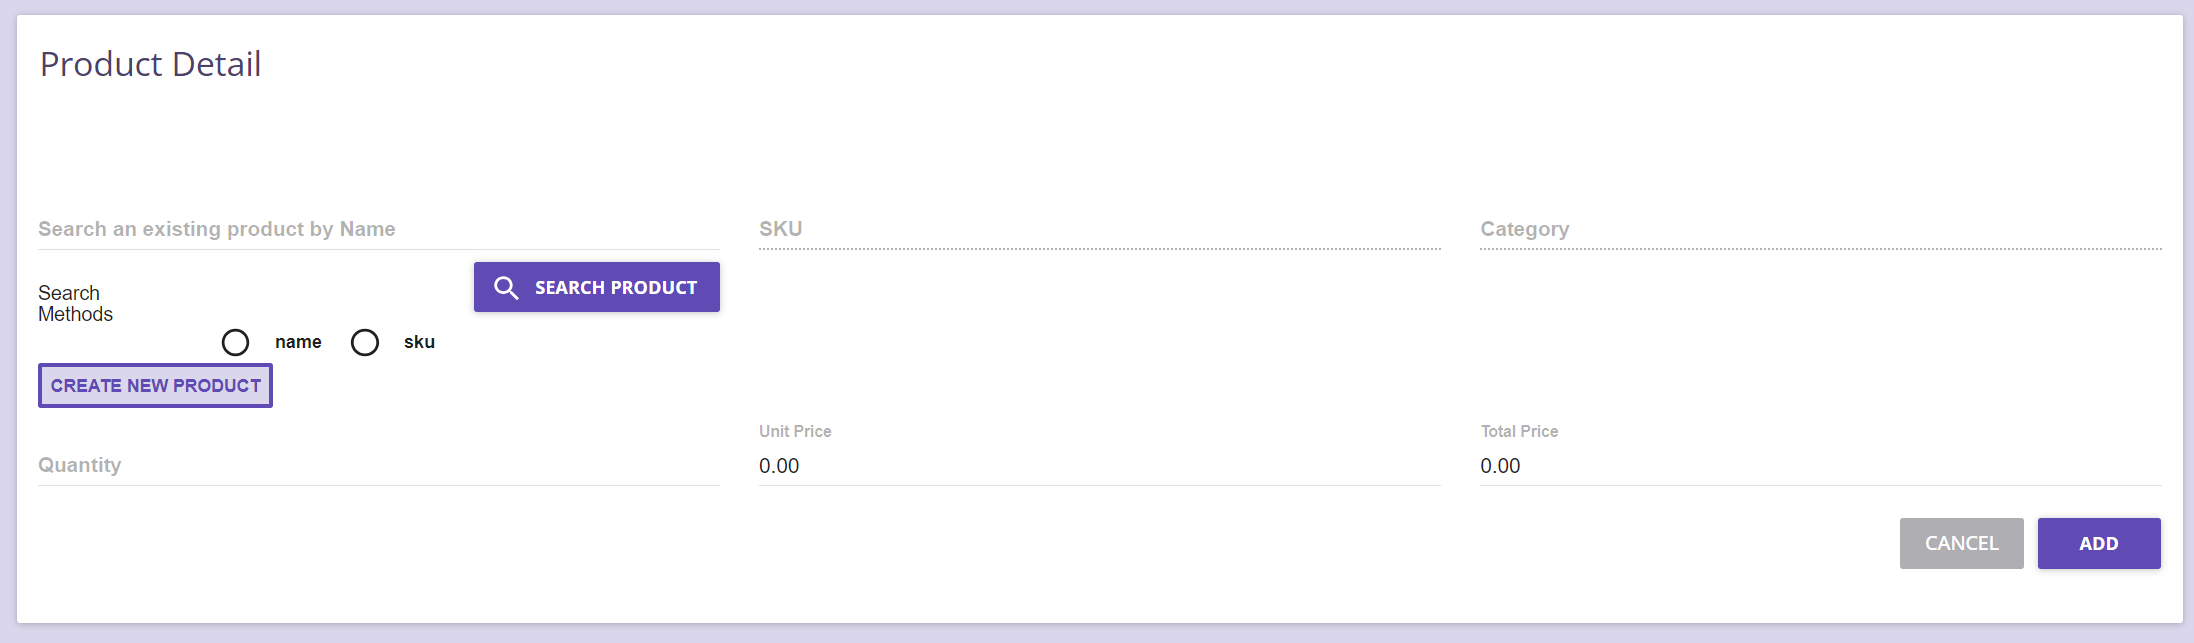
Step 3: Add products to the Purchase Order by filling out the information provided below. If a product is not in the system, click Create New Product. When all the details have been provided, click Add.
Tip: Product can be searched either by Product Name or SKU Number
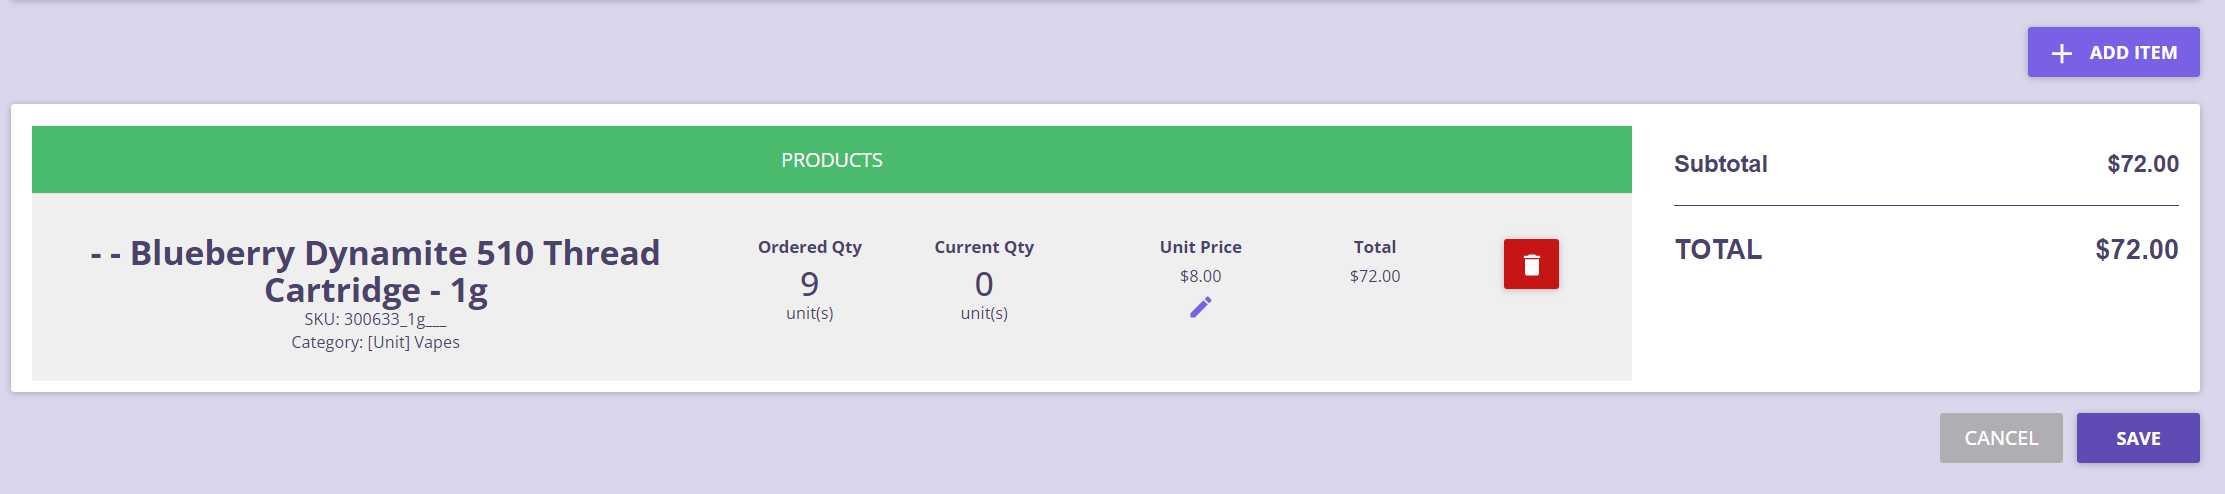
- Step 4: Next, you will simply add products until you complete your Purchase Order by clicking on the
Option 3: Completing and uploading the cannabis template
When receiving a PO from a privatized wholesaler for your cannabis, you will simply need to download and fill out the cannabis template in order to receive your order and sync it onto the system.
Step 1: To download the cannabis template, go to the Purchase Orders page under the Inventory tab. Click on the button labeled "DOWNLOAD CANNABIS TEMPLATE" located at the top of the page.
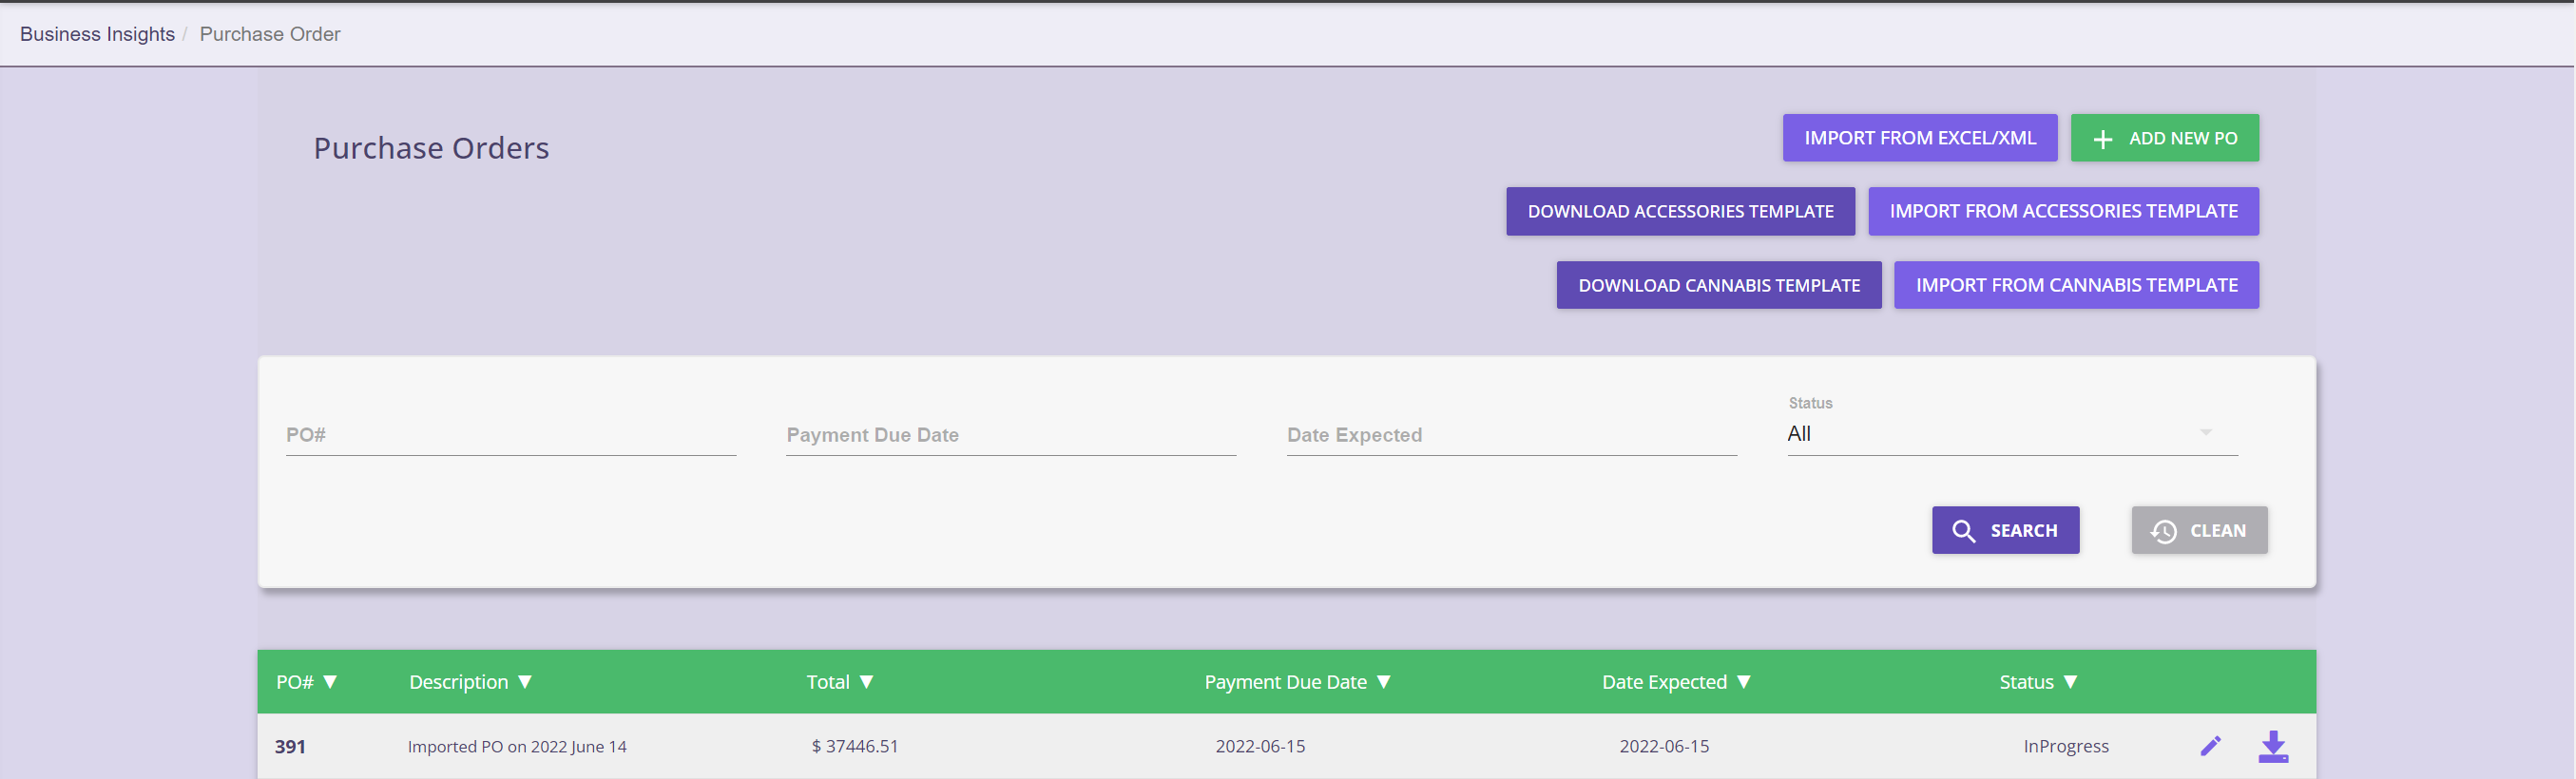
Step 2: After downloading the template, fill out all the necessary information on the page. Once completed, save the file and then select "IMPORT FROM CANNABIS TEMPLATE" to import it into the system.
Two Ways to Fill Out the Template:
Procedure 1: Creating PO for Existing Products
This means that the products are already created on the system, you just need to create a PO for re-order.
Mandatory Fields to fill out in this mode:
1. SKU Number - The system finds the product based on the SKU number. If you are adding an existing product, make sure the SKU number on the template matches the SKU number on the system.
2. Total Quantity - Quantity per item.
3. Unit Cost Price - Unit cost per item
NOTE: for products that have already been received onto your system previously, the optional values are not required to be filled out.
Procedure 2: Creating PO for New Products
This means that products on your invoice are not added on the system at all. So you will need to create a new listing for this products. Good news is the system can automatically create these new products, as long as the following fields are filed out.
Mandatory Fields to fill out in this mode:
1. SKU Number
3. Total Quantity
4. Unit Cost Price
5. Unit Sales Price
6. Lot Number
6. UPC
7. THC Value
8. CBD Value
9. Product Name
7. Category Name - Ensure category name matches the categories on the system
8. DFE