- Create recursive schedules
Under Admin / Schedules / in the main menu, we can find the button + ADD NEW SCHEDULE

This button will show up a Dialog with the schedule information we need to input. The first look is the single schedule, which is asking for Date, Start and End time, employee, and Color tag. And at the top, we can find a toggle asking if we want to add a single schedule or a recursive schedule, which is a schedule that is repeated every week in a range of time.
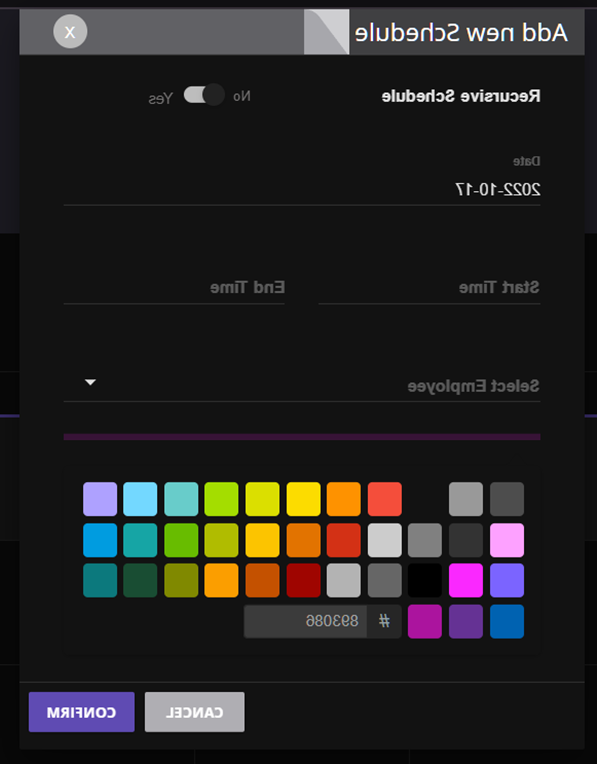
Figure 1 Single schedule input
For recursive schedules, You must select a Date start and a date end, which is the period this schedule will be repeated. We also must select the days of the week that the employee is going to work on. When the days of the week have been selected, a table with the Start time and Start end will show up per day in the week. Also, You must select an employee and color tag.
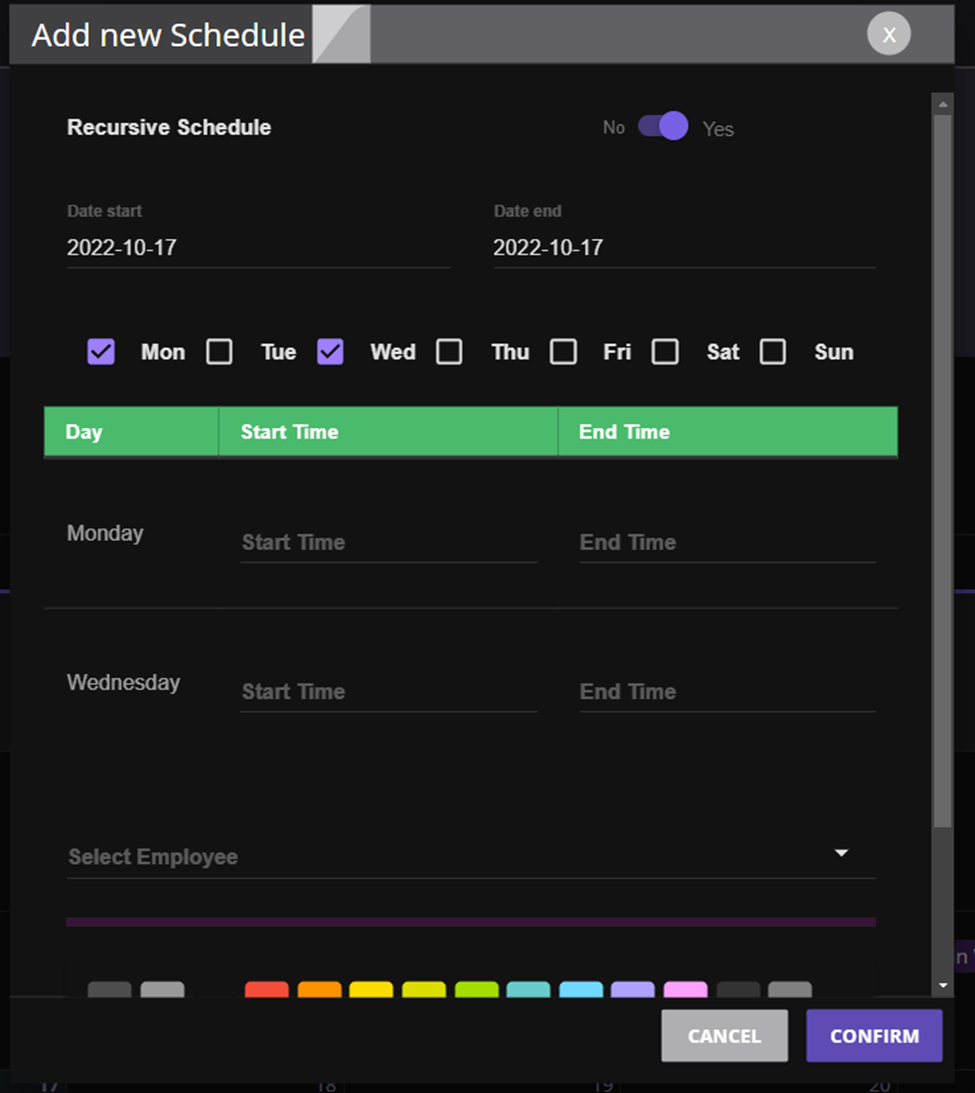
Figure 2 Recursive schedule dialog
- Set color by schedule
Below of both Add new schedule dialogs, we can find a color
You will be able to pick any color from the Picker or create their own hexadecimal color code. A preview of the color selected will be shown above the picker.
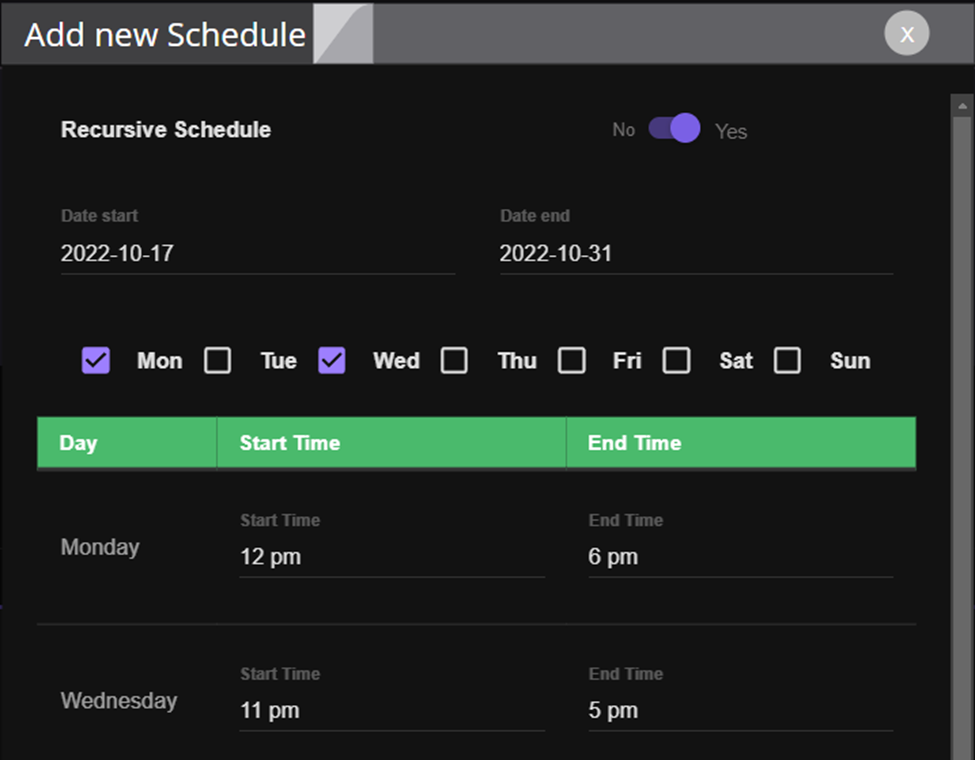
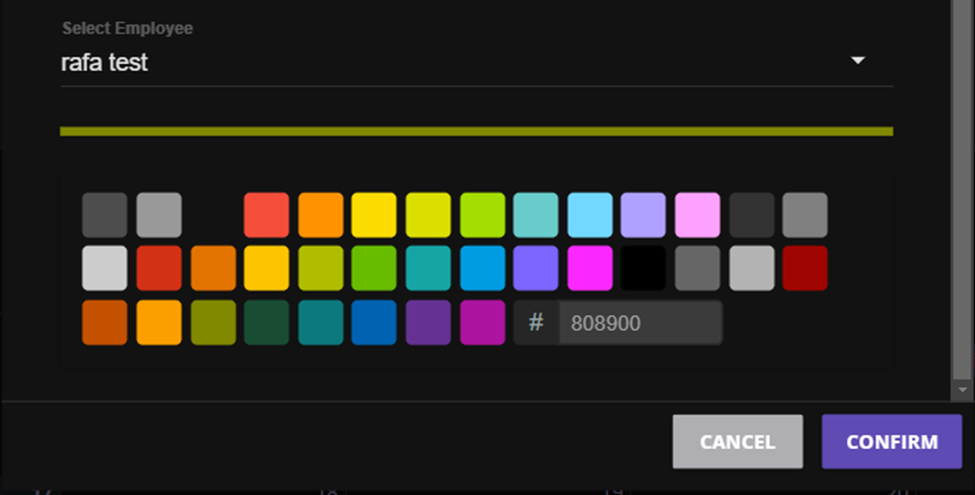
Figure 3 Color picker
After the you press CONFIRM the schedule will be created and show up in the main calendar in the Schedule list.
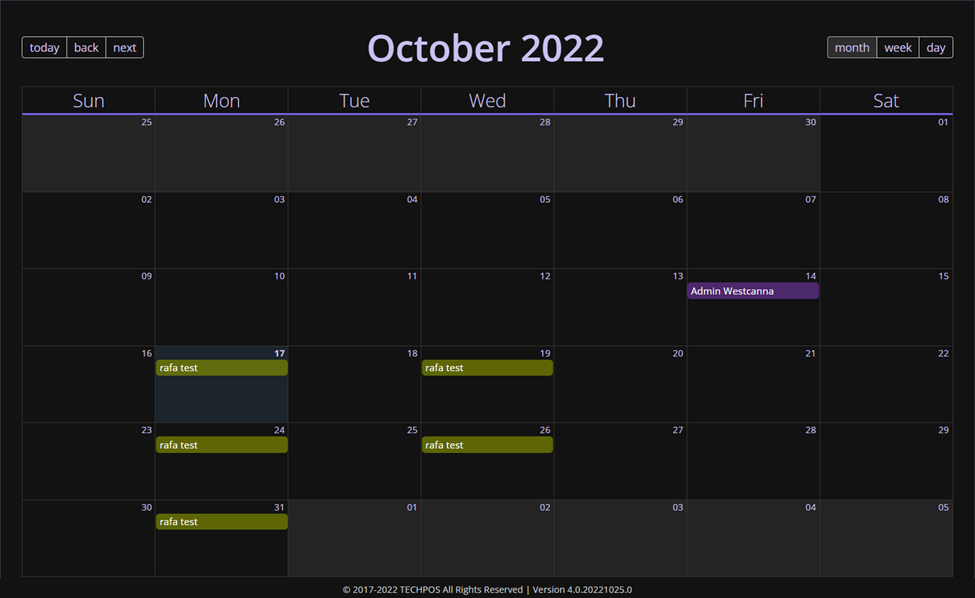
Figure 4 Schedule create Mondays and Wednesdays}
Each schedule work as a single schedule, so we can change de color tag for any schedule individually, if you would like.
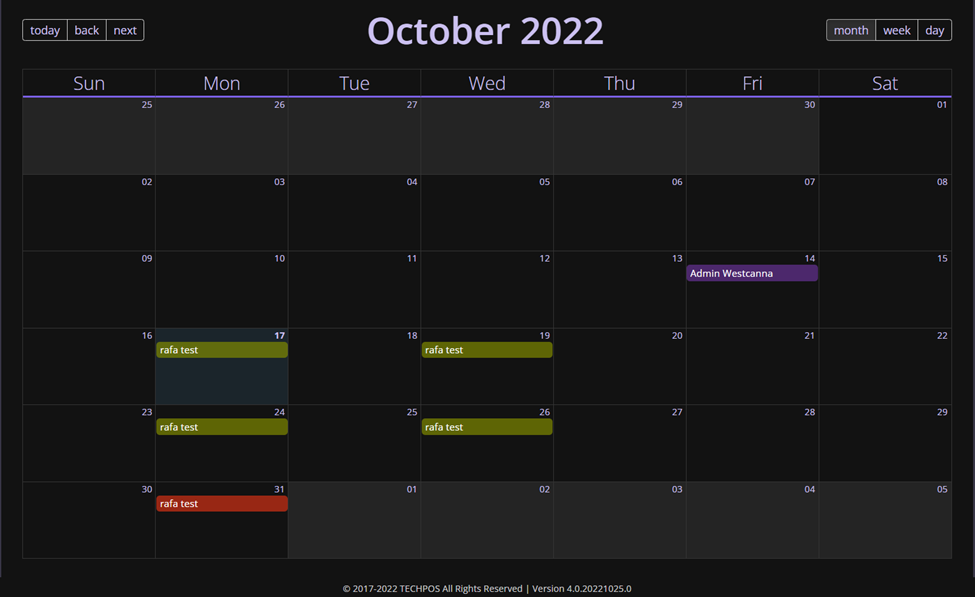
Figure 5 Schedule List
- Remove schedule (recursive or single)
This action woks for recursive and single schedules.
- Single schedule
If we want to delete the schedule Oct 21 for TechPOS, we must press the button Delete under the schedule details Dialog.
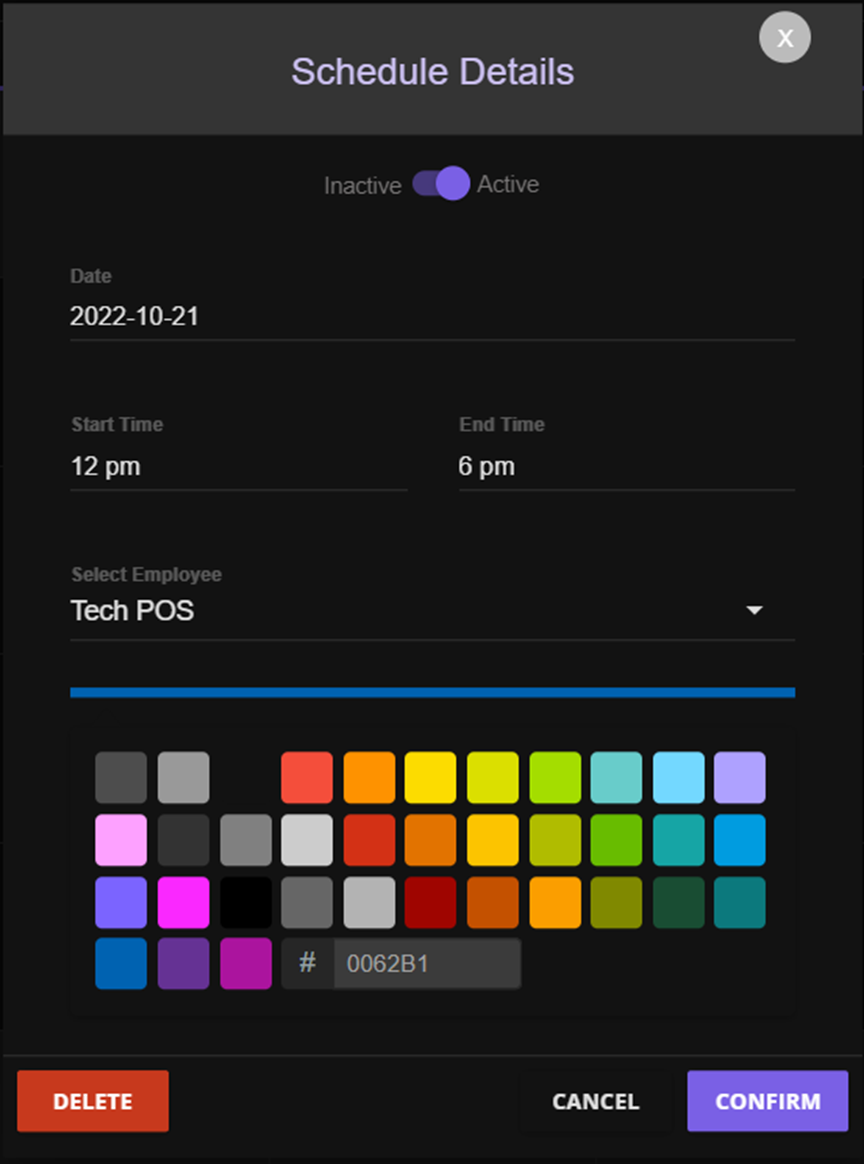
Figure 6 Schedule details dialog
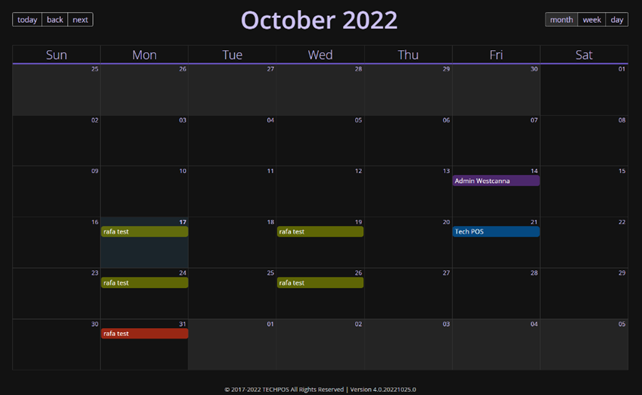
After pressing the button, a dialog confirming this action will show up.
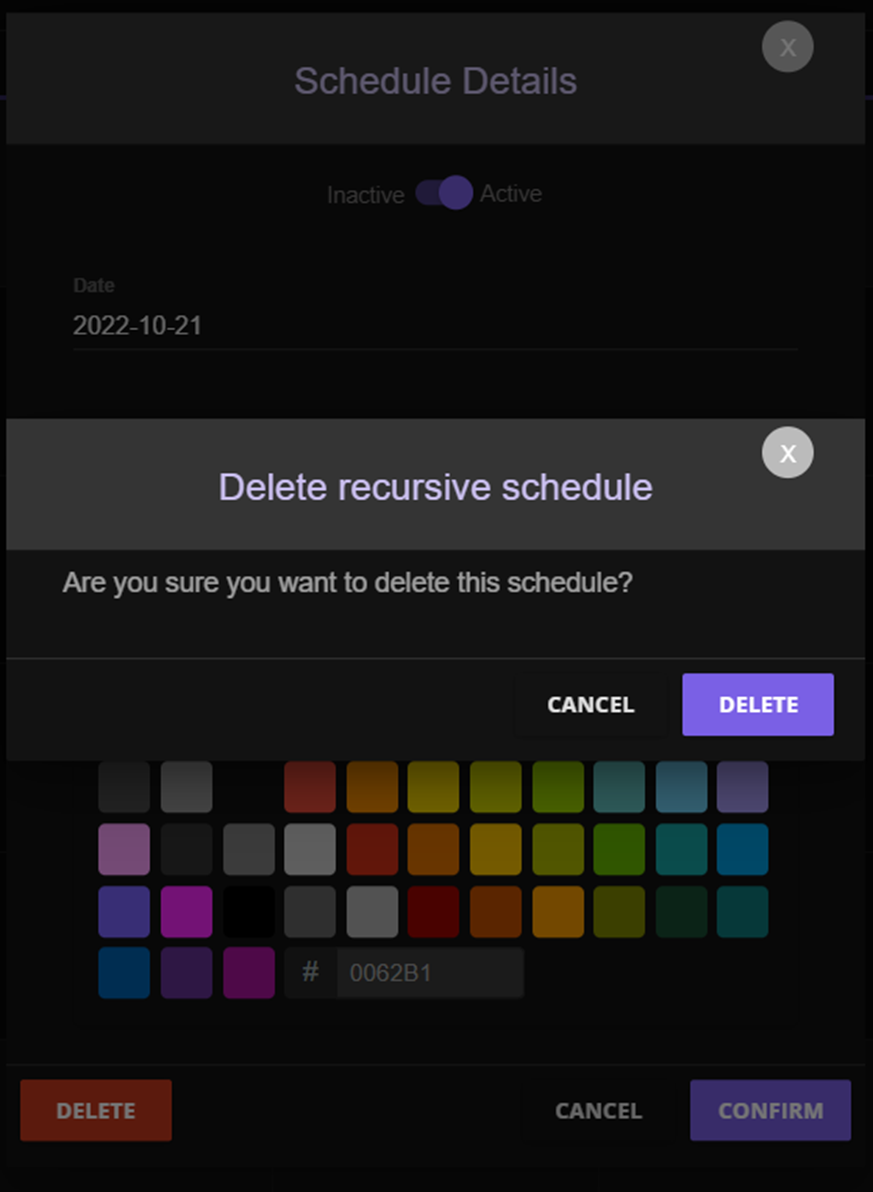
Figure 7 Confirmation delete single schedule
The schedule has been deleted

- Recursive schedule
In case of recursive schedules, we can trigger 2 actions: Delete just the schedule selected, or Delete all recursive schedules created. If we want to delete one of the schedules we created in the previous step, we must select the schedule and press Delete. A dialog will show up saying that the schedule selected has been created as recursive schedule, and then ask if the customer wants to delete all of them or just the selected schedule. Press just this is you want to delete the selected schedule.
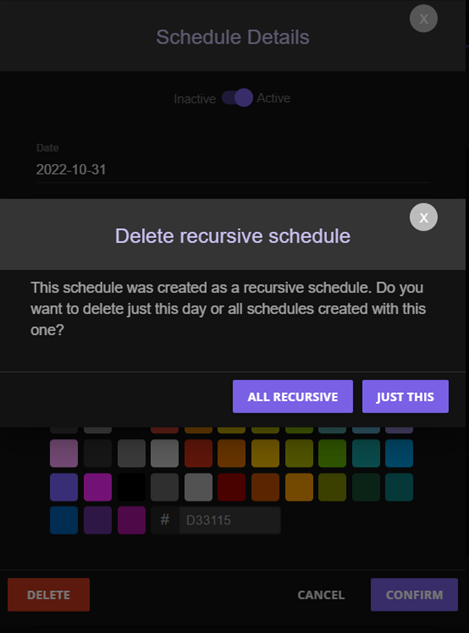
Figure 8 Confirm dialog, recursive schedules
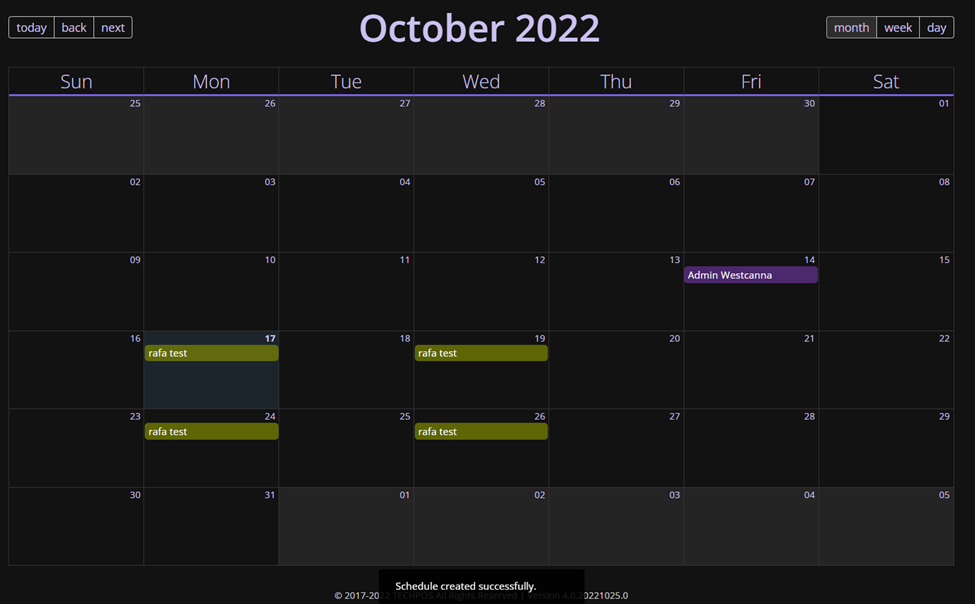
Figure 9 Schedule deleted
To delete all the recursive schedules, we can press the button All recursive, in the Confirm dialog to delete all for them.
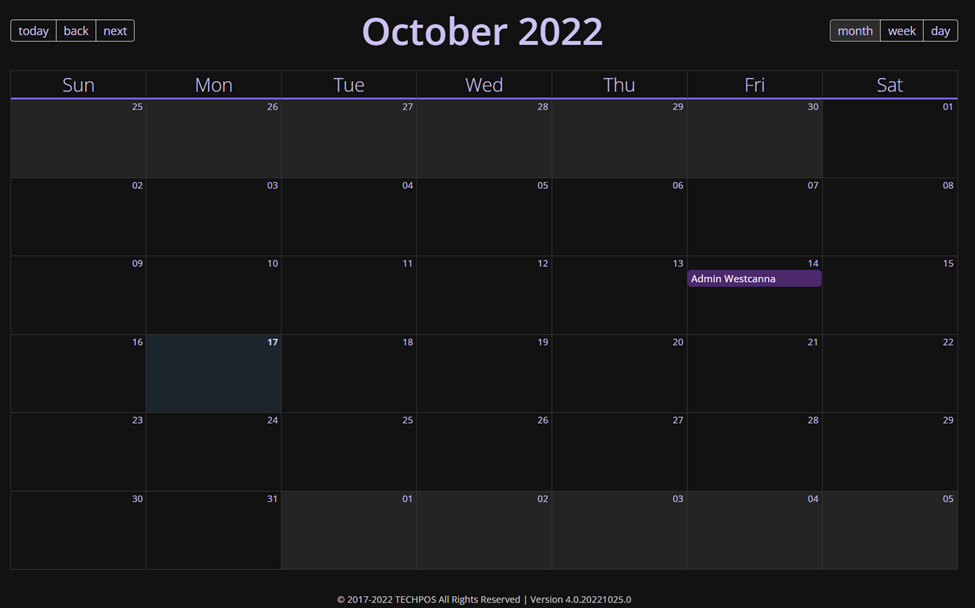
Figure 10 all Schedule removed
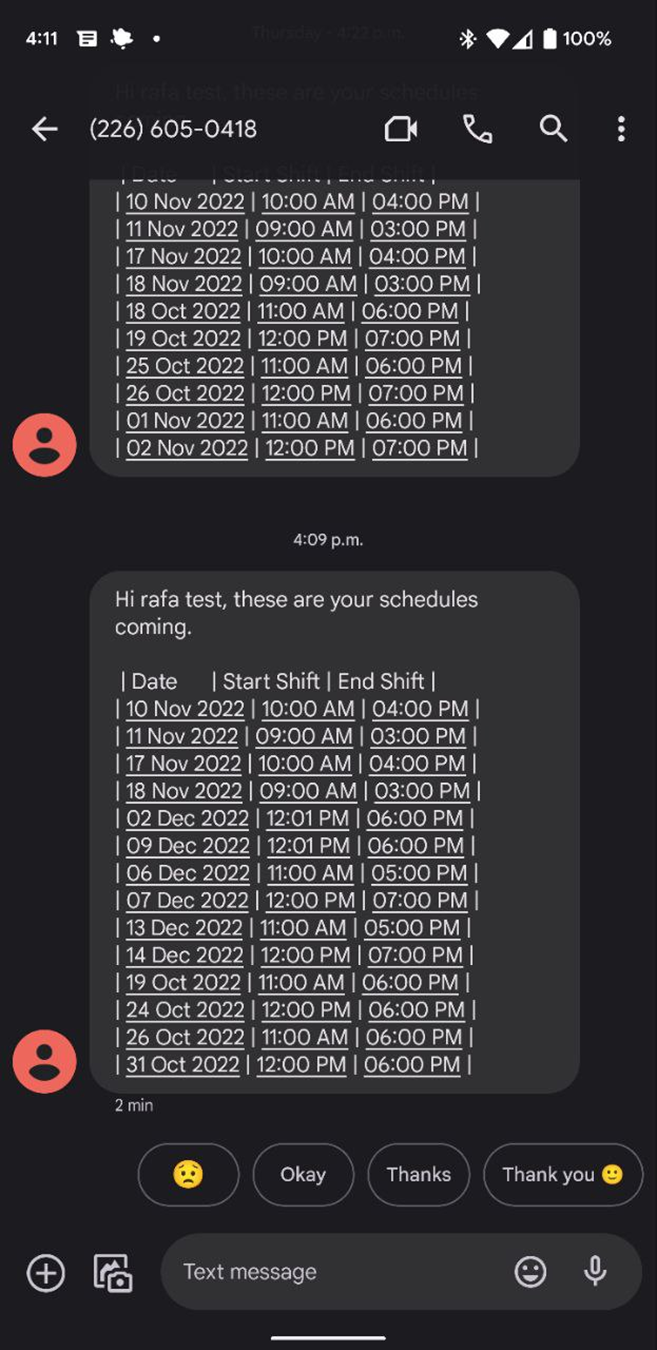
- Send schedule to employee by email or SMS
The last but not least step is sending the schedule to the employee. We have a new button called SEND SCHEDULE, which will send the next schedules to a selected employee. The button, will show a dialog asking what we want to send: Email or SMS. Also, will show a employee list, which we can send their schedules, we can select all or just a few of them.
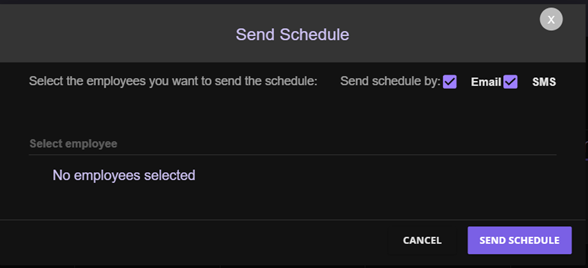
Figure 11 Send schedule dialog
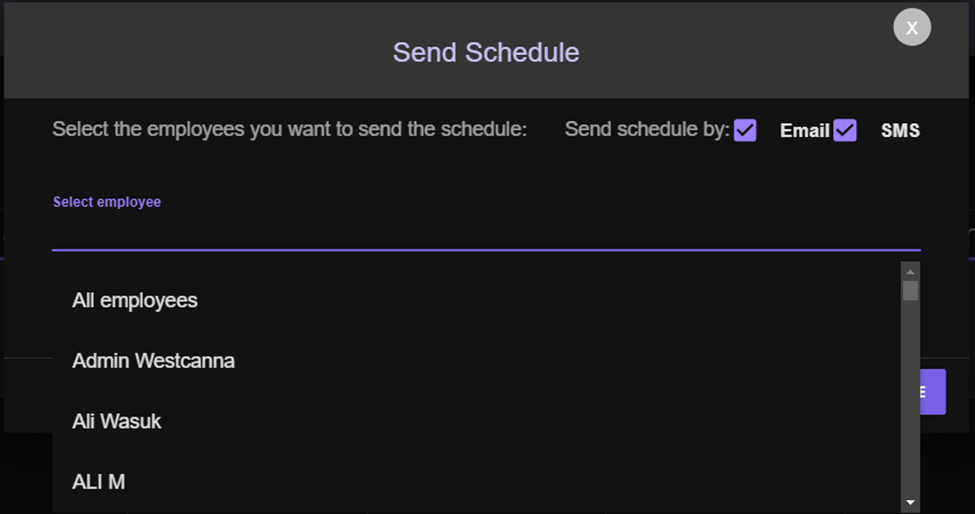
Figure 12 Autocomplete input for employees
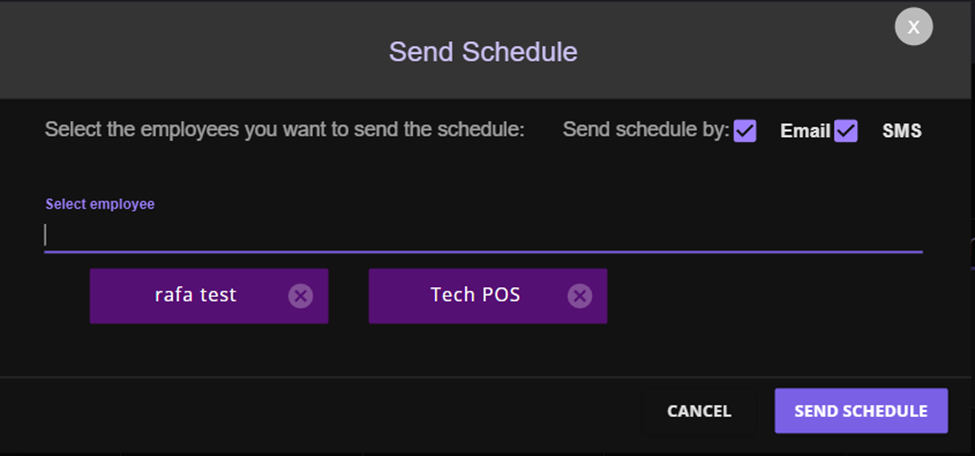
Figure 13 Selected employees
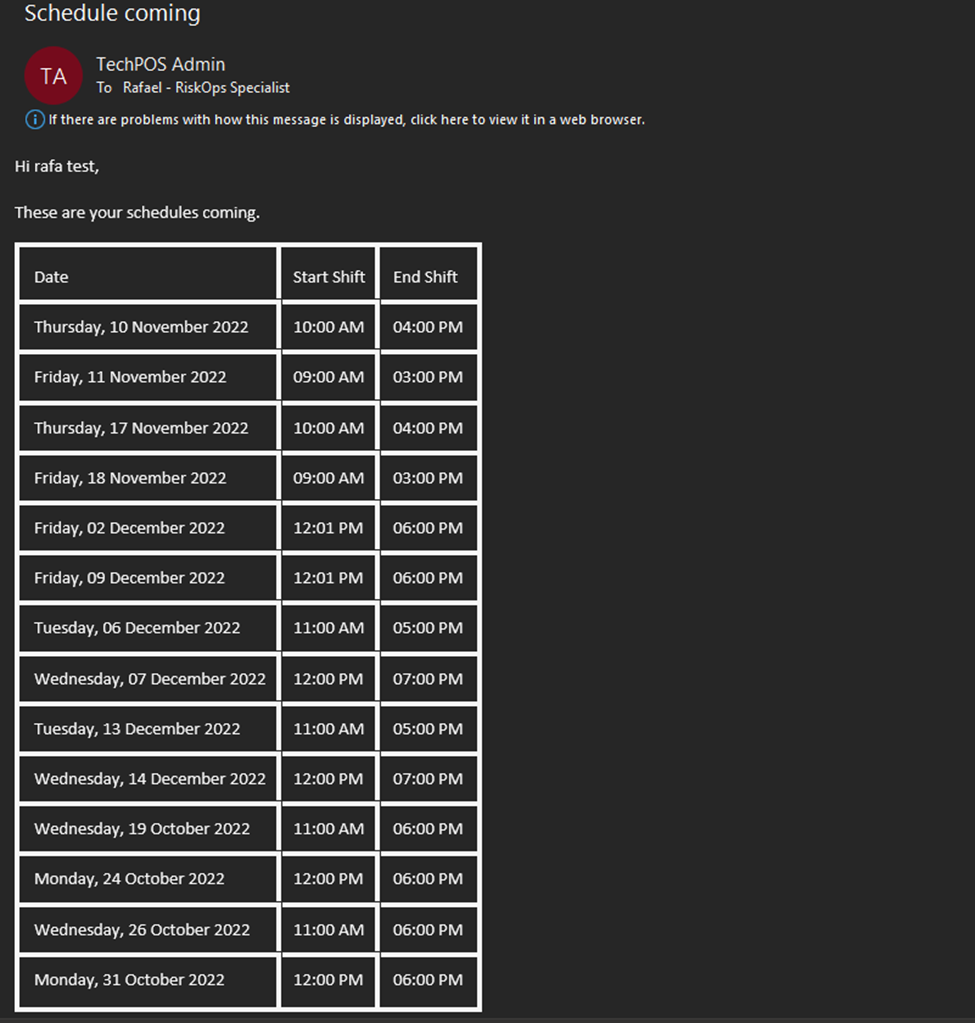
Figure 14 Email sent