Below is the correct connection:
Connection Overview: https://knowledge.techpos.ca/en/knowledge/terminal-hardware-connection
Detailed Step by Step Connection:
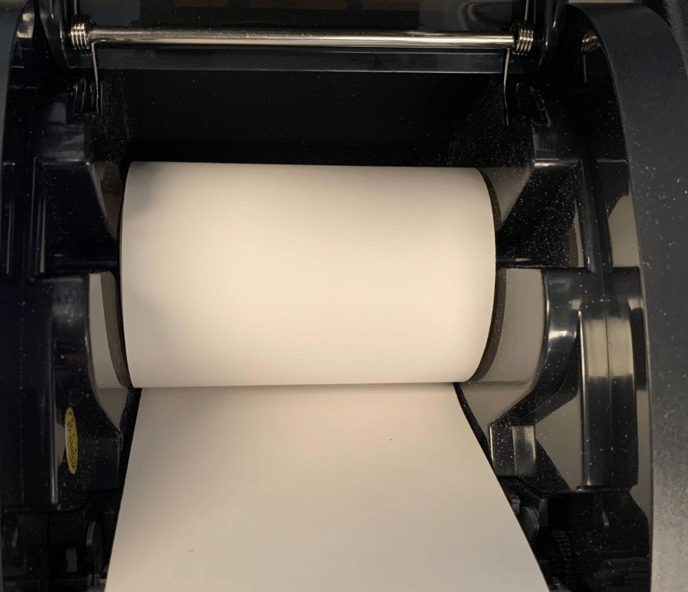
Step 1: Install the paper on the printer. Receipt Paper should be installed this way:
Step 2: Connect the printer to power. The printer cable contains the following:
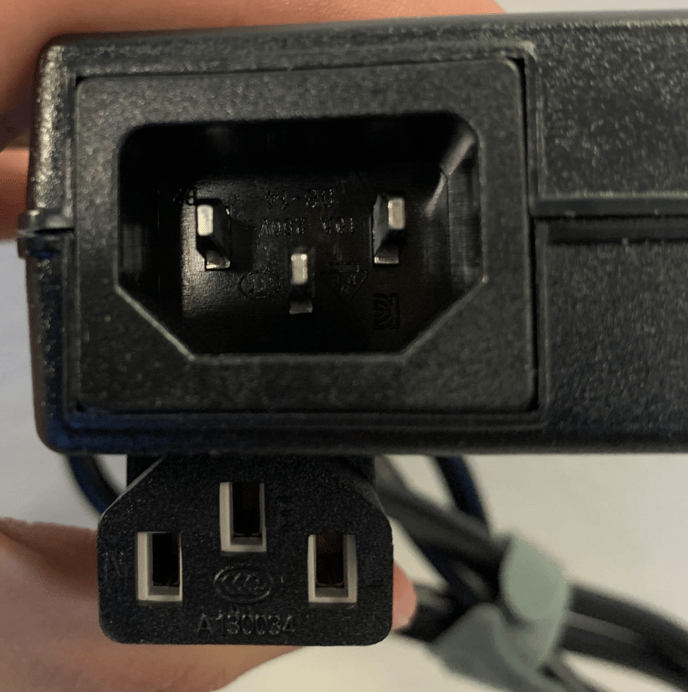
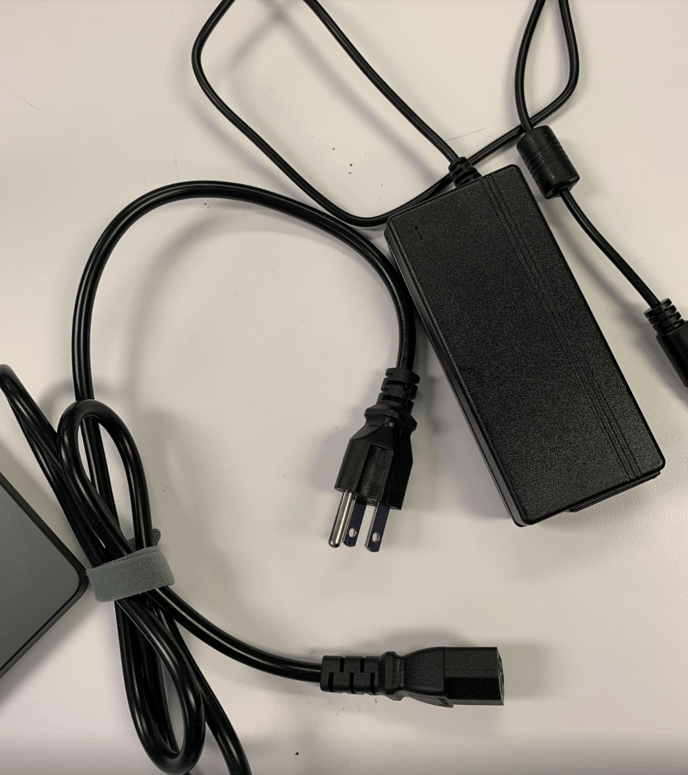
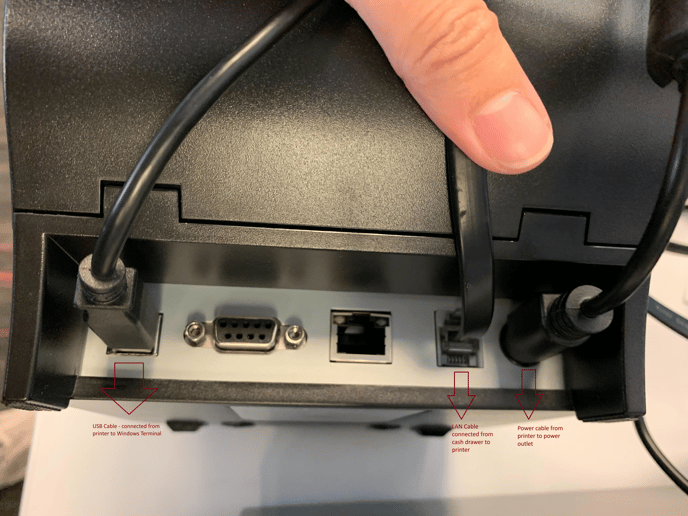
Step 3: Connect the power cable at the back of the printer, then the other end to the power outlet. 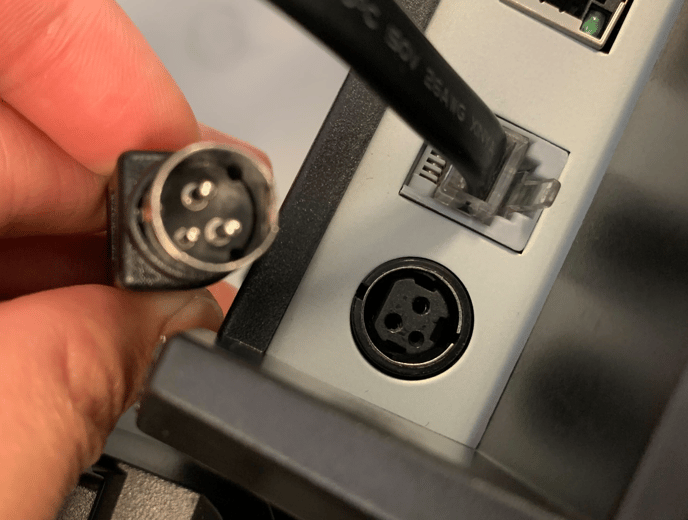
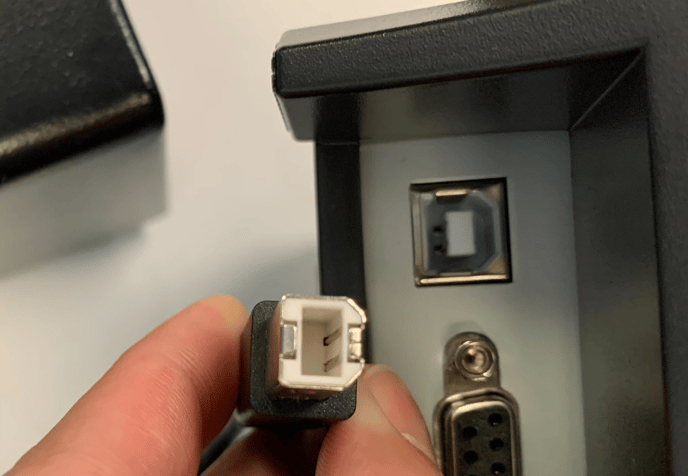
Step 4: Connect the USB cable on the printer on Windows Terminal.
Printer USB connection:
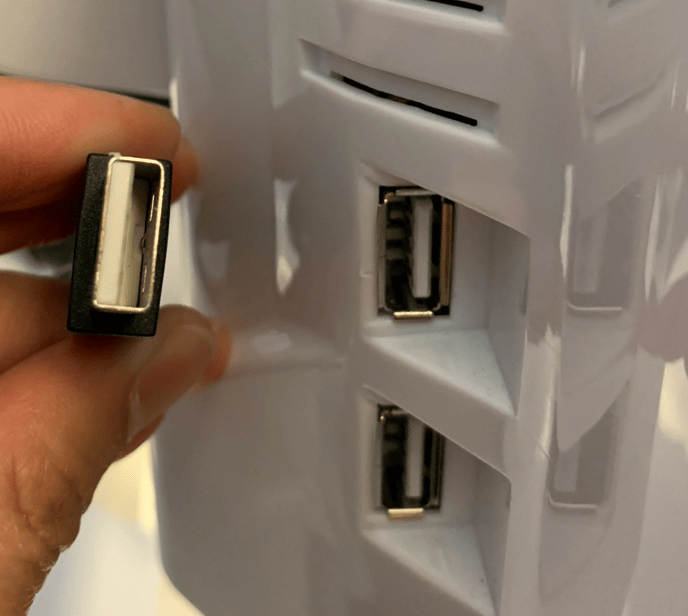
Windows Terminal USB connection:
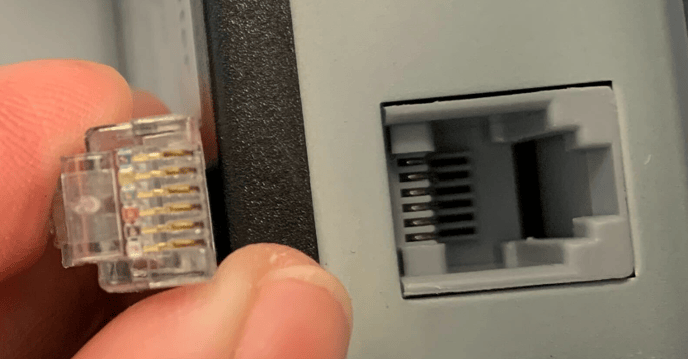
Step 5: Connect the cash drawer to the printer.
Bottom of cash drawer:
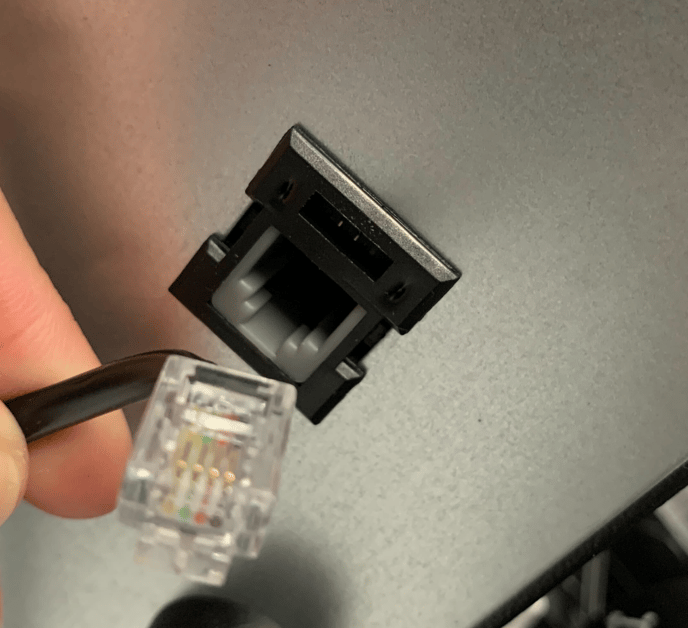
Cash drawer connected to the printer: